
Introducing Workspace,
Reading and Printing PDF Files
 Content of the lesson:
- PDF (Portable Document Format)
- Workspace of Adobe Acrobat 9
- Using Help
- Viewing PDF Files
- Using Organizer Tool
- Printing PDF Files
PDF (Portable Document Format)
This format was developed by Adobe Corporation in 1993 to be used for electronic publishing of documents.
Properties
- The format PDF stores electronic appearance of a printed document. It is usually used to publish an electronic document which is not determined for further changes (changes of text and graphic elements).
- It is suitable for publishing documents on websites. When creating the final PDF you can set the size of file and also the quality of texts and graphic elements. On the top of that, you can insert multimedia objects like audio, video, flash or 3D objects from other applications.
- It preserves the appearance of each document - PDF documents will be the same on a different computer with different operating system or hardware resources, also change of the viewing software do not affect the appearance of document.
- It preserves fonts - every used font can be saved into the document and used when opening the document on another computer. Programs like Word would replace a missing font with a similar one (in case of non-standard or commercial font) - this would damage your document of course.
- One PDF document can contain several more file types inside.
- PDF format is accessible for everyone. When buying a new computer, the support for PDF is usually installed, but in case you are not able to open a PDF file, you can download Adobe Reader which is free of charge and which can be used to view, read or print PDF files.
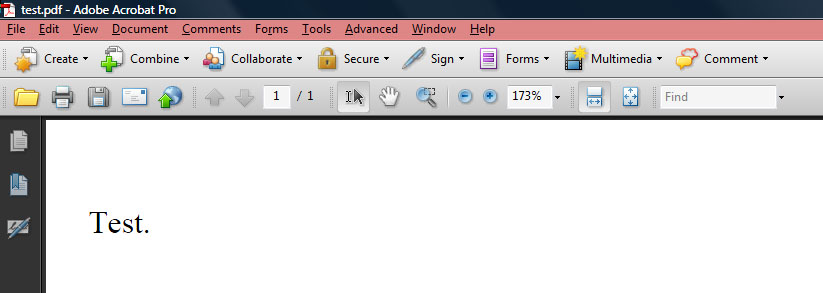
Menu Strip (Workspace)
This part can be called as "menu". It contains standard commands which are available in almost every program. Also the layout is very similar to other programs for better orientation. You will often use the File, Edit and View buttons. The following buttons are quite specific. You can find the Window and Help buttons at the end of course.
Now take a look at every category to imagine which commands are inside them:
- File – Opening or saving a document. Export, printing and its settings or a command to exit the program. You can also find the Document Properties command here.
- Edit – Tools connected to copying and pasting, step back or forward, selecting, searching etc. You can also find the Preferences here.
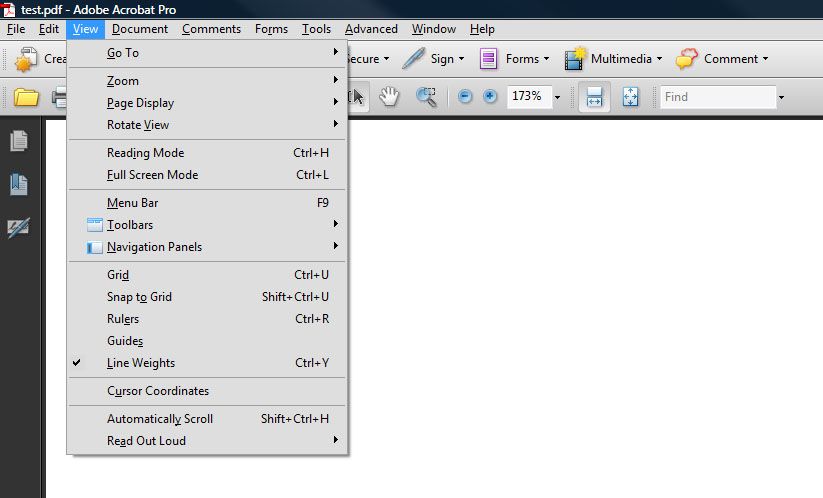
- View – Viewing and hiding panels or tools. Options for viewing the whole document. Movement inside the document.
- Document – Working with document as inserting, moving, deleting pages, crop or rotate commands. You can find OCR tools here (to recognize printed text), add bookmarks or link external files.
- Comments – Tools used for adding notes or comments.
- Forms – Tools used for creating forms.
- Tools – Combination of tools like notes, selection, zooming, editations, writing machine, analysis, multimedia.
- Advanced – Tools used for securing documents, digital signatures, pre-print preparation, redacting, creating PDF from websites.
- Window – Layout of windows, panels, switching between them.
- Help – Help, information about program and plugins, addons, activation/deactivation, actualization, on-line support.
Quick Tools Strip (Workspace)
The next strip (also called "task strip") is located below menu. This strip is little bit different from the other panels. You can see that it contains icons with texts and small arrows next to them. These icons with texts create buttons and you can view all command after clicking on them. This strip simplifies our work inside Adobe Acrobat because it merges similar tools to categories. If you click on this strip using the right mouse button, you can set which buttons should be displayed and which should not. Standard situation is that all buttons are set as visible.
We can also take a look at functions of each button to be able to imagine commands which are hidden under these buttons:
- Create – As you can see from the title, it is used to create a new PDF. You can quickly create PDF from file, scanner, website or from the clipboard. There are commands for creating PDF portfolios or merging PDF files in the bottom.
- Combine – You can find tools for creating PDF portfolios or for merging documents. These tools are the same as in the previous category but are listed separately so you can quickly access them.
- Collaborate – This button can be used for copying files to server, sharing files of cooperating with other people. You can create an on-line document or use the ability to share your display via an on-line conference or presentation.
- Secure – You can find options for securing PDF files here.
- Sign – Similarly to the previous button, this group is used for improving security - you can add a digital signature.
- Forms – Tools for creating forms.
- Multimedia – Tools for inserting multimedia (sounds, videos, flash objects, 3D objects).
- Comment – This button contains tools for redacting documents (notes, comments, common redacting).
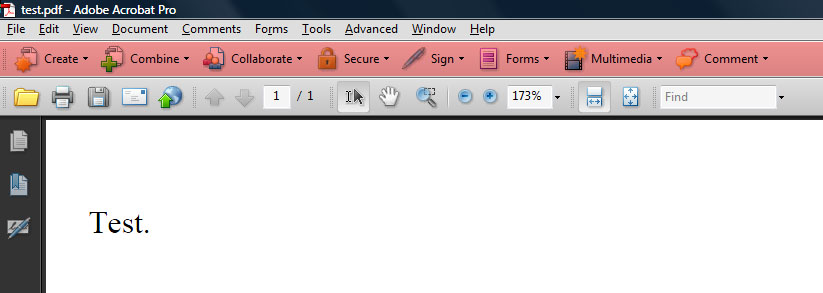
Tools Strip (Workspace)
We are going to move to the next panel - Tools Strip. There are no categories inside this panel, you see concrete icons (buttons). Icons of similar commands are grouped together. Take a look at the "File" tool. This group contains tools for opening, printing, saving or uploading documents. On the other side, the section "Select & Zoom" contains tools for selecting, creating image, zooming in or out or setting the view size. When you place cursor over a border of any group, you can see the description. You can also drag groups (in case that strips are not locked - see "Viewing and Hiding toolbars" below) and change their order or size (you have to click on the left border but dragging will be explained later). If you place cursor over any button, you will see the description of this tool.
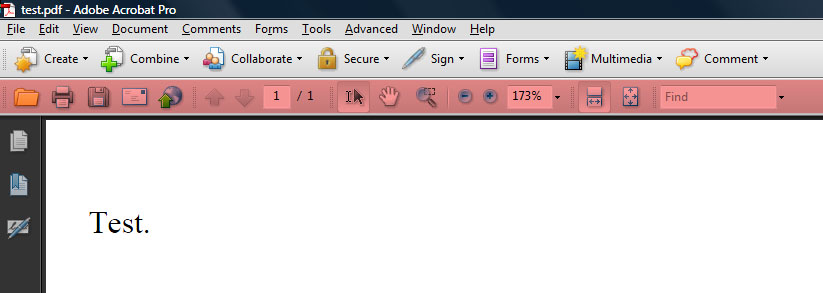
Viewing and Placing Toolbars
The layout of toolbars can be different (the image illustrates default settings of the program) and you can change anything like you want. You can make two adjustments. You can display or hide concrete tools (buttons) or change the order of toolbars.
In case of displaying you can set which tools should be visible. Several tools are available after the first run and several ones are hidden. You can also display or hide whole toolbar. Take a look inside the menu part called "View". You can hide it easily. To be able to display it again, hit F9 key which is programmed for this purpose.
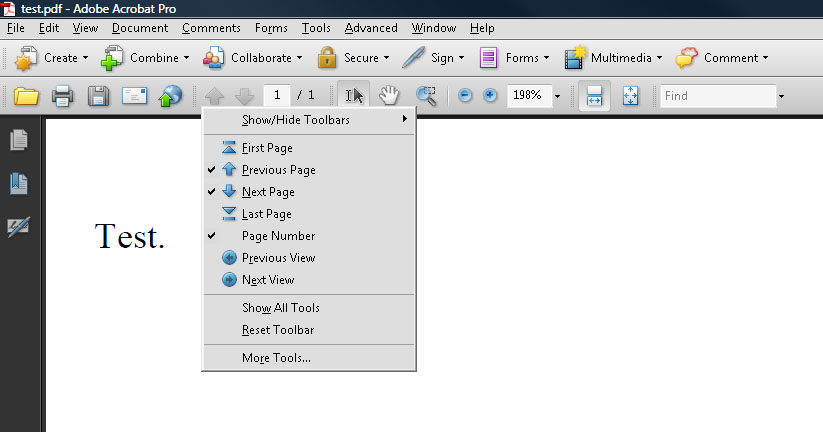
- Displaying and hiding toolbars – a dialogue window for this purpose can be displayed using two ways. You can select "View -> Tools" or click using the right mouse button on the Tools panel in place without buttons. The exact place is illustrated in the following image - the left upper corner of the dialogue window. As you know, tools are divided to groups and you can display or hide these groups. You can also lock and unlock strips as mentioned in the previous paragraph using the command "Lock Toolbars".
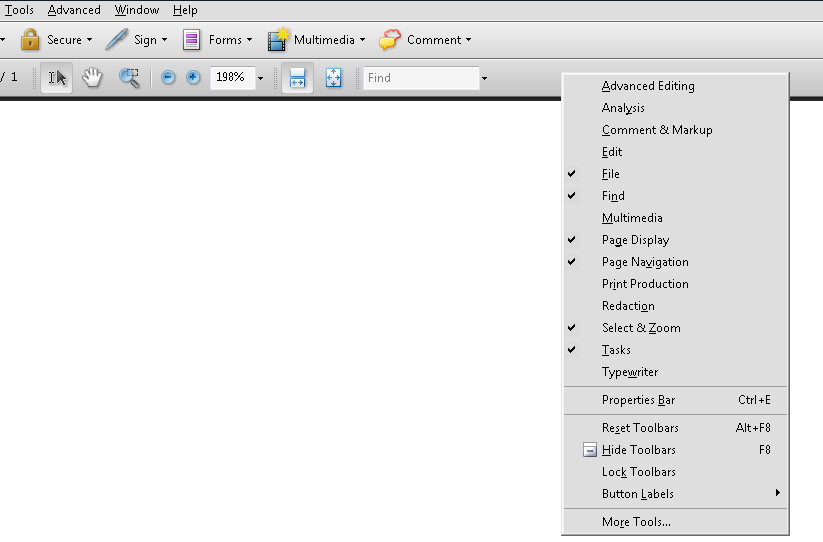
- Displaying and hiding tools inside toolbars – place the cursor above toolbar and click using the right mouse button. You will see context menu similar to the one in the following image. You can see that only some tools are selected. You can adjust the visibility of every tool like you want. You can also reset toolbar or show all tools.
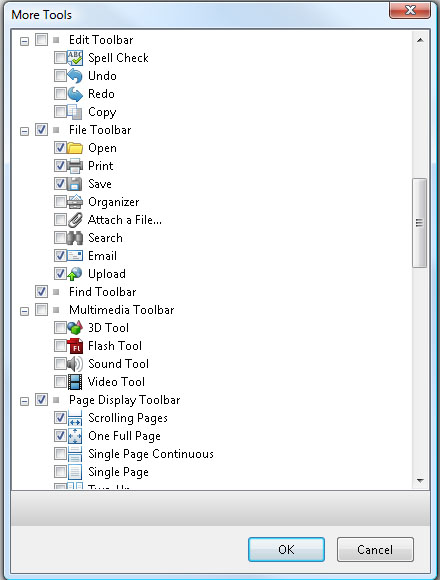
- Displaying and hiding tools inside toolbars (another method) – you can hide or display concrete toolbars and their tools in one dialogue window. This window is called "More Tools", commands are structured like a tree and you can check tools which should be visible. You can view this window from menu (View -> Toolbars -> More Tools) or using several other ways (you can see the command More Tools... in the previous image as a part of context menu).
- Layout – layout of toolbars can be changed by dragging any toolbar by its left border (if toolbars are locked see "Viewing and Hiding toolbars" above) - you can see a scalloped strip here. This strip is called berm strip. You can place the toolbar wherever you want and then release the mouse button. Using this way you can change the layout as you wish.
Selecting another Tool
It is very easy to select another tool than the active one. You only have to click on the icon/button in the tools strip and select the tool.
You can also use another way which is a little bit more complicated - the Tools category inside menu.
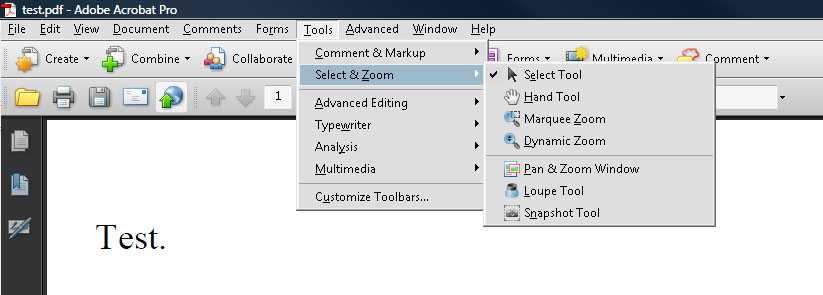
Changing Properties of Tools and Objects
You can use the Properties panel for this purpose. To display the Properties panel click on "View -> Toolbars -> Properties panel" or use any similar context menu. In case you work with different tools you can see additional settings for these tools.
Information about Page Size (Workspace)
You can get this information after placing mouse cursor in the bottom left corner. When you do it, the following rectangle will display.

Setting Units
You see that the dimensions are displayed in inches. To change units you have to display the following dialogue window.
"Edit -> Preferences" and in list "Categories" you should select the last item "Units & Guides"
You can set the parameter "Units" in the upper part under item "Page & Ruler Units".
Navigation Panel (Workspace)
You can see another strip with icons/buttons on the left side.
Settings of Navigation Panel
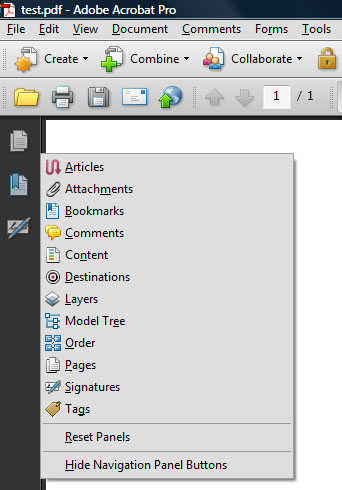
As you can see, several items in the navigation panel are available as icons and the other ones are available after right click on this panel. If you select an item which is available as icon, the command will be run. For example the item "Pages" displays panel with list of pages.
In case you select an item which is not available as icon, it will be added to the panel or opened as a floating window. If you want to anchor the icon inside the panel as the other ones, you have to view the dialogue window once again and select the option "Reset Panel" in the bottom part to reset the layout or select the option "Dock All Panels" to anchor the floating window. Floating windows usually have more bookmarks so more icons can be added when docking such a window.
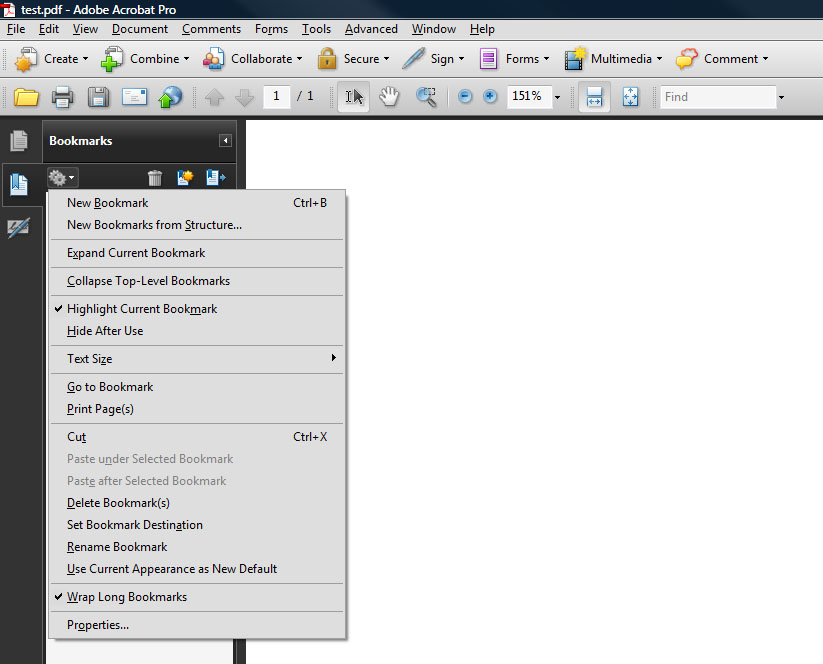
Options in Navigation Panel
In case you click on any icon in the navigation panel, you will see a small icon of cogwheels. You can view options of the selected tool by clicking on it.
Strip with Messages of Document (Workspace)
This strip is displayed only in several cases and informs users about a particular situation, for example about the way how to fill in a form and send it.
Using Help
Help for this program is very complex so you should view it in case you do not know what to do.
How to Use Help
- help in program - Help is a part of Adobe Acrobat 9 and explains how to work with this program. If you want to use an unknown function for the first time, you can find information inside help. This help is designed for users who do not have access to the Internet at the moment when they need help.
- on-line help - Another possibility is using an on-line help on Adobe server. The biggest advantage is that this help contains the most actual information. In case you have an Internet connection you should rather use this variant.
- help in PDF file - Help in PDF file is available at the same website as the on-line help which was described in the previous point. You can find a link in the left upper part of the page in a black strip. This help is designed to be printed.
How to Search
- topics - to find an answer you can use single topics. In the left part you can see a tree with all topics and sub-topics. If you want to find an answer for a particular operation, you can try to find a similar topic.
- word - you can also find a word to answer your question. All found articles with that word are displayed as a list. You can then select the best item from the list.
- exact phrase - in case you want to find a concrete phrase (connection of several words in a given order) you have to place that phrase into quotation marks. The searching engine then searches for the whole phrase instead of searching for single words.
- be aware to typing errors - searching for a wrong word or phrase can result in finding no topics.
- try a synonym - in case no results are found or results are not satisfying, you can try to search for a synonym to previous word of phrase which has the same meaning.
- create bookmarks - in case you find a solution, you can make a bookmark because you can return to it anytime. You can use this solution in every following case when you want to use the same procedure and you do not have to search for it again.
How to Solve Problems
- most common problems - if you want to solve any problems related to Adobe Acrobat, find support videotutorials, completed solutions or just an inspiration, you can visit this website.
- communication with other users - You can also use this forum and find needed solutions from other users of Adobe Acrobat. You can ask any question or start a conversation about your problem.
Viewing PDF
To view PDF files you can use Adobe Reader which is free or charge. It has almost none of the advantages from Adobe Acrobat (Adobe Acrobat users can restrict or allow access to several items for Adobe Reader users).
Full Screen Mode and Read Mode
Full Screen mode: View -> Full Screen Mode (keyboard shortcut Ctrl+L)
Reading mode: View -> Reading Mode (keyboard shortcut Ctrl+H)
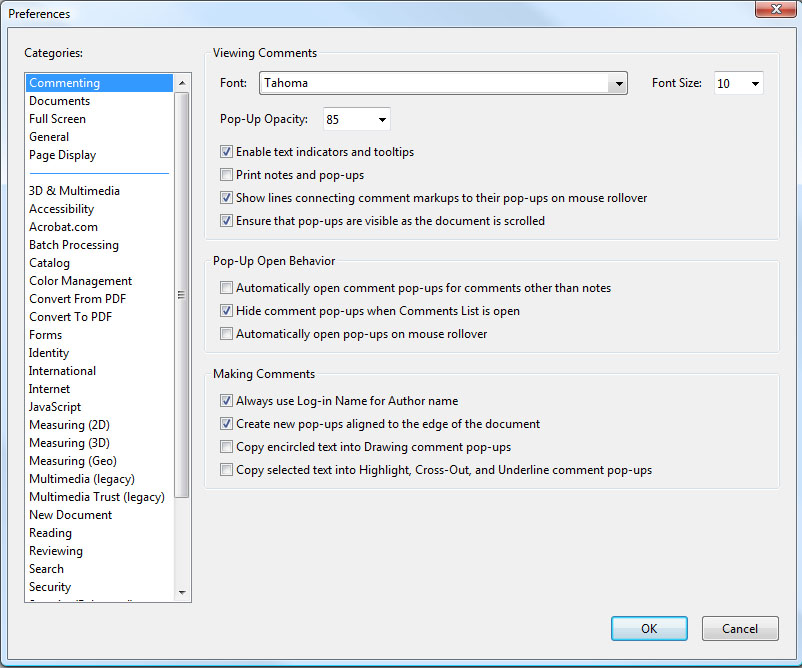
Setting Preferences
You can view preferences by this command: Edit -> Preferences...
All settings here are used for the computer you are working on only. Changes are not saved inside the document and will not be applied on another computer - these are only local settings. In case you want to set preferences for all computers which will open this file, you have to use the command File -> Properties... and then save all changes (save the document).
Organizer
This is a useful tool inside Adobe Acrobat which allows you to effectively work with all PDF files.
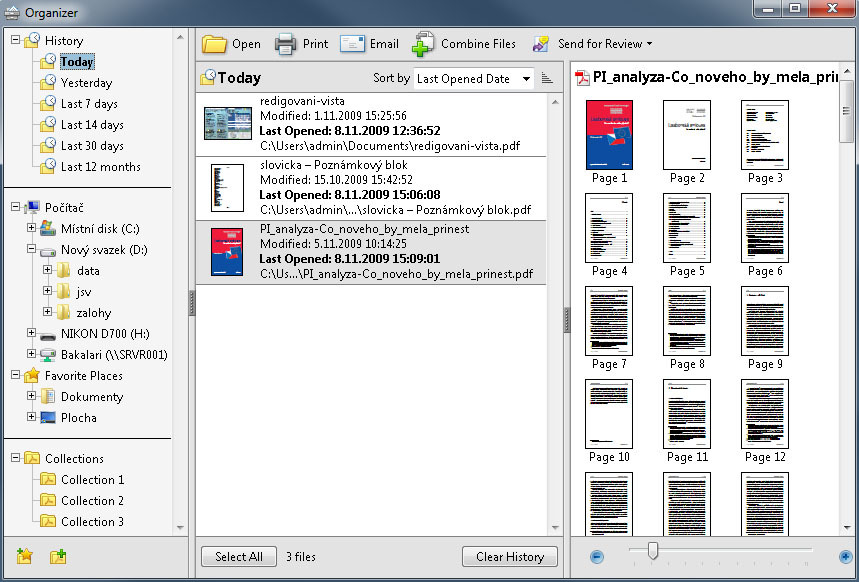
- History - you can sort documents according to the last modification date.
- Viewing files on hard drive - you can browse your hard drive and search for PDF files similarly as in Windows.
- Collections - collections are packets which can be created from different PDF files on your hard drive but you do not have to copy them to the same directory. They remain in their previous locations but are listed as a packet.
Printing PDF Files
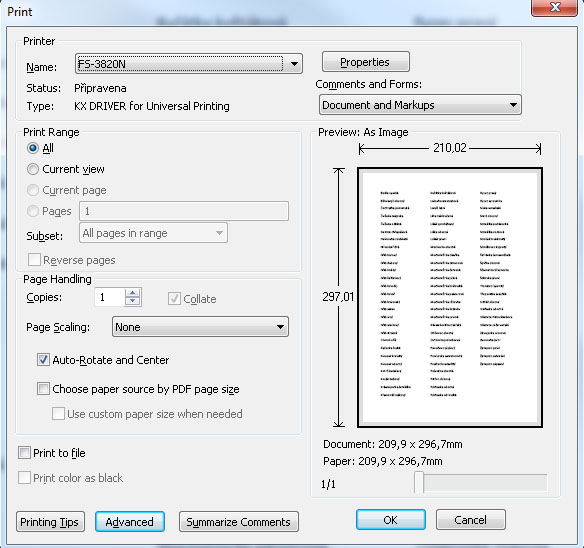
This is the dialogue window which is viewed when you want to print your PDF file. The most important option is the way how the document is printed -- Comments and Forms. You can choose to print the plain document, document with notes, document with stamps or just form fields (no background, only text and images). Another important option is Page Scaling - you can set to stretch the document to page or to print more pages on one paper.
Basic Information about Converting to PDF
When talking about creating PDF, we meant converting another formats to PDF. However, you can create PDF also from a printed document. Tools for creating PDF are inserted to MS Office; you can create PDF from e-mails or from web pages.
Adobe Distiller, tagged PDF
Format PDF is very closely connected to format PostScript. We can say that PDF is an adjusted PostScript. PostScript is an older way when document was exported to format PS and then converted to PDF by Adobe Distiller.
PostScript
PostScript is a programming language used for graphical description of printable documents. It was developed in 1985 by Adobe Systems Incorporated. The main advantage is that it is device independent and this format is considered as a standard for more expensive printers. Because of its huge possibilities it started being used for storing images too.
Its standard extension is .ps and MIME type is application/postscript. Program GhostScript is used for interpreting this format with the GhostView extension for graphics.
The extension .eps (Encapsulated PostScript) is used for bitmap, vector or combined images. EPS file is special because the bounding box (rectangle which borders the printable area) contains only the image (PS format copies also the sheet of paper inside the bounding box).
PostScript was later replaced by PDF.
source: wikipedia.org
Tagging PDF
Tags in PDF are very similar to tags in XML. Tags in PDF mark the structure of document - which text is the headline, which content creates a section, which text is a bookmark etc. The tree of this logical structure represents the inner structure of the whole document. Tags can show the exact order of reading and can improve navigation - especially for longer and more complex documents - without changing the appearance of PDF.
The viewing software then chooses the way of presentation and interpretation of the content of document using this tree of logical structure. Most of programs create the proper order for reading using these tags and offer alternative descriptions (sounds for example) for images and additional content. Document without this structure has to be considered as a standard document and Acrobat has to use its own structure using the order of texts. This situation can result in wrong order of objects in pages and several items can be skipped.
Also reformatted document for a small display of mobile device uses the same tags for structuring the document.
source: help.adobe.com
Creating PDF Files
Printer Adobe PDF
The newest way to create PDF is using a virtual printer. It is the same principle as in the previous sample when document was exported to PS and then converted to PDF. The difference is that all these steps are done at the background and user does not have to do anything. Everything is done without his activity and temporarily created PS files are automatically converted.
You should know that the Adobe PDF printer does not create tagged PDF files.
Non-tagged document can be then converted to a tagged one by the command "Add tags into document". However, the result is not as good as we would expect because this procedure cannot do the same job as Adobe Acrobat when saving a new PDF file.
Ways of Creating PDF

Command Create PDF
- Create PDF from file – this command lets you choose the file which should be converted to PDF.
- Create PDF from scanner – you can also create PDF files directly from a scanner. After selecting this command you can choose the way how to create the PDF file from a material inserted inside your scanner. After you confirm the dialogue, the file is scanned and displayed in Acrobat.
- Create PDF from web page – Acrobat allows you to enter a website which should be converted to PDF. You can also set to convert the whole web to PDF. This is not recommended because it causes an enormous overload for the selected server. The algorithm can also include hypertext links to other webs so you have to use settings smartly or set the number of levels which should be downloaded.
- Create PDF from clipboard – you can also create PDF file from the content which is inserted into clipboard.
Individual Task 1: Creating PDF from File
Documents for practicing: dokument-1 - dokument-2
Imagine the simplest situation when you want to convert a file from MS Word into PDF.
- In the Task Strip select the icon "Create". You can use the command "Create PDF from file..." in the submenu.
- Inside the dialogue window which will appear choose the file you want to convert to PDF.
PDF file is created. Take a look at the options before you create the file. In the previous case the file type was set to "All supported formats". You can set this type to a concrete file type, in this case the MS Word file. After this step you can click on the button Settings.
You can see a window which will affect the final properties of the PDF file. You should consider the best combination of quality and file size according to your intentions.
PDF Settings
Before explaining these items, you can see the button "Edit". From the unpacking list you can select a particular option (a set of settings). Every set can be edited using the Edit button. However, this is a difficult procedure which requires professional knowledge so it is not recommended to change anything.
- Quality print - this option should be used for a quality print on table printers or for control previews. Subsets of characters for all fonts are inserted, colors are not changed and transparency is not merged.
- Oversized pages - can be used for viewing technical drawings (bigger than 200 x 200 inches for example).
- Print quality - a PDF file with high quality which can be used for commercial purposes. Subsets of characters for all fonts are inserted, transparency is not merged. Colors are converted to CMYK. Images are resampled to 300 PPI (monochromatic ones to 1200 PPI).
- PDF with rich content - files which contain hypertext, bookmarks and tags.
- Smallest file - these files are used for web or as an attachment in e-mails. Low quality damages images. Fonts are not inserted; this option is used for presenting text on computers.
- Standard - there files are used for printing on table printers or for a backup on CDs/DVDs. Subsets of characters are inserted for every enabled font.
Individual Task 2: Creating PDF File Using the Adobe PDF Printer
Documents for practicing: dokument-1 - dokument-2
Printing a file using the Adobe PDF printer is very easy. You only have to select the option Print inside the menu File - similar to a real printing procedure but you should set the printer to Adobe PDF. Then you can adjust the properties according to your intentions and print the document to PDF. The document is not sent to a real printer but is saved as a PDF file.
Individual Task 3: Converting Thesis to PDF and Inserting Scanned Assignment
Documents for practicing: diplomova-prace-vzor - diplomova-prace-zadani
Additional Texts
Question
- What are the advantages of PDF?
- What is the Task Strip?
- How can you use the navigation panel?
- Where can you set information about the page size?
- Which types of help do you know?
- What are the advantages of using the organizer?