
Working with a Virtual Camera and Lights in 3D
 Content of the lesson:
- Working with a virtual camera in 3D
- Working with lights in 3D
Working with a Virtual Camera in 3D
Demonstration of the Use of a Camera
In this demonstration we can see a text with a logo turning vertically once around its axis. The used text is from the previous unit (with the used heredity). Then there is also a camera inserted into the composition as well as a zero object that makes the movement of the camera easier. It may look like it is a simple rotation of a text a logo but in fact the text with the logo stays still and the impression of the movement is created by the movement of the camera.
The Procedure of Creating the Sample Animation
We have prepared any text (but the best choice would be the text with the logo from the previous unit) and insert a camera into the composition. It is done by clicking the right button on the timeline and choosing New and Camera from the offer.
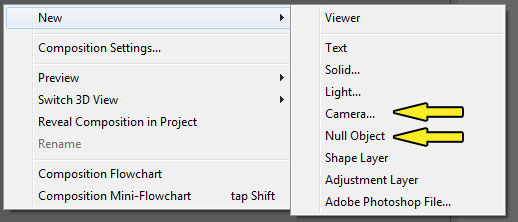
Adding new objects
A dialog box of the setting of this camera appears. When we have finished, click OK to confirm and the camera is inserted as another layer into the timeline. The zero object is inserted the same way as the camera but there is no dialog box appearing and the zero object is added in the timeline.

Setting of the camera
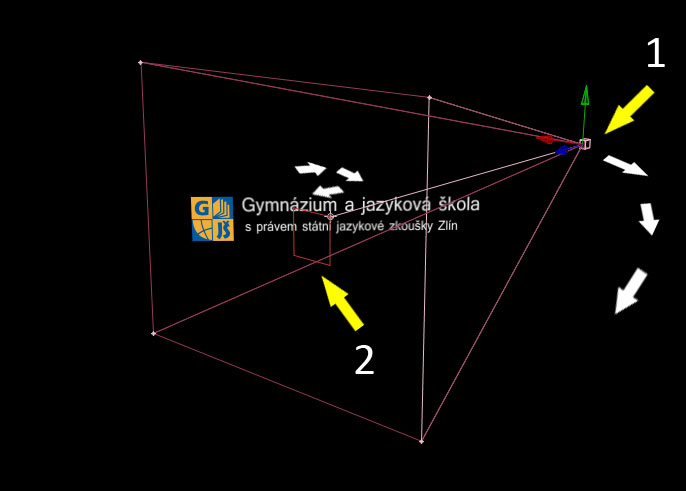
So, we have inserted a camera and a zero object into the timeline and now we want the camera to go around the text with the logo. This means we have to make the camera move on some circle. But to do this is quite a complicated and difficult work and that is why it is better to use the zero object as a tool. We can imagine the zero object as some point or a cube that we can manipulate with by its setting (when the small triangle is unrolled, we get to the Transform setting that is there in default setting). And we can transform it the way that we turn it around one of its axis (to be precise around the axis the text with the logo is turning round) just there using this setting. When a camera is connected to such a zero object using heredity (we can imagine the camera has been attached to this zero object by some beam, the zero object will rotate and the camera will move at the same time. This means we do not have to run around with a camera and change the setting but it is enough to make the zero object rotate and the camera follow its movement so that it looks like the zero object does not change position.

Demonstration of the inserted camera and zero object in the timeline
There are some important things we must not miss in the image. N 1 points out the necessity to activate 3D space. To be able to work in 3D, we have to click this so that a symbol of a cube appears. N 2 points out the name of the layer. If we click the head of the column in this part of the program, we can switch between Source Name and Layer Name. If we switch over the Layer Name, we can change this name by clicking the name of the layer and pushing Enter. N 3 points out heredity. The heredity is set so that the camera takes the setting of the zero object. And the last N 4 points out the setting of the zero object, its rotation around y-axis in time, this means by key frames.
Demonstration of the camera and zero object in the timeline (N 1 camera, N 2 zero object)
To handle the camera, we can use the appropriate tool chosen from the upper part of the program.

Unified Camera Tool
Then we can take a look at the composition from different points of view. This option is in the upper part of the Composition panel.
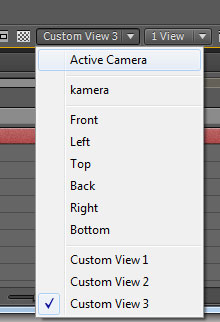
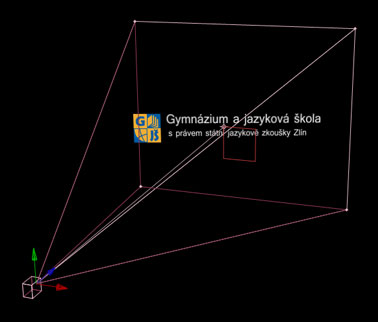
Choosing the view with the demonstration of the result
Another Demonstration of Working with a Camera
The demonstration of animation of the FAI logo and BTSM title.
Individual Task
Create the following animation using the previous techniques
Working with Lights in 3D
To work with lights, we have to insert the object Light... in the timeline. It is done by the same way as with the camera or the zero object. So, click the timeline by the right button and add light from the menu. A dialog box appears again with the setting of this light and after we do it and confirm, the light appears in the timeline as a new layer.

Adding new objects

Setting the light
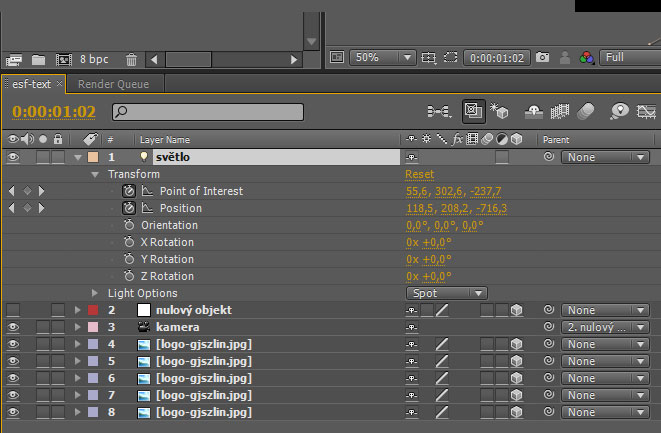
Demonstration of an inserted light in the timeline
Individual Task
Create the following animation.
Procedure
Creating such an animation is easy. We use the composition from the previous task with the camera and zero object. Set the cursor so that we turn logos as it is in our demonstration. When we have finished, switch off key frames that nothing changes when moving the scroll bar. Then we insert the light in the timeline and choose the Spot type in the setting. After that we move the light into places where we want to have the initial position by setting, activate the appropriate key frames and create an animation by moving the light to the terminal position and set the parameters. This is done by using key frames so that there are changes in the timeline.
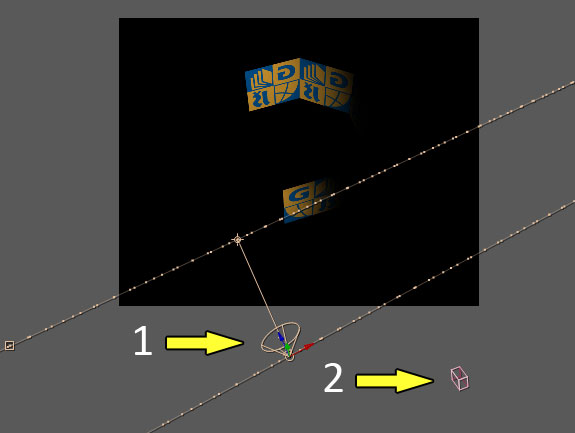
Demonstration of insetrted light (N 1 is light, N 2 is camera)
OtÃzky
- What is a camera in AE used for?
- What would you use a zero object for?
- Show a simple animation by using a camera.
- What can the lights in AE be used for?