
Spaceships Combat
 Content of the lesson:
- Spaceships Combat – Demonstration
- Spaceships Combat – Explanation
- Spaceships Combat – Individual Work
Spaceships Combat – Demonstration
Spaceships Combat – Explanation
To create a demonstration we have just seen, it is necessary to create a new project with a new composition. Then we also need to import objects, spaceships.
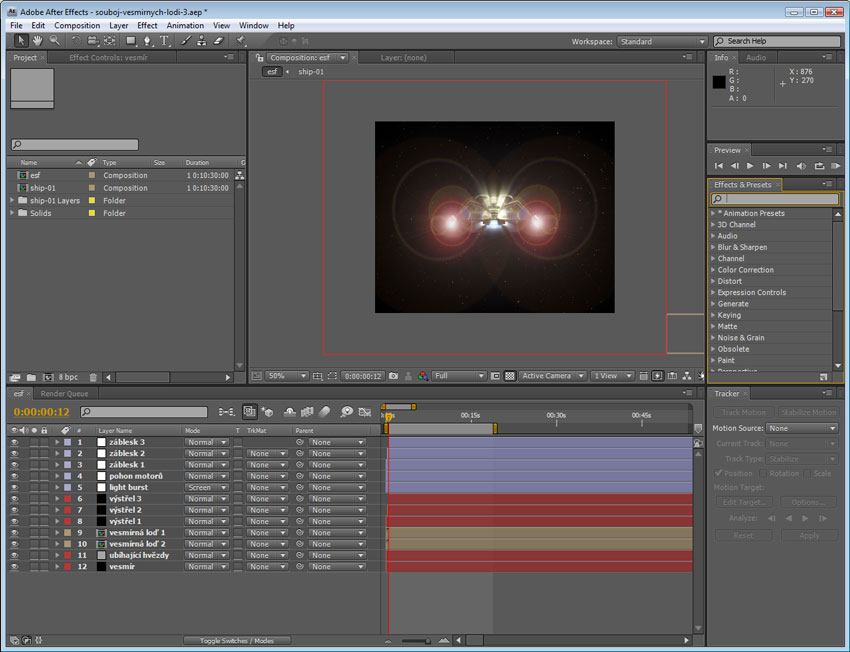
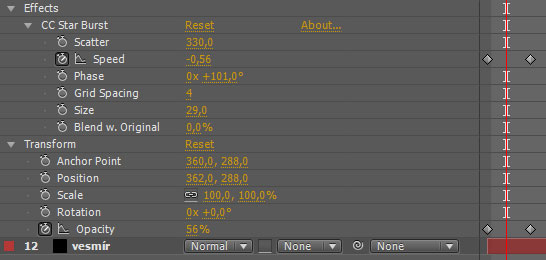
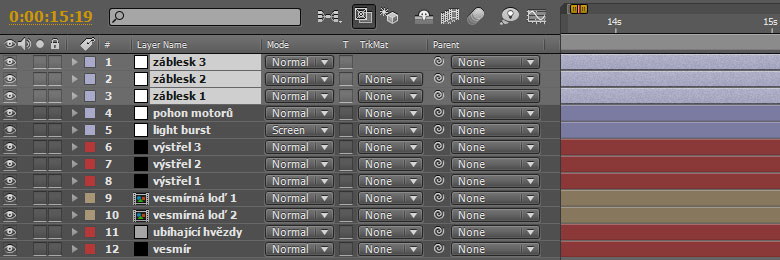
AE program preview – inserted layers namely that are needed to create the previous demonstration
Creating the Universe Environment
At first we create a new layer of the “Solid” type on the timeline. It is done e.g. via menu, “Layer” item and “New” (similar offer can be set up directly by clicking the right button on the timeline). Name the layer “universe”, set it black and confirm by “OK” button. Now the new layer is on the timeline.
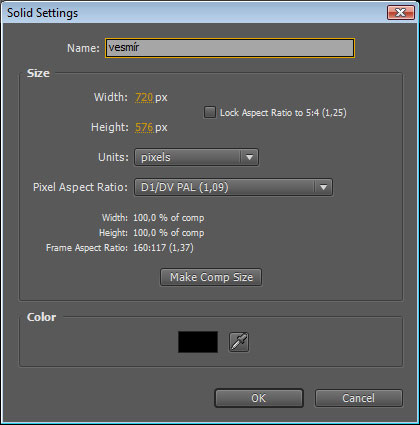
Setting the “Solid” object to create the universe environment
Now we have the layer that represents the universe itself and we have to add stars. This is done via menu, “Effect” item. We choose “Noise & Grain” in the offer and “Fractal Noise” there (we can insert the effect similarly by “Effects & Presets). This effect is inserted on the layer and represents an extensive disturbance that needs to be adjusted. At first we set the value “Scale” very low in the item “Transform”. Then we adjust “Contrast” to a higher value and set the “Brightness” item negative. This setting can be done either in “Effect Control” (just next to the “Project” panel in the starting position. by clicking on the required layer or on the timeline when we unroll the required layer.
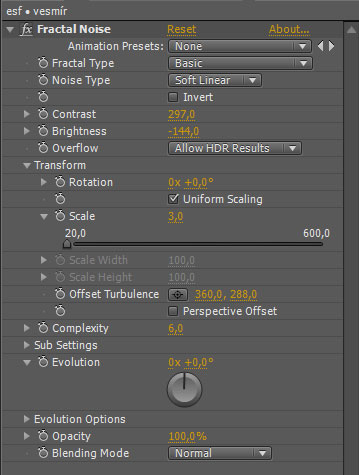
Demonstration of the “Fractal Noise” effect and its parameters
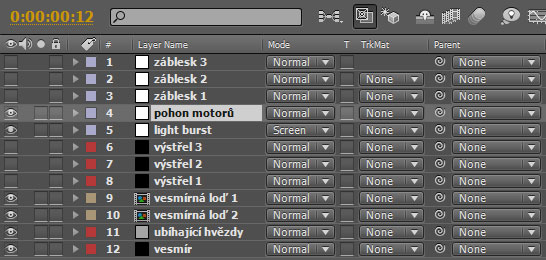
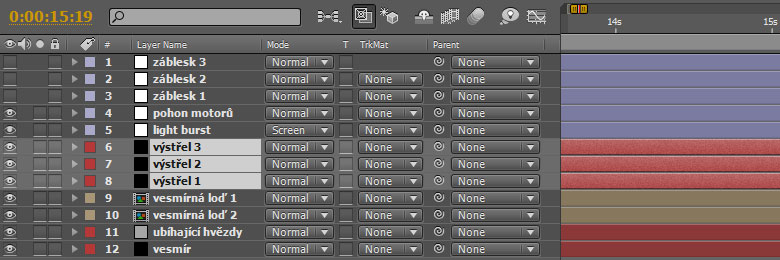
We simulate the universe this way, we have black environment with small dots representing stars. In the next picture we can see the layer as the lowest one and it is the background of the whole video.
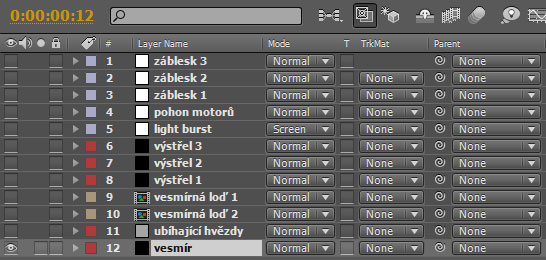
Layers and their use in the given video
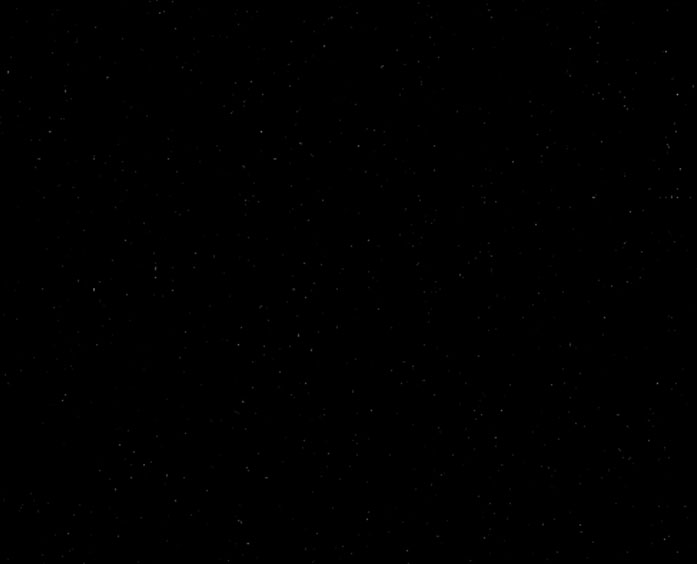
The universe environment – the result
Passing Stars (Flight Illusion)
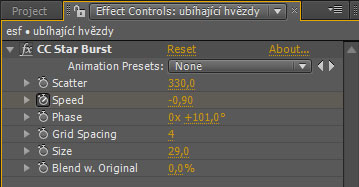
We add some other stars but this time in the way that evokes an illusion of flight. It means that the stars will pass along from all sides of the scene towards the centre. For that purpose we create a new layer, of the “Solid’ type again and apply an effect called “CC Star Burst” on it. Then do all the necessary settings of the effect, place the red cursor at the beginning of the video where we want the stars to be most visible and set the parameters according the picture below. We can also see that key frames are activated at the “Speed” item. It is because we want the illusion to make us think that the stars are passing first and then they gradually stop which means the flight has stopped. To create this we have to change the “Speed” value in time so that the passing is stopped after some time (e few seconds of the video).
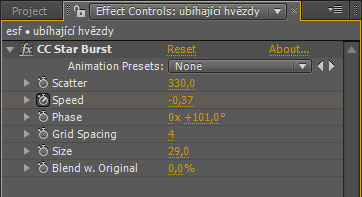
Demonstration of the “CC Star Burst” effect setting
All this is supported by changing parameters of the layers in the “Transform” item, part “Opacity”. There we set key frames in time in the same way as in “Speed” at the effect itself. As a result, passing of the stars gets slower and these stars start to disappear at the same time. WE can see a similar effect in e.g. Star Trek series when the spaceship is moving through the space.
Using key frames in combination with “Opacity” parameter in “CC Star Burst” effect
Layers and their use in the given video
Inserting Spaceships
It is quite simple. We have imported ship-01.psd file and place it from the “Project” window onto the timeline. We use a PSD file because the picture of the spaceship is without its background and this part is transparent after being inserted. It is also possible to open the file and edit it if we want to make some further adjustments.
We insert this object twice on the timeline. Once we place the object in the centre of the scene and then into the right bottom corner so that it is out of the scene for the second time. In addition, we make it smaller (“Scale” parameter) to get the illusion that the spaceship is more in the background.
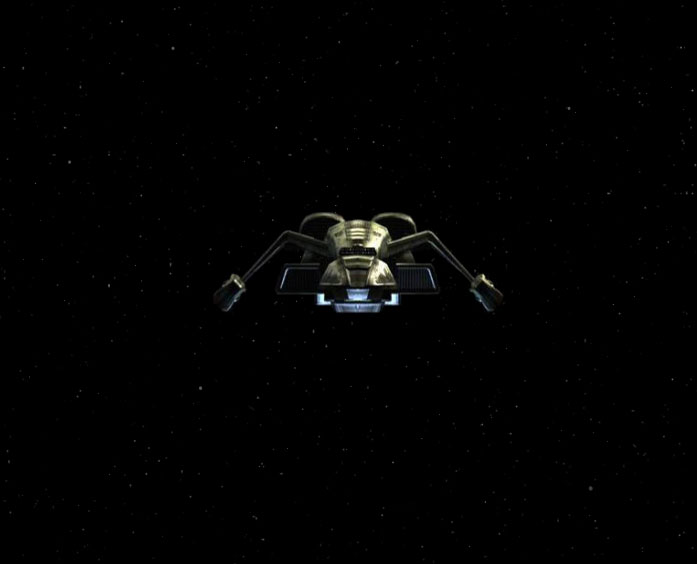
The spaceship inserted in the scene
Light Burst
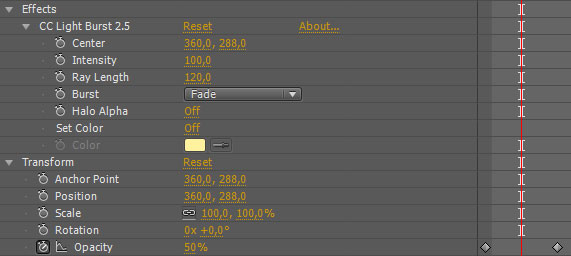
We add another layer, the “Adjustment Layer” type this time and apply the “CC Light Burst” on it. This effect emphasizes the required flight through the universe. We can see setting of the parameters in the picture.
Demonstration of the “CC Light Burst” effect setting
It is again necessary to synchronize “Opacity” layer parameter that changes in time as we did with passing stars. This helps us to create the effect of the spaceship flying through universe its gradual stopping.
Adjustment of the “Opacity” parameter in time

Layers and their use in the given video
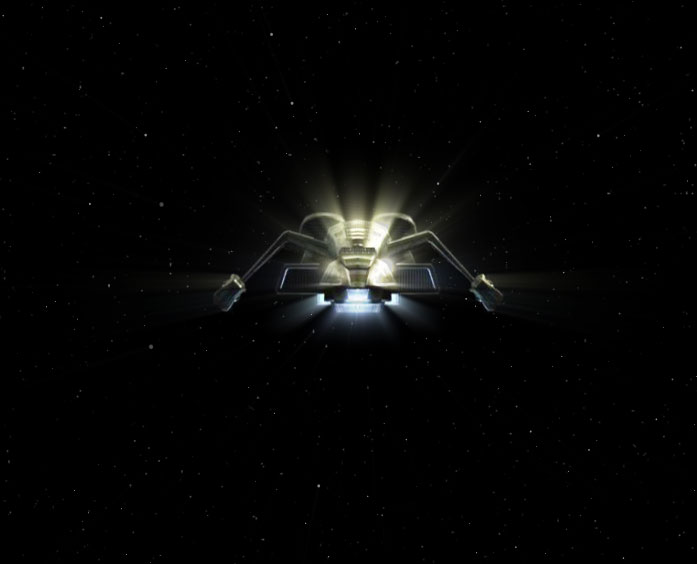
Demonstration of the spaceship in the universe with the applied “CC Light Burst” effect
Engine Drive
We now want to create an illusion that the spaceship has active engines that enables it to fly. To create such an illusion we can use so called “Lens Flare” effect. We create a new “Adjustment Layer” type layer again and insert this effect into it. And we insert it twice. We set each of these effects to one engine and then we adjust values of the effects according the picture bellow.
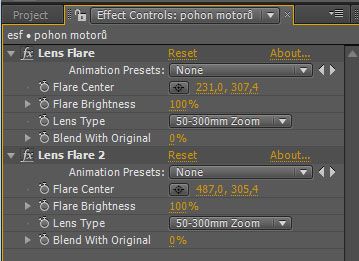
Demonstration of the setting of the “Lens Flare” effect
Again it is necessary to change “Opacity” parameter in this layer in time and synchronize everything with the previous effects. We want to make the passing stars slow down until they stop and disappear and the “Light Burst” effect disappears at the same time. The engines conk out in addition. That is why we have to time this parameter with layers of the mentioned effects.

Use of “Opacity” parameter to synchronize with the previous effects
Layers and their use in the given video
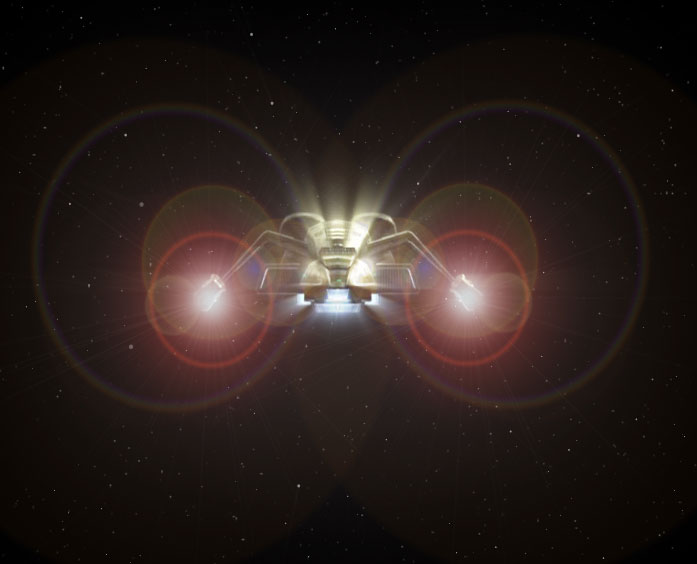
The use of “Lens Flare” effects as engines drive
Movement in the Universe and the Second Spaceship Shot
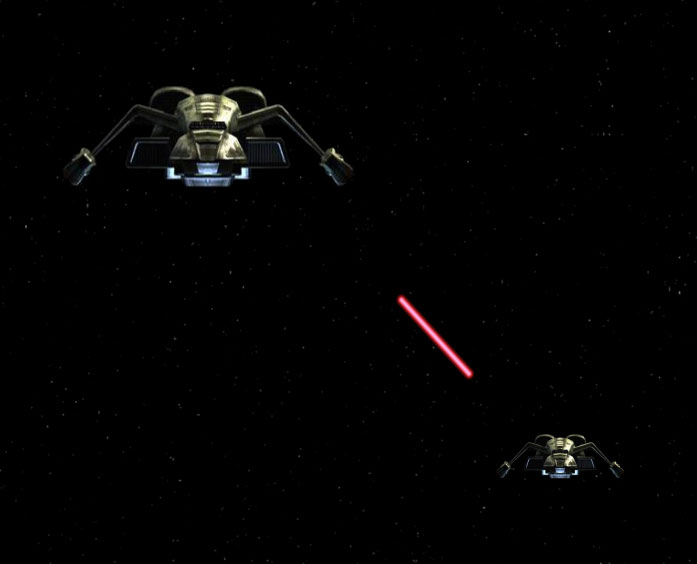
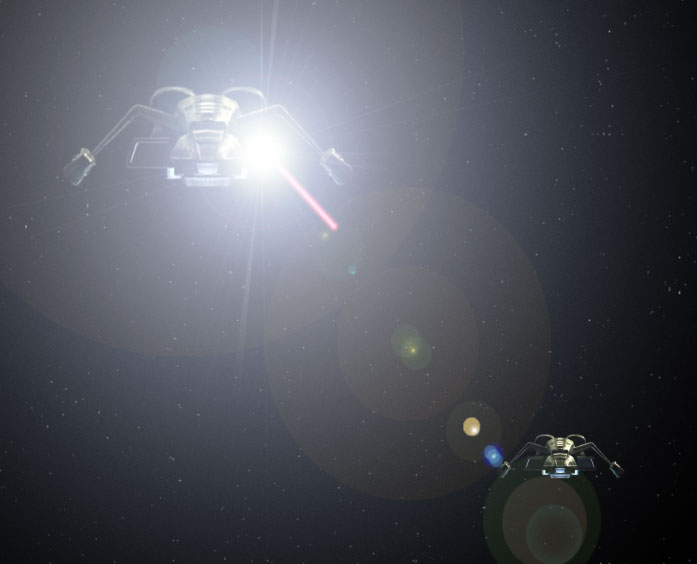
We have created the spaceship flying through the universe that slowly stops. Moving of the scene so that the spaceship is moved to the left top corner and another spaceship appears in the right bottom corner is the next step. Everything is done by changing the “Position” layer parameters in time which means by key frames.
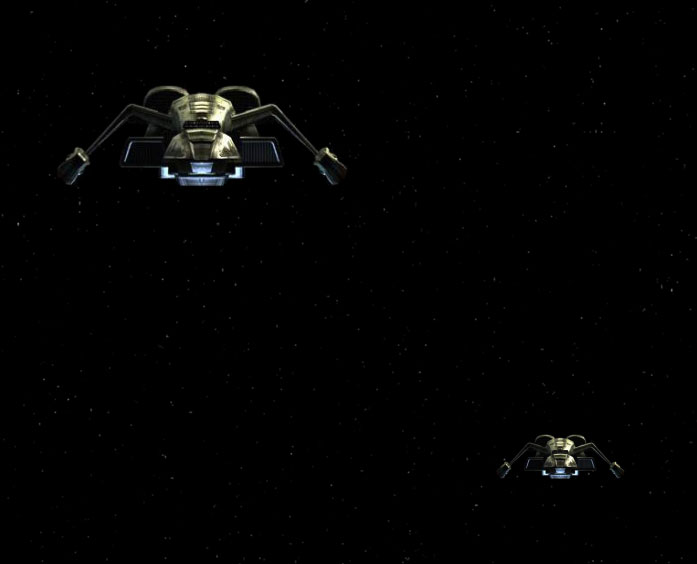
The view of both spaceships in the universe
In the picture below we can see the change of the “Position” parameters in time for the layer with both the first and the other spaceships and “universe” layers as well. To be able to move the last mentioned layer as well, it is necessary to make it bigger by the “Scale” parameter. The movement of the spaceships is simple. Set the red cursor in the timeline into the starting position, activate key frames and after this set the cursor some time further and change parameters (or mark the layer directly and move the spaceships into their final position by the mouse). Move the “universe” layer in time in the same direction and in the same way as you move the spaceships. It is not necessary to move it exactly as the spaceships but we can move it less. Doing this we create some sort of would-be 3D effect and we can have the feeling that the camera is moving through the scene and the nearer objects (spaceships) are moving more than the objects further away (stars in the universe).

Setting and synchronizing the parameters of the above mentioned layers (both spaceships and the universe)
Shots
And now we will try to add an effect of the shots of one spaceship against the other. We need to insert another new layer of the “Solid” type onto the timeline and apply the “Beam” effect on it.
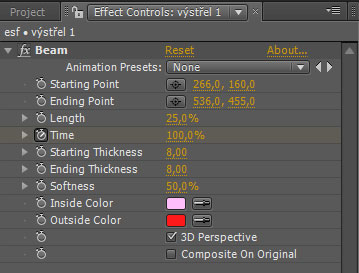
The “Beam” effect parameters
If we select this layer, we can see that there are two marks in the scene. We can move them either by the mouse or by changing the “Starting Point” and “Ending Point” parameters. It is clear from their names that these are the points where the shot starts and ends. To get the effect of the shot, we have to change the “Time” parameter and we have to do it in time by key frames. We use the parameter of the “Opacity” layer at the same time and make this effect visible at the time of the shot and then we make it invisible again otherwise there would be a dot of the shooting ray in the starting and ending points.

The work with the “Beam” effect in time
When you have prepared one shot, copy this layer twice and the other one as well and move them on the timeline so that the shots come one after another.
Layers and their use in the given video
Demonstration of the shot effect in the scene
Lightning at the Time of the Hit
To finish our work, we have to insert a blast after the hit of the beam. Create another new “Adjustment Layer” layer and insert the “Lens Flare” effect into it. In the picture we can see the setting of this effect. Then set the position of this effect at the place of the stroke of the beam.
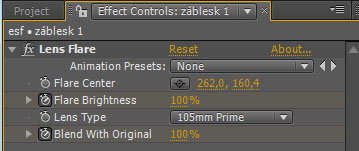
Setting the “Lens Flare” effect for the explosion
It is necessary to change the parameters in time to get the effect of the explosion. In the next picture we can see that they are “Flare Brightness”, “Blend with Original” and “Opacity” in “Transform” item parameters. Using this setting we get the flare that appears and imitates the explosion. It gets bigger at first and then it goes off and disappears.

The work with the “Lens Flare” effect in time
Copy the layers after that and move them on the timeline to get this explosion after each hit of the beam.
Layers and their use in the given video
The explosion effect in the scene with the hit of the beam
Spaceships Combat – Individual Work
Task
Create a similar video using the attached file and use the explained procedure.
Photoshop program file: vesmirna-lod
Questions
- How can the “Fractal Noise” effect be used and where can we find it?
- How can the “Lens Flare” effect be used and where can we find it?
- Can you show the way of creating the effect of the hit?
- How can the illusion of the passing universe be created?
- How can the “Light Burst” effect be used and where can we find it?