
Matte Painting
 Content of the lesson:
- Matte-painting - Demonstration
- Matte-painting - Explanation
- Matte-painting - Individual Task
Matte-Painting – Demonstration
The Video before the Adjustment
The Video after the Adjustment
Matte-Painting – Explanation
Is it the truth of a fiction? The unit about matte-painting technique could be also introduced by these words. The aim of this technique is to create an imaginary and unreal scene. The reason for creating such a scene is the price of creating the real scene but also (and more often) because of our own abilities. It means that even if we had enough money we would not be able to create the scene in real. This method had already been used before digital technologies were introduced. Painters were hired to paint the scene and then the final desired picture was created in a camera with the right setting of the distance of the painting and the real scene and with the right placement of the camera. Nowadays, modern compositional programs are used. The video is shot at first often in front of a green or blue background and then the object is placed at the required place. This place or the object it includes can be created in some of the 3D programs or we can use a static picture and adjust it in a graphic editor using masks like we show in our demonstration.
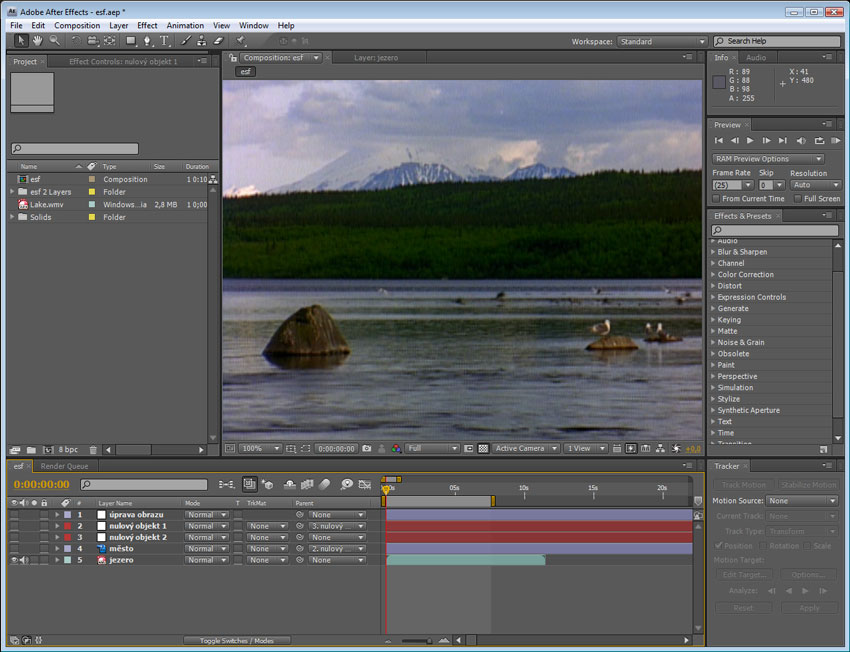
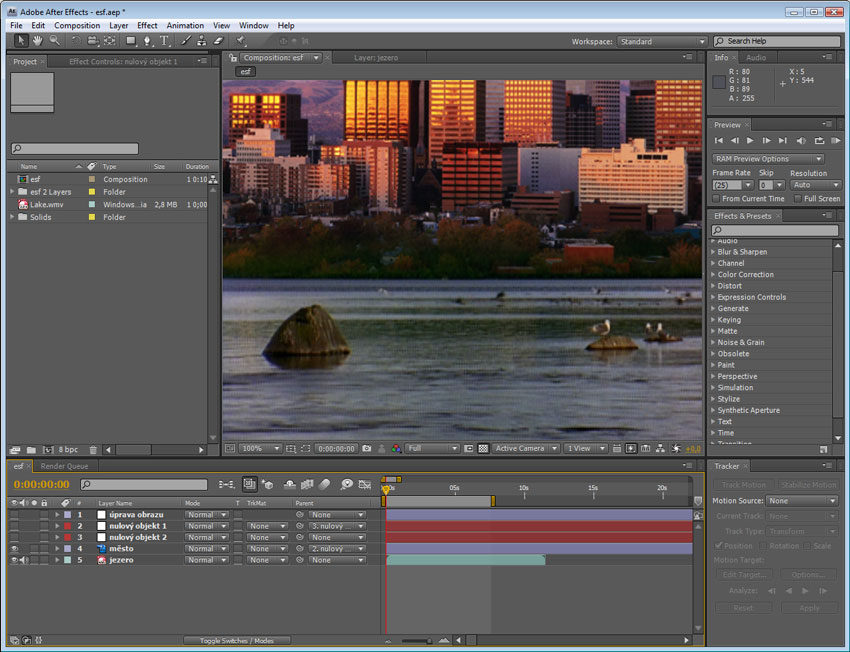
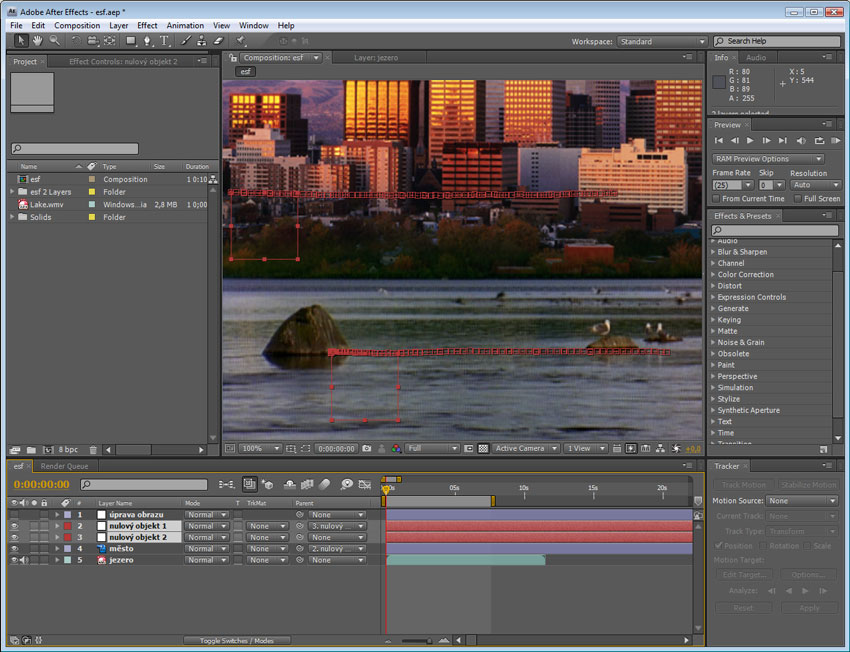
Individual layers in AE program and a preview of the inserted video
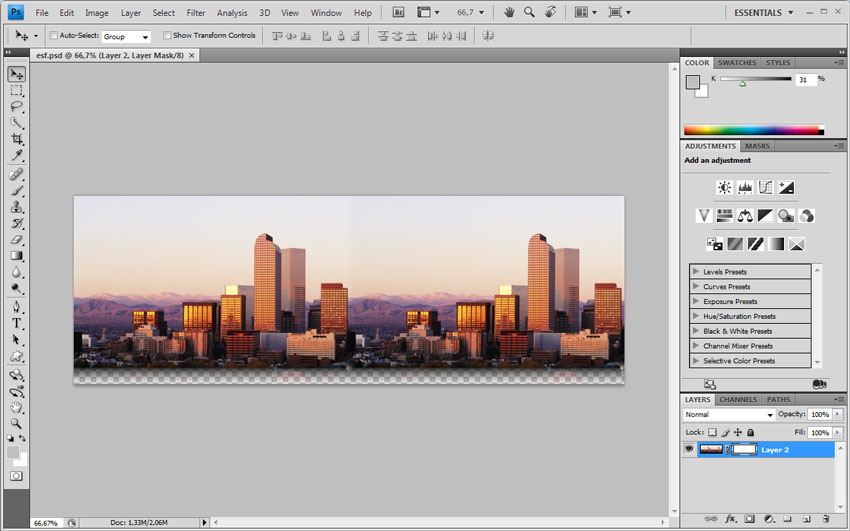
Prepare a new project with a new composition and insert a video into it. Then open the Adobe Photoshop program and insert a photo of a town in. The photo is duplicated twice and inserted one into the other as we can see from the picture below. We have done this to get longer photos because of the movement of the camera in the video with the lake. This will be explained later. Let`s now prepare such a picture. Create a composite photography using procedures known from the unit about Photoshop. Then use a mask and decrease opacity. Save this into nazev.psd file and import this file to Adobe After Effects program.
When importing we are invited to choose the way we want to import the file in. We choose “Composition” in “Import Kind” and choose “Editable Layers Styles” in “Layer Options”. This enables us to make changes of the picture inserted in After Effects in Photoshop.
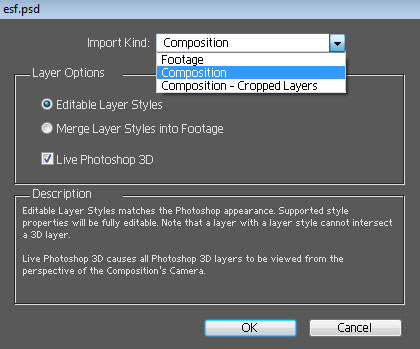
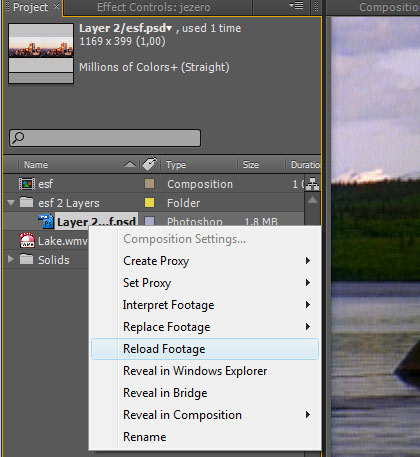
If we adjust the picture, we have to save the nazev.psd file again and upload this imported file in After Effects once more. This is done by clicking the file in “Project” and by clicking the right button we also get the context menu where we then click “Reload Footage”.
After inserting the file into After Effects, we can place it on the timeline as another layer. And because we created a transition using mask in the lower part of the picture, the picture behaves in the same way in After Effects as well. We can place it where we want (on the bank of a lake in our case) and give the impression of buildings built on the banks of this lake. It may look complicated to make changes in Photoshop and after that to check the result in After Effects. That is why it is better to copy the screen so that we have the picture of the lake and insert it into Photoshop as a new layer under the adjusted picture of the town. Then we are able to make changes of the picture more easily in order to fit the video as good as possible.
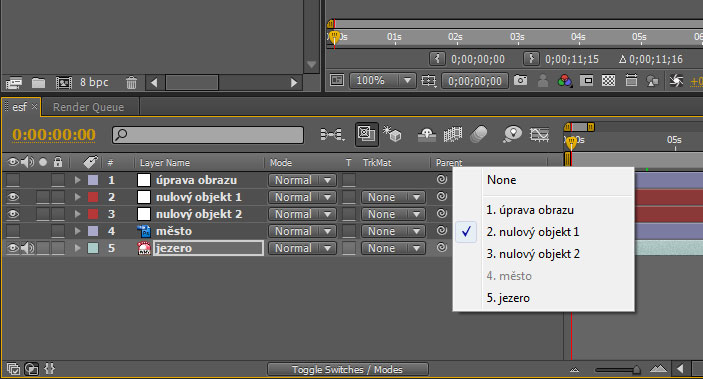
Getting the same movement of the picture with the town as the movement of the camera is another step. This creates a faultless illusion that it is a part of the played video and we can use our knowledge from the unit about tracking motion and by “Track Point” via “zero objects”. “Zero objects” are found in menu, “Layer” item and “New” and we insert two such objects in the timeline.
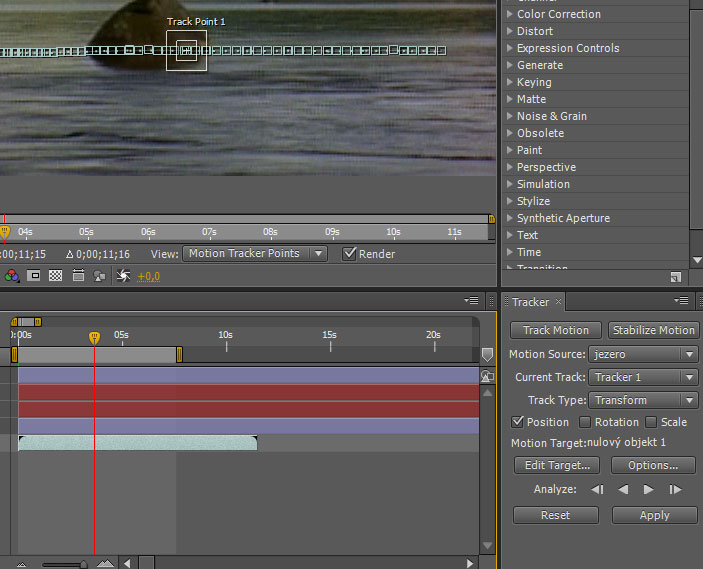
We open “Tracker” at first and by clicking “Track Motion” we watch the movement on the video with the lake. Then we place the red cursor in the timeline e.g. at the beginning of the video, place “Track Point” at some contrary place (in this case watching the position is enough) and run an analysis.
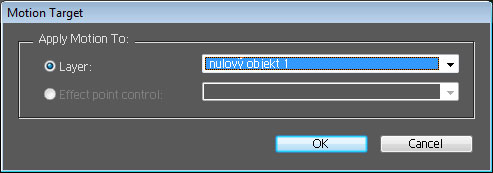
When the analysis is finished, click “Edit Target” in “Tracker”. We have to choose now which layer motion tracking will be applied on. We choose “zero object” 1 and set the video into the position where the “photomontage” of the picture of the town in the video with the lake is done so that the scene is as real as possible and use heredity. The layer with the picture of the town from “zero object” 1 inherits and the picture is then tied together with this object and adopts its route in the course of time.
We need to have the other object there because the movement of the camera is longer and to have just one object would not be enough. The “zero object” 1 is moving on the basis of the video analysis but we need to make the movement longer. That is why the second analysis of another part of the video is done using a new point of reference on the screen. The movement is applied on the “zero point” 2 when the analysis is finished and after that it is necessary to synchronize both objects and tie them together.
Matte-painting – Individual Task
Task
Use the attached video to create a similar montage as you could see in the previous demonstration. Use the procedure which was explained above.
Video to practice: matte-painting.mpg
Another Demonstration
Additional Texts
Questions
- What is matte-painting and what is it used for?
- Why do we need Photoshop?
- Why motion tracking is used?
- What are “zero objects” used for and what are their advantages?