
Motion Tracking, Image Stabilization
 Content of the lesson:
- Image Stabilization
- Motion Tracking
Image Stabilization
It is very easy to imagine how a video recorded by a small hand camera without a camera tripod would look like and we will see such an example in the next demonstration. The thing is that the shot recorded in this way is a bit shaking and we want to adjust such a shot so that it looks like a still shot recorded with a camera with a camera tripod.
Image Stabilization Demonstration
The first example shows a close-up of a school with the view being moved away gradually and the camera recording other objects around. To become aware of the difference and of what happens when making the action stable, we use just this example. The camera is focused on a point on the school building and the picture is stabilized using just this point. We can see that individual shots are moving in x and y coordinates so that it looks like the building stays on the same place. The stabilization in x and y coordinates is used there but we have not used the stabilization of a rotation. All this can be set and in the next example we are going to have a look at the possibilities of stabilization and we are going to try them as well.
Explanation of Image Stabilization
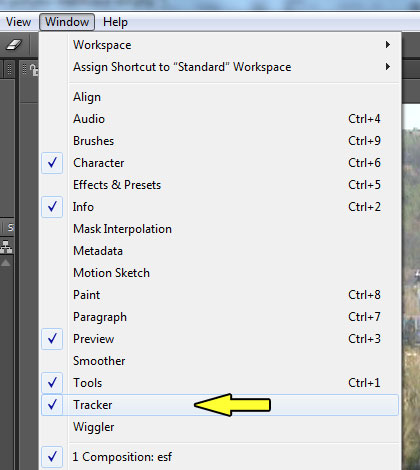
We stabilize a picture by Tracker panel but to be able to work with it we have to activate it. The Tracker panel is activated in Window menu Tracker item.
Panel Tracker
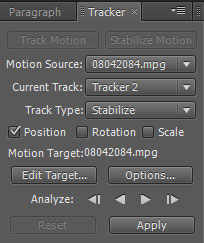
To start the image stabilization, we have to choose the layer on which we want to apply the stabilization and click it. After clicking the layer, Track Motion and Stabilize Motion buttons in Tracker panel are made available and we use the Motion Stabilize one.
Tracker panel
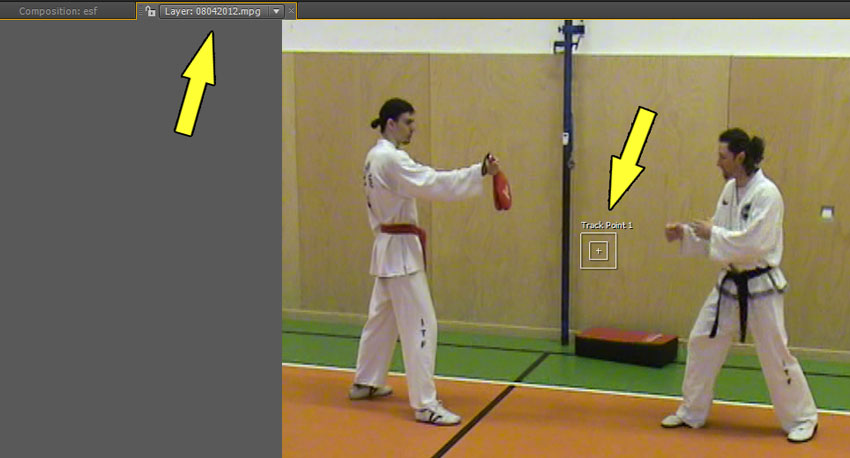
After clicking the button, a new window with the appropriate layer is opened in the place of the Composition window. In this case it is the layer with the video which we are going to stabilize. A Track Point 1, a small object with a cross in the middle and two squares around, is also added to this video.
Tracker panel
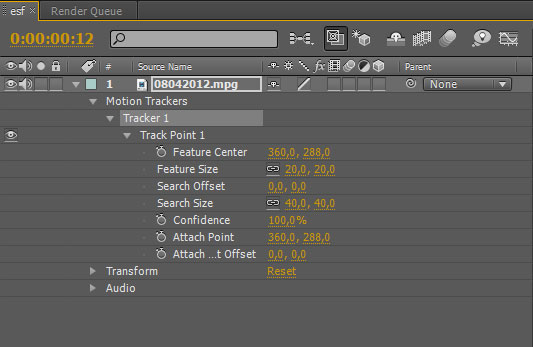
Then a sub-item Tracker 1/Track Point 1 is added into the layer into the Motion Trackers item. There we can see a lot of different settings but it is not necessary to make the changes manually, everything is done automatically if we keep the given working procedure.
Panel Tracker
Stabilization (position)
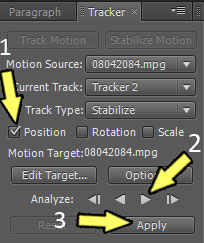
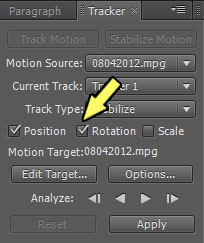
And now we are going to try to stabilize just a position. First of all move the mark to a point with contrast around in a video. It is the holder of the horizontal bar in our video and we move the mark so that the cross in the middle of the squares points just to this white point. Then we tick off Position (n. 1), place the cursor to the beginning of our video and push Analyze Forward (n.2)
Tracker panel
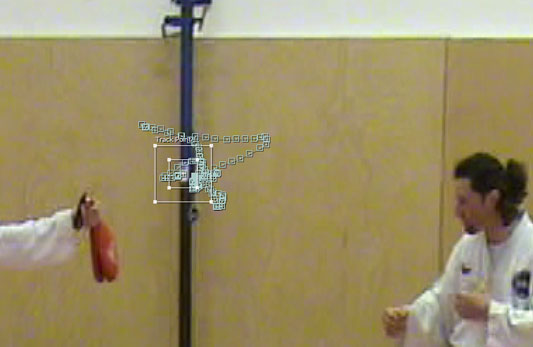
Analysis is run and conducts a survey of the motion of the inserted mark. We can see in the picture that a route that conducts a survey of the motion of the marked point in the course of the video is created. The points in time could be adjusted manually if there was the need but the work done automatically will not probably need any further adjustments modifications.
Tracker panel
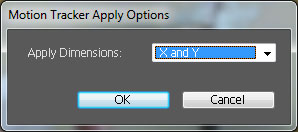
Click Apply (n.3) in the Tracker and the changes are written in the settings of the layer in Transformations. But before this a window appears that asks us if we want to apply the changes of the position in both axes or in each one separately.
Tracker panel
The Video before the Stabilization (position)
The Video after the Stabilization (position)
Stabilization (position, rotation)
The previous procedure is used but in the Tracker Rotation is ticked. And at this time there are two marks in the opened window with the layer (video).
Tracker panel
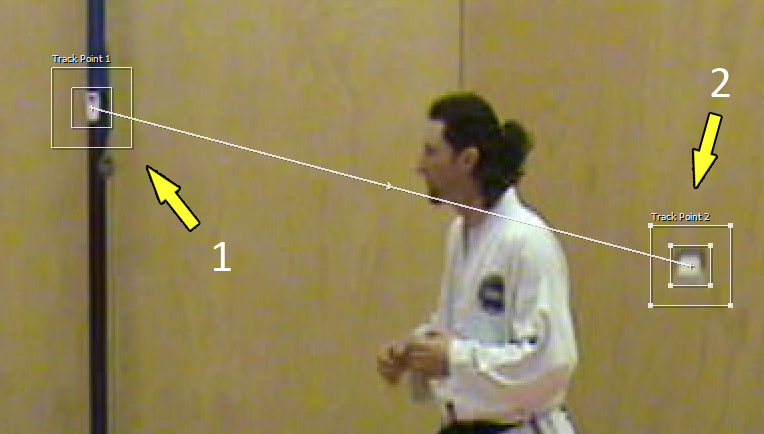
One (n.1) is used to stabilize the position and the other is used to stabilize tilting (rotation) of the camera. And again the marks have to be placed in contrast places so the white point on the holder of the horizontal bar is chosen for the first mark and the socket for the other one. Analysis is run once again and after the route for stabilization is created, we confirm it by Apply.
Panel Tracker
The Video after Stabilization (position, rotation)
The Video after the Stabilization (position) and after the Adjustment of Black Edges
This is very simple. We set the Scale parameter in the layer of the video to higher value and the moving margins cannot be seen because the stabilization moves the position of individual shots so that it creates an impression of a stable video picture. But this time the shaking is was too big and the Scale parameter had to be raised a lot and that is why the original video is mostly missing on the edges.
Tracking of Motion
Motion tracking can be used when we want to insert another object in to the video so that there is an impression that the object is just part of the video. Let`s have a look at the following demonstration.
The Video before Tracking of the Motion
We can see in the following demonstration that a text has been inserted into the video. The text is only marked and there is some blending. Nothing else, the text is there just like some watermark.
The Video after the Tracking of the Motion (position, rotation)
We have used motion tracking in this demonstration together with ticked parameters of position and rotation and the final text looks like it is written on the wall of the gymnasium.
Explanation of the Tracking of Motion
To track motion we need Tracker panel as well. We are able to activate it or it has been active since our previous task. But to revise the procedure we can say it is done by Window menu Tracker item.
Tracker panel
To be able to start tracking the motion also in this case, it is necessary to choose a layer where we want to apply the stabilization. When we click this layer, Track Motion and Stabilize Motion buttons become available in the Tracker panel. We use the first one, Track Motion, this time.
Tracker panel
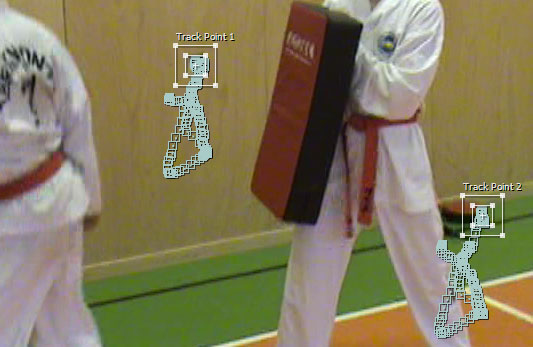
After clicking the button a new window with the appropriate layer in the place of the Composition window opens. And it is with the video where we are going to apply the tracking. The Track Point 1 and Track Point 2 (small objects with crosses in the centre and two squares around) are added to this video as well.
Tracker panel
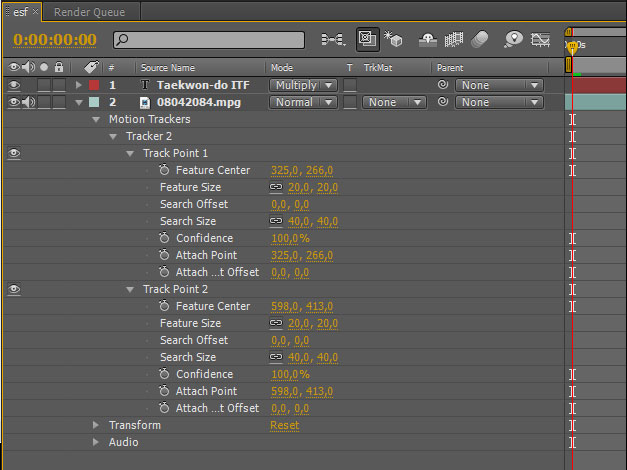
The next step is adding Tracker 2/Track Point 1 and Track Point 2 into the Motion Trackers in the layer. There we can see a lot of settings, but it is not necessary to make changes manually there because everything is done automatically if we keep the right working procedure.
Tracker panel
Tracking (position, rotation)
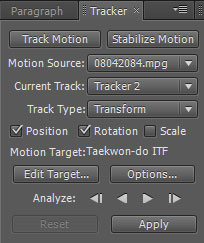
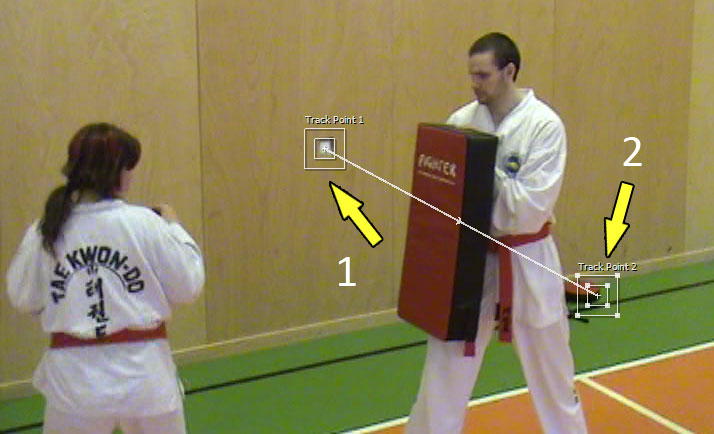
Now we are going to try the tracking of both position and rotation. First of all we move the mark to the point with a contrast around it in the video. It is a socket in our video and we move the mark so that the cross among the squares points directly to it. Then we tick Position and Rotation (n.1), place the cursor to the beginning of the video and push Analyze Forward (n.2).

Tracker panel
The analysis that conducts the survey of the inserted marks motion is run. As we can see in the picture a route is created that conducts the survey of the motion of the marked point in the course of the video. The points in time can be adjusted manually if it is needed to get a perfect impression but the work is usually done automatically and does not need any other adjustments.
Tracker panel
Now click Apply (n. 3) in the Tracker panel and the changes are written into the layer setting in the Transformation item. Just before that a dialogue box appears asking if we want to apply the position changes in both axis or in each one separately.
Tracker panel
Questions
- What can motion tracking be used for?
- Show motion tracking in some examples.
- How can stabilization of a picture be used for?
- Show an example of stabilization of a picture.