
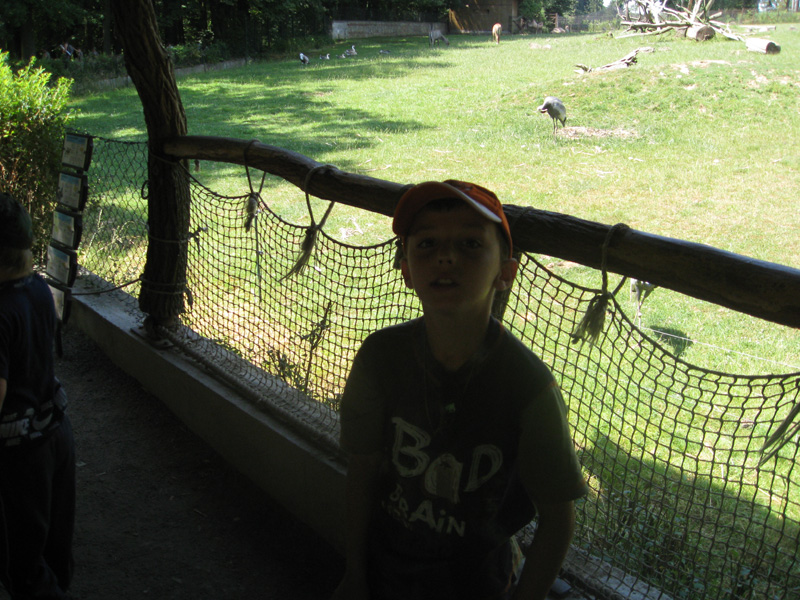
Digital Photography and Its Characteristic II
 Content
of the lesson:
Content
of the lesson:
- ISO Setting
- Aperture Setting
- Shutter Time Setting
- Choosing the Right Lens
- Using Flash
- Specialties
Prologue
We are going to describe several photos and talk about the used settings, why they were used and how could the photo be captured better. You surely know that the same result can usually be achieved by more combinations of settings.
ISO Setting
Setting the ISO value can help you in case that there is not enough light in the scene, but you have to be aware of the noise. It is surely better to have a sharp photo with noise than to have a blurred photo without noise. The maximum value of ISO when the noise will not be visible inside a photo is usually 200 or 400 for compact cameras and 800 or 1600 for reflex cameras.
1. Charles
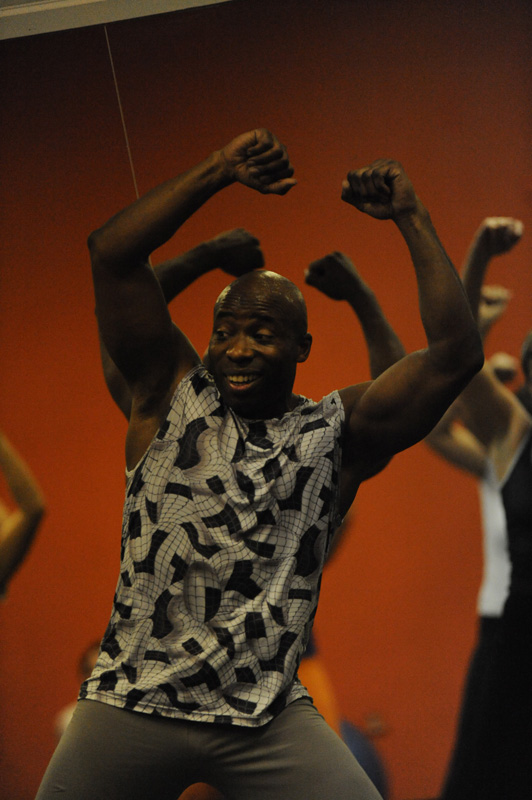
ISO: 6400
aperture: 2,8
shutter time: 1/250 s
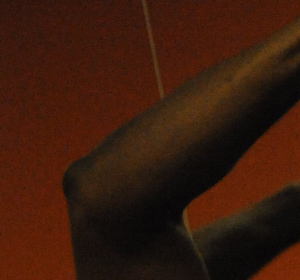
The time could not be extended because of the movement (otherwise the photo would be blurred), aperture value was set to minimum but the ISO value was increased to compensate the lighting conditions. No camera can take photos without noise using these values. The noise is visible in details in the previous image.
2. Mosque
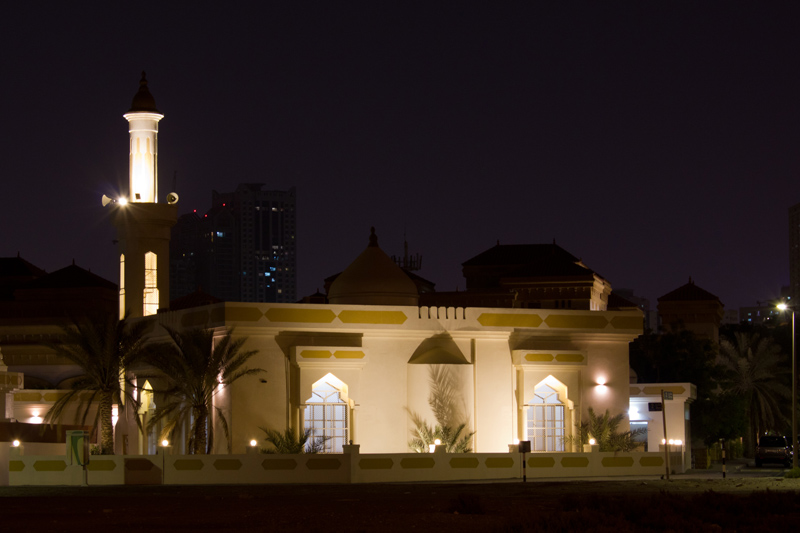
ISO: 400
aperture: 9,0
shutter time: 1,6 s
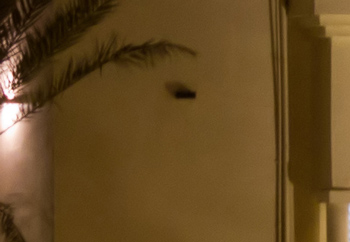
The photo was taken from a tripod because of the time. The value 400 was used for ISO and it is unnecessarily high because a tripod was available - you can see the noise in details. The following couple compares situations before and after using a denoising program (NeatImage):

Aperture Setting
Setting the aperture value influences especially the depth of sharpness and can also help you when taking photos in complex lighting conditions - for example in dark room you can set a lower value or against the Sun you can set a higher one. The luminosity of lens is closely connected to the values of aperture.
1. Concert
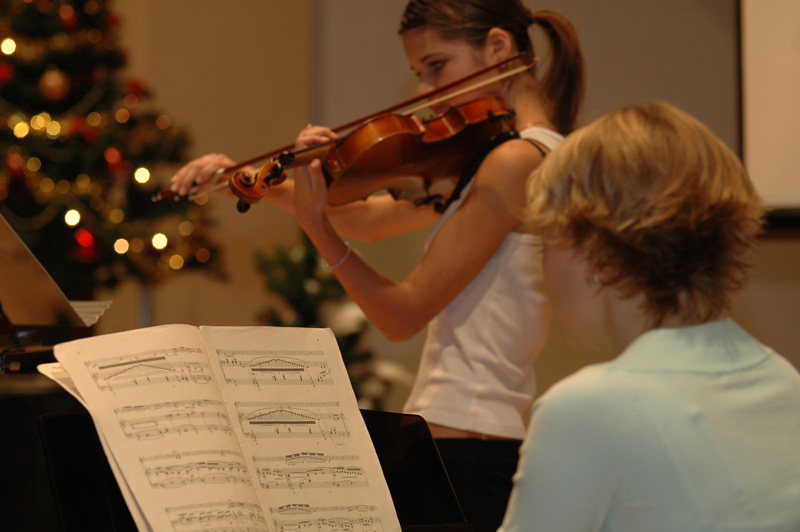
ISO: 400
aperture: 4,0
shutter time: 1/60 s
You can see that a lower aperture value was used which caused a reduced depth of sharpness - the photographer focused on the sheet with notes, the violin player is mildly blurred but the trees in the background are blurred much. This technique can be used to optically separate the foreground from the background.
2. Puppet
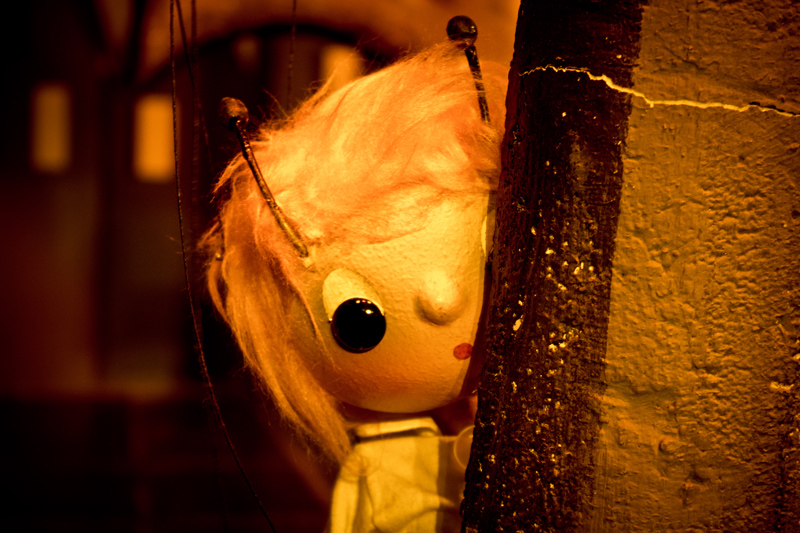
ISO: 800
aperture: 4,5
shutter time: 1/30 s
Another low value of aperture was used and in combination with full zoom created nicely blurred background (focused on the eyes of the puppet).
3. Landscape
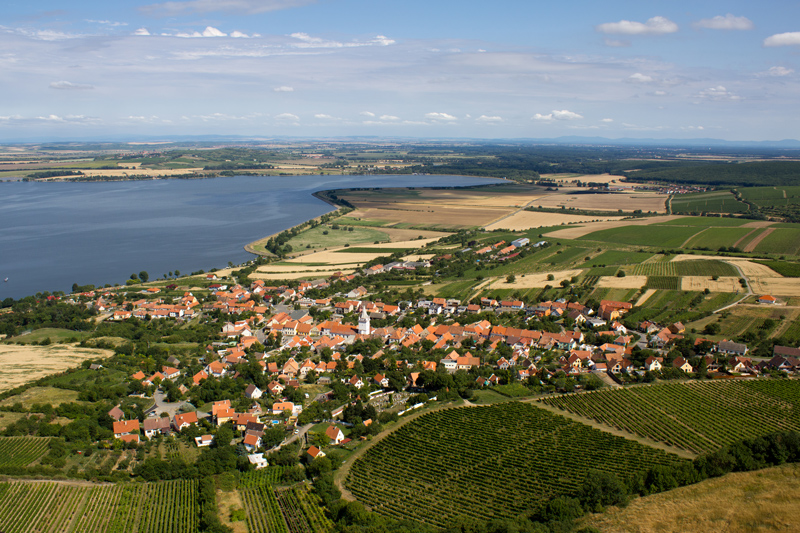
ISO: 100
aperture: 9,0
shutter time: 1/250 s
Most objectives reach the highest sharpness using values around 8.0 – 9.0 therefore it is suitable to use these values when taking photos of landscape without zoom. The lighting conditions were ideal so a short time and low ISO value were used.
4. Taps - Comparison
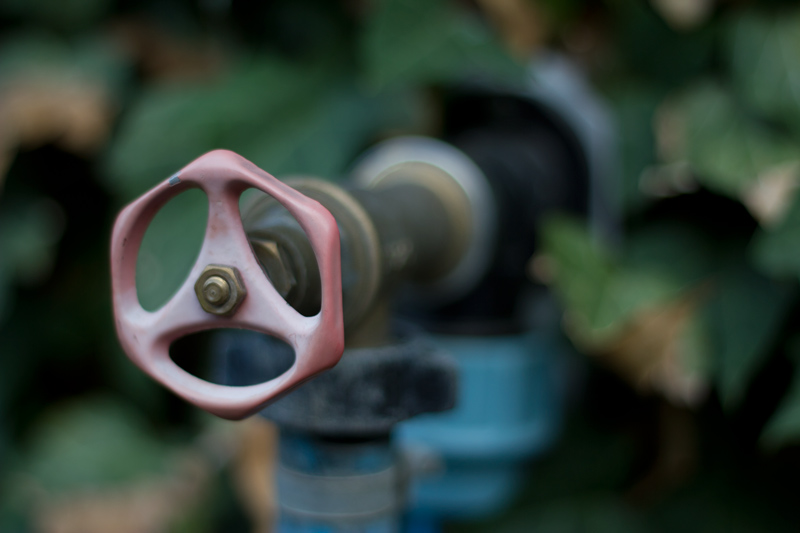

ISO: 100
aperture: 1,8 | 9,0
shutter time: 1/160 s | 1/30 s
Photos illustrate how a change of the aperture value can affect the result - both photos were taken approximately from the same place, in case of the first one an extremely low aperture value was used, in case of the second one the value was higher. Photographer focused on the middle of the tap.
5. Face
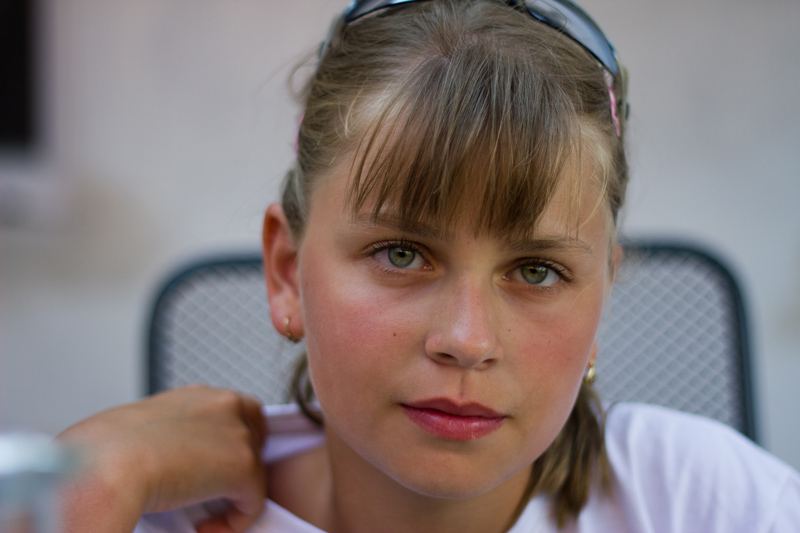
ISO: 400
aperture: 1,8 (solid focal distance 50 mm)
shutter time: 1/1000 s
Another very low aperture value, you can see that the camera focused on the eyes, then the nose and mouth are also sharp but the rest of the head is blurred.
Shutter Time Setting
The shutter time is the last part to the trio ISO-aperture-shutter time. Using it you can fundamentally affect the final photo - it can be over- or under-exposed, the movement can be frozen or blurred to be highlighted. The luminosity of lens is very closely connected to the shutter time.
1. Aerobic
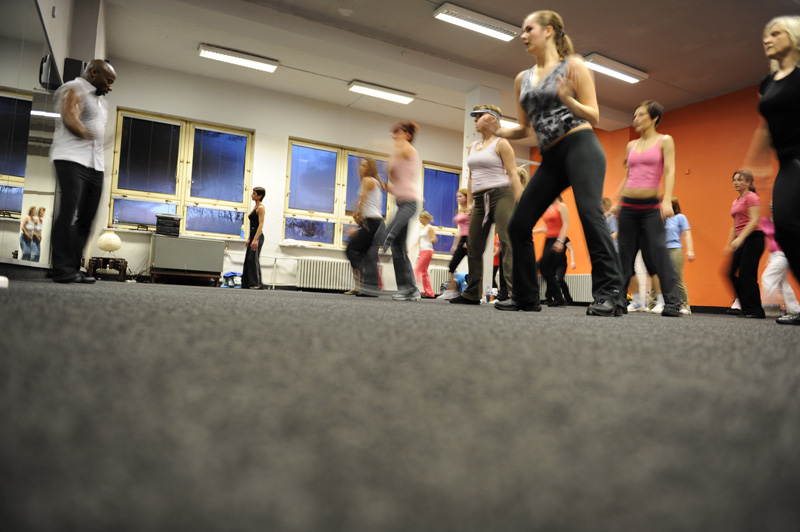
ISO: 320
aperture: 2,8
shutter time: 1/8 s
You can see that too long value for the shutter time was used. The camera was laid on the floor because you cannot hold it in hands while using so long value. Because of the moving objects inside the scene the final photo is blurred (note: the image stabilizer would not improve this photo - why?).
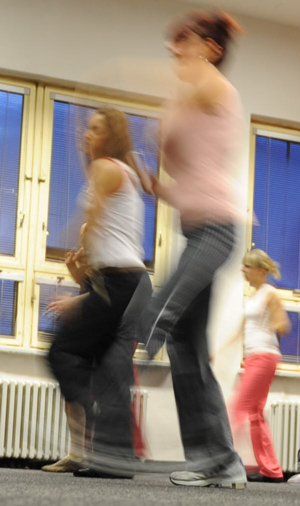
A part where the photo is very blurred:
2. Party

ISO: 200
aperture: 4,0
shutter time: 1/8 s
The same problem as in the previous photo, the woman with green clothes is blurred because she was moving while the photo was taken. According to the shutter time value a tripod was used - because the rest of the photo is sharp.
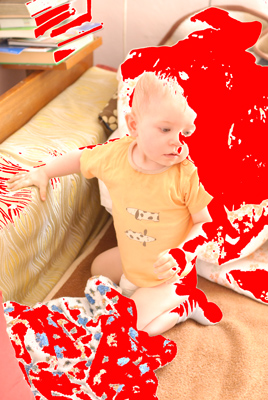
3. Child

ISO: 800
aperture: 3,2
shutter time: 1/40 s
The shutter time was too long in combination with the other values (especially high ISO value). You can see overexposed areas in the photo - areas without any details which cannot be repaired. These areas are highlighted using red color in the following image.
4. Lighning
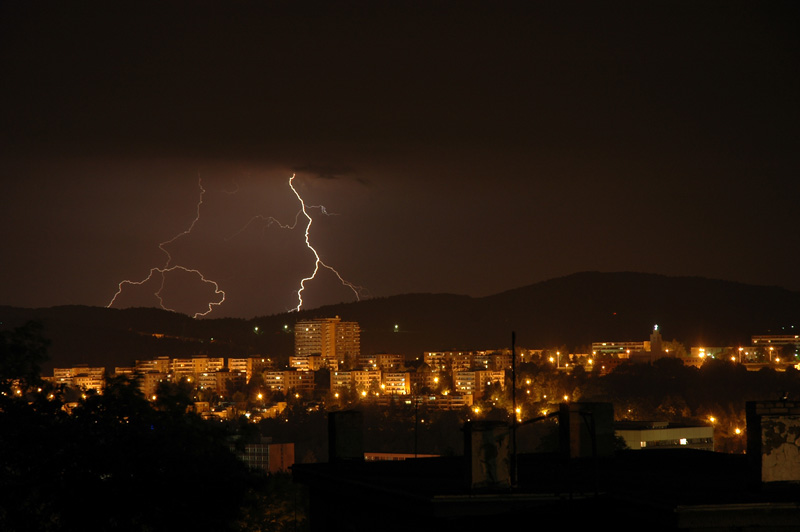
ISO: 200
aperture: 5,6
shutter time: 13 s
You can see that a long shutter time (13 seconds) was used which allowed the camera to catch the lighting in the background. This value surely requires a tripod and solid attachment. Then you have to be quite lucky to catch lighting in the moment of exposition.
5. Ghosts
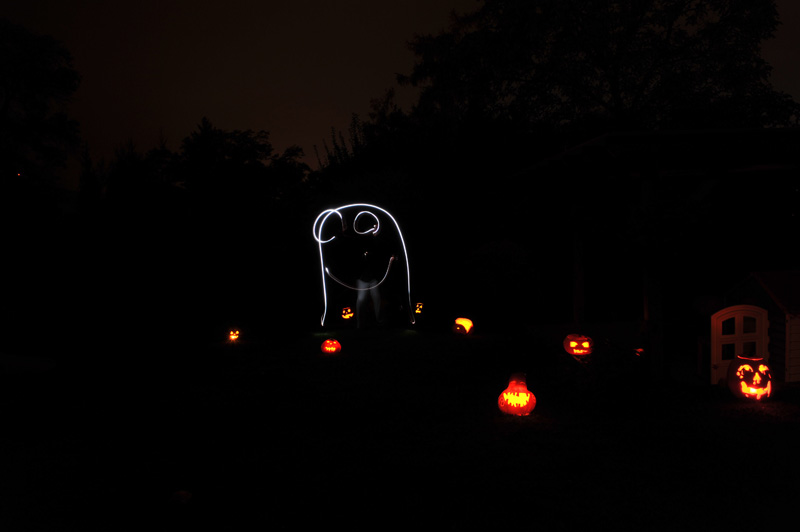
ISO: 200
aperture: 10
shutter time: 13 s
The same principle as in the previous example - a long shutter time was used and then a light was used to create the shape during the exposition.
Choosing the Right Lens
The selection of lens plays an important role. Not all lenses can be used for each photo.
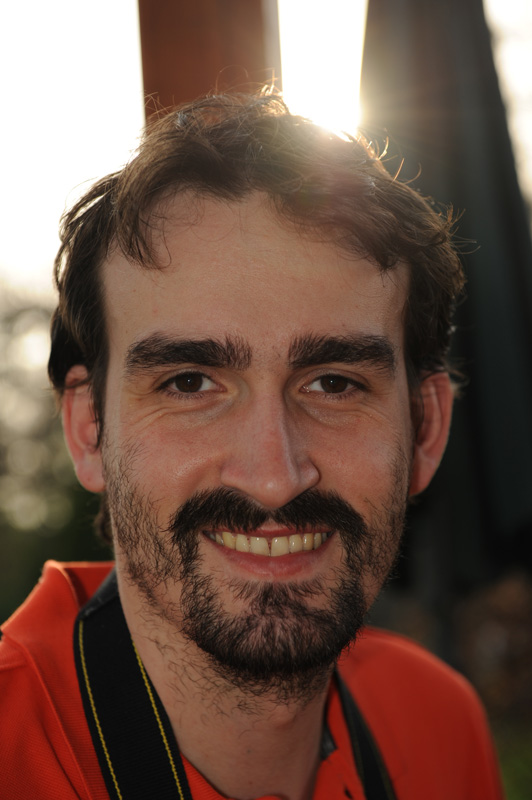
1. Portrait
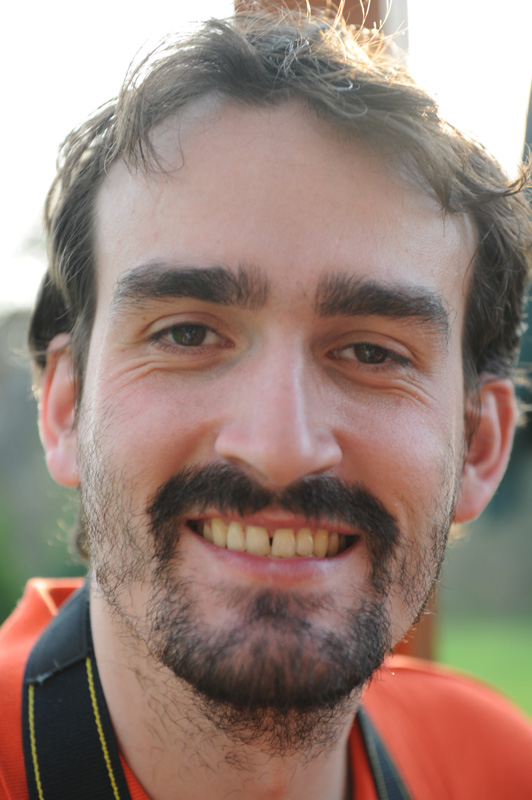

ISO: 200
aperture: 4,5 | 4,0
shutter time: 1/80 s | 1/60 s
You can see the difference well. In the right photo a wideangle lens was used and close objects were distorted - the face looks like a barrel. A normal lens was used for the left photo with maximal zoom - you can avoid the barrel appearance when using this setting.
Using Flash
We will consider two types of flashes to simplify the situation - an internal flash (built-in, usually placed above the lens) and an external one (several flipping flashes and other flash equipment). A flash adjusts the color of the scene slightly but when used properly it can help you much. You have to wait a particular time while it is being recharged.
1. Portrait
ISO: 200
aperture: 5,0 | 4,5
shutter time: 1/100 s | 1/250 s
You can see that the problem of backlight can be solved using a flash. The face is too dark in the left photo but thanks to the flash the scene was lit correctly in the right one.
2. Backlight (2 photos)
ISO: 160
aperture: 2,8
shutter time: 1/500 s
ISO: 400
aperture: 2,8
shutter time: 1/60 s
These photos illustrate the same problem. There is a backlight in both of them and this confused the automatics of the camera. The automatics then computed the final exposition wrongly so the people are too dark. We can avoid this mistake using a flash which will light the foreground part and adapt it as we want.
There would probably be another problem because no flash lights so large radius and probably the end of the table would be covered in dark.
3. Shades behind Flash
ISO: 200
aperture: 2,8
shutter time: 1/60 s
The shade behind the captured person is a problem inside this photo (you can see it behind the head on the left side). This occurs when you use an internal flash. In case you used an external one you could place it to light the whole background. In absolutely ideal case you would use two flashes to light the background from two different directions..
4. Ball
ISO: 200
aperture: 2,8
shutter time: 1/100 s
You can see another problem of internal flashes in the photo. In case you use lens with lens hood or your lens is too large, it can produce a shade. The shade is not nice at all and you are usually unable to remove it. The solution might be to use an external flash which can be placed to correct position.
Specialties
Several special techniques how to take interesting photos will be explained in this section.
1. Macro
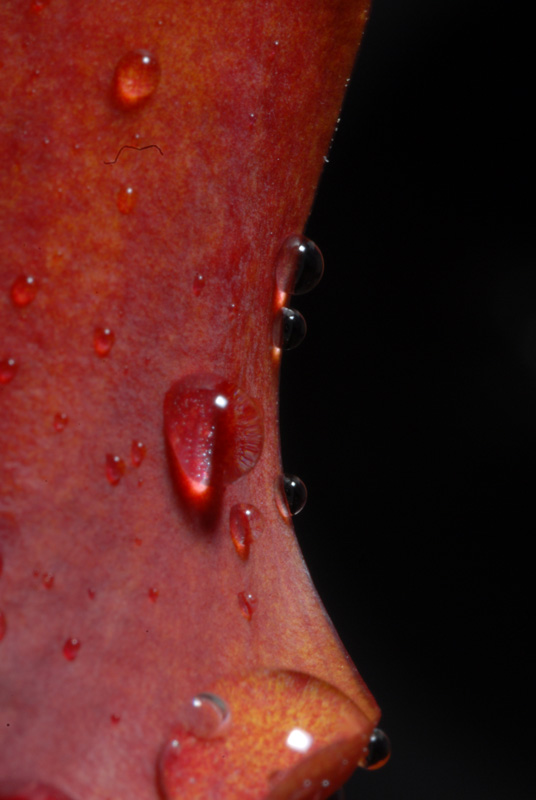
ISO: 200
aperture: 32
shutter time: 1/250 s
This effect is often used for macro photos. The photographed object is nicely lit, drops reflect light and the background is fully black. We do not need any objects to create the background. In case you set the highest possible value of aperture and the shortest possible shutter time (when using the flash cameras will allow you to use the shortest shutter time around 1/200 s - 1/250 s – depends on each camera) you will get exactly the same result. If you use an external flash you can also affect the position of reflections inside the drops.
Of course this setting will work inside a room but not on a direct sunlight where you will hardly get a black background.
2. Hyperspeed
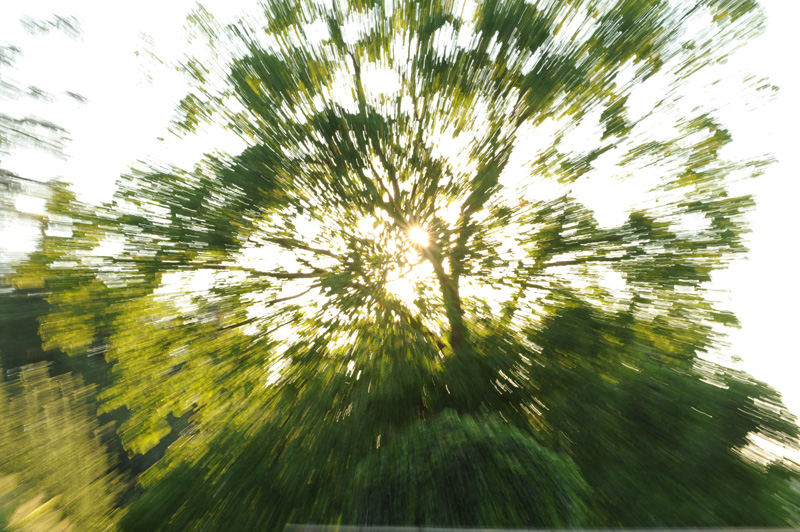
ISO: 200
aperture: 22
shutter time: 1/6 s
This effect of a high speed requires a tripod. It is nothing miraculous, you set a longer time and in the moment when the camera is capturing the scene, you rotate the zoom circle on the lens. The final effect will be the same as in the photo. It is a good idea to zoom smoothly. A similar effect can be done in Adobe Photoshop.
3. Night Photos (2 photos)
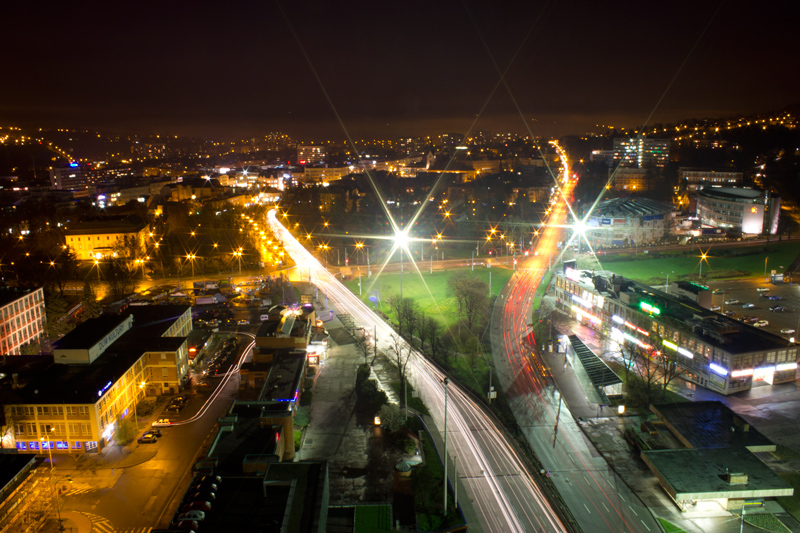
ISO: 100
aperture: 9
shutter time: 25 s
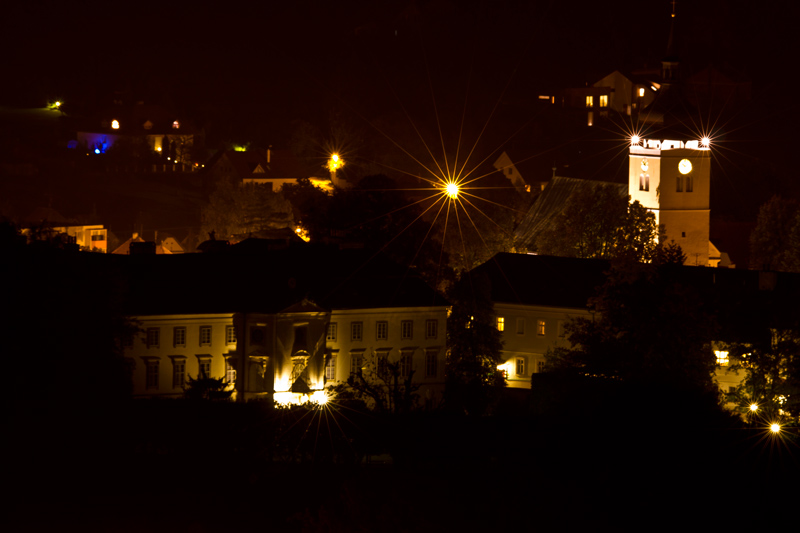
ISO: 200
aperture: 11,0 (focal distance 232 mm)
shutter time: 213 s (3,5 min)
Night photos are impressive but you have to pay attention to several things:
- Cover the viewfinder to prevent light from getting inside the camera
- Avoid any severe backlight
- Avoid any movement of the camera (wind, vibrations)
- Be patient, take enough warm clothes with you during the winter
- Enable the automatic reduction of noise (attention, the time of exposure will be doubled)
You can see a difference in the way of light dispersion from the sources of light - it depends on the number of lamellas inside the lens. The more lamellas inside, the more light rays will be dispersed from the light sources.