
Creation of a Sale Poster
 Content
of the lesson:
Content
of the lesson:
- Assignment and Approach
- Import of an Image and Live Trace
- Creation of the SALE Headline
- Finishing All Texts
- Adding and Positioning Stars
- Finishing border elements
- Export to PDF
Assignment and Approach
We are going to create a sale poster in this lesson which can be placed in a store selling equipment for cowboys.
The whole poster is realized using the vector graphics which means that there is no problem to enlarge it without losing quality (the whole content is stored using curves which can be computed into any resolution).
We are going to trace the image, add effects for the texts and for the other graphic elements.
Import of an Image and Live Trace
Open Adobe Illustrator and choose A4 type of paper and make sure it is rotated vertically. You can set a Bleed if you plan to print the poster using a printer which supports it, otherwise set 0. Do not change anything else and click on OK.
For the next steps you need to download this photo of cowboys.
Now you can drag the image to Adobe Illustrator, or select File > Place option from the menu and place the image on the canvas.
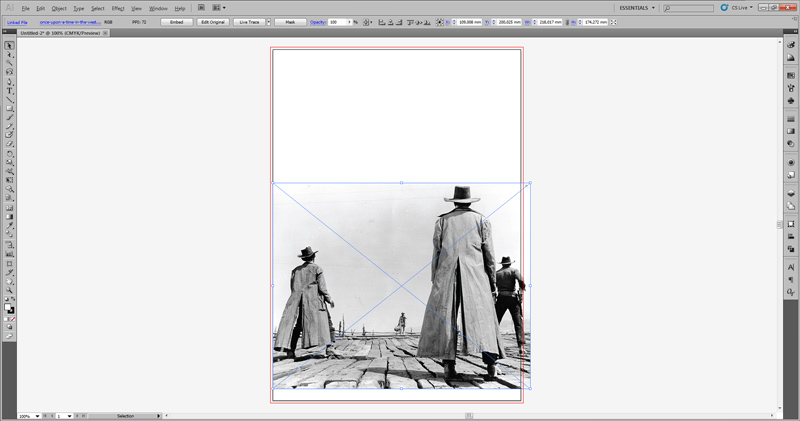
Do not resize the image and select Object > Live Trace > Tracing Options from the menu.
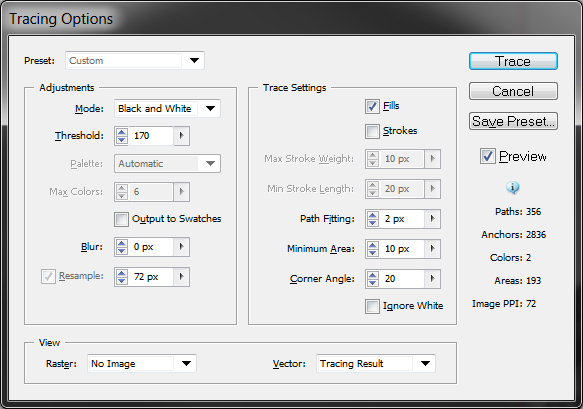
A dialog window opens and we can set several parameters. Check the option Preview to see the results immediately. This slows down the response of the program but without this option you are not able to trace the image properly.
If the mode is not set to Black and White you should set it. The biggest changes can be done with the Threshold parameter which sets how many parts and details will be drawn after tracing.
We should try to get the best combination of setting and keep the Threshold values between 130 and 180.
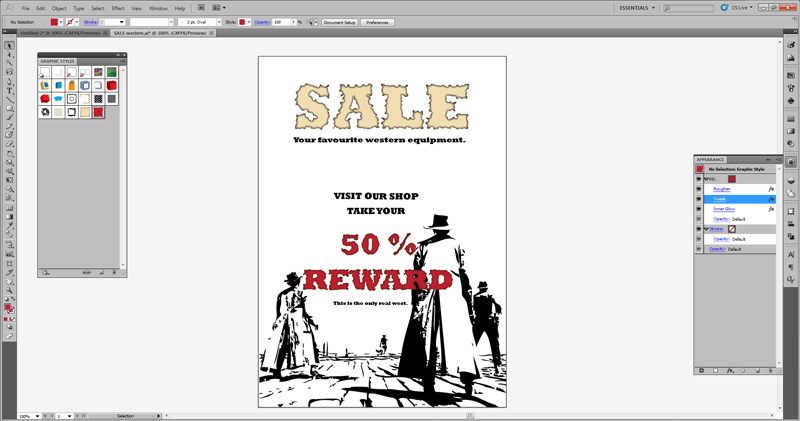
If you are satisfied with the Preview, click Trace and align the image in the bottom part of the canvas (resize it if needed to fit).
We have finished editing the image after this step because the image looks like the one in the sample image.
Creation of the SALE Headline
For creating the SALE headline use the font Rockwell Extra Bold (you can install the font if not available in your system after right clicking on the downloaded file and selecting Install option - requires administrator rights in Windows Vista and 7). Set the size to 150 and follow the steps below the video.
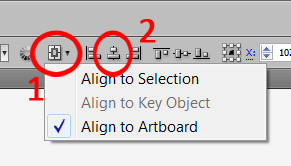
We assure that the option Align to Artboard is selected (step 1 in the image) and we let the text be centered horizontally (step 2).
The next step is to display the Graphic styles panel (from the Window menu) and open the collection Artistic styles because there is not the style we need in the actual collection. Drag the style from the Artistic styles collection to the actual collection. You can edit the style of course using the panel Appearance where all settings can be changed.
In case we want to modify this style differently for different objects, we have to add it in the actual collection more times (you can also rename it) because editing a style changes all objects with this style applied at once.
Finishing All Texts
Now we are going to add the next texts gradually and let them be horizontally centered. We use the same style on text "50 % REWARD" but we change the color to red (do not forget to add a new instance of the style to the actual collection before changing the color; otherwise you will also change the color of the text "SALE").
Adding and Positioning Stars
At first create a star. While dragging the object with the mouse you can change the final shape of the star. Using the Up and Down arrows you can change the number of vertexes, when holding the Ctrl and/or Alt key and moving mouse you can change the angle inside the vertexes and using the Space key you can move the star.
Duplicate the star twice without paying attention to the positions. Select all three stars and select Vertical Align Center (do not forget to switch Align to Selection option) and then select Horizontal Distribute Center (this function creates the same spaces between 3 or more objects, see the video).
Finally, Group the stars together and center them horizontally (do not forget to switch the Align to Artboard option).
Finishing border elements
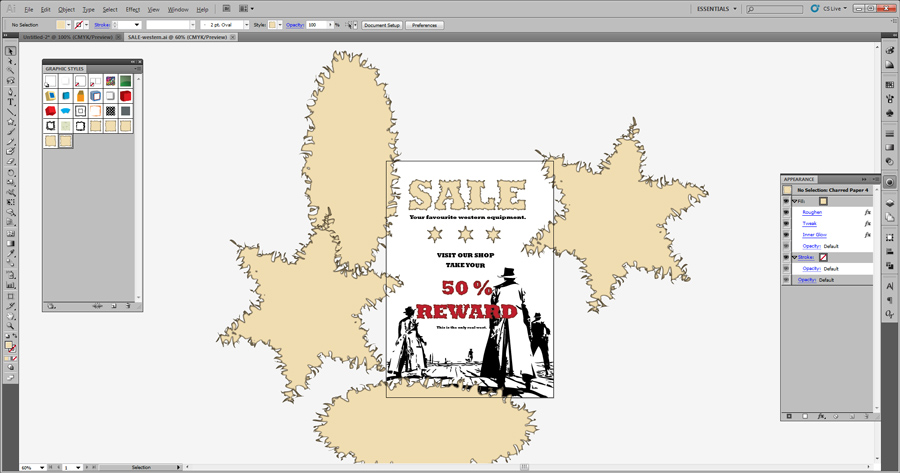
The last thing which is missing is completing the border effects. Use different shapes which are available, apply styles and try to experiment with values inside the Appearance panel to get a result you like.
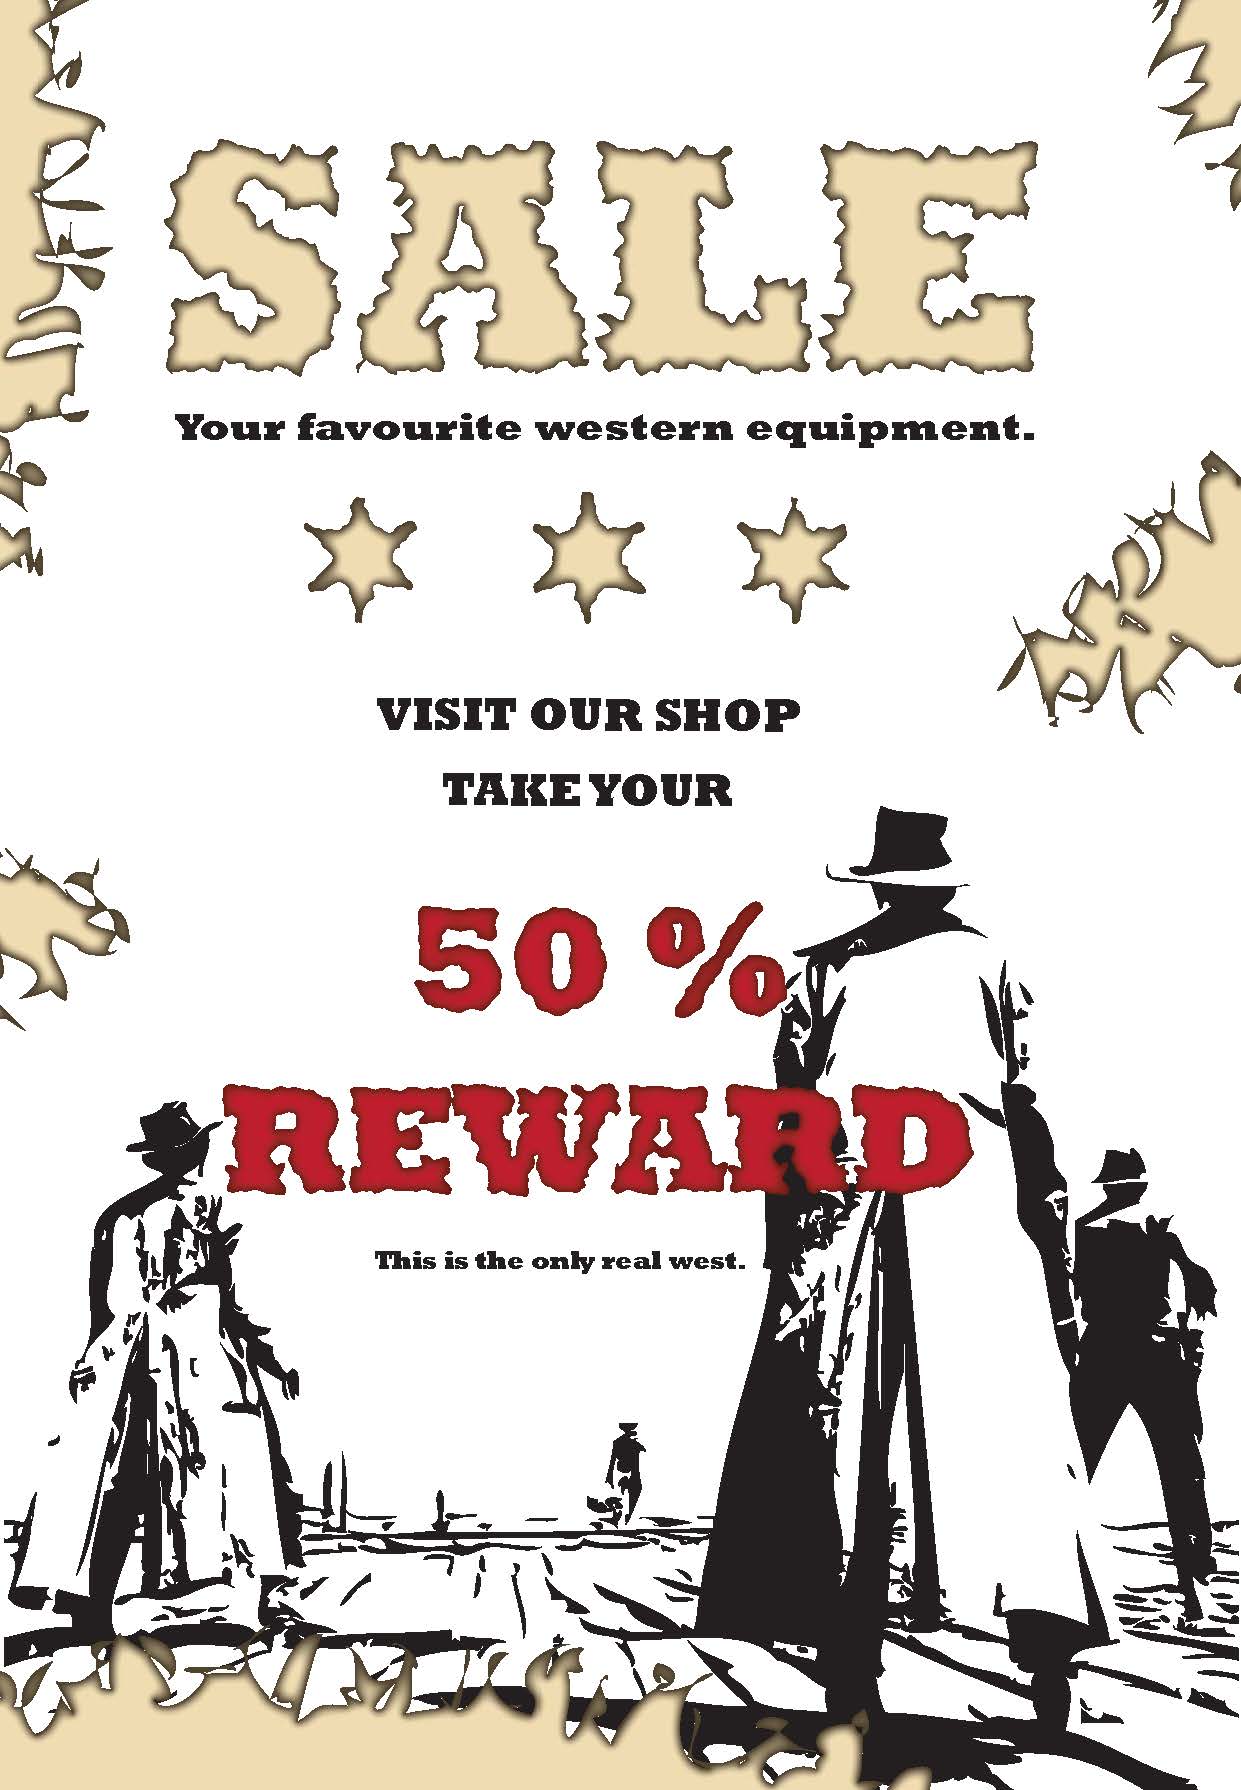
The final layout can look like this one:
Export to PDF
If you want to print the poster, probably you would like to save it to PDF format which could be opened in almost every system or even loaded by some printers from a flash disk.
Choose File > Save as from the menu and choose Adobe PDF. You can be interested into bookmarks Compression and Marks and Bleeds in the dialogue window which will appear.
In the Compression bookmark you can set the compression of the images. If you want to have a quality print then set the compression to none to be sure that every image will be saved in the best quality and that the PDF file will be readable in all versions of Adobe Reader. You should also set not to reduce resolution for a quality print.
In the Marks and Bleeds bookmark you can turn on printing marks, bleeds, color pallets and more objects on the border of the paper.
After clicking on Save to PDF your file will be saved and ready to be printed. The final PDF file can be downloaded here.
Additional Texts
Questions and Exercises
- Try using the Live Trace option on another images and use other combinations of settings - for example a colored result.