
Creation of Shapes
 Content of the lesson:
- Shapes
- Pathfinder
Shapes
You know several shapes from Adobe Photoshop (Rectangle, Ellipse, Rounded rectangle). You can also find the Polygon tool in Adobe Illustrator and you can add or remove vertexes by arrows. There are two more tools which were not involved in Adobe Photoshop - Star tool and Flare tool. You can change the number of tips by arrows as for the Polygon tool.
When speaking about shapes, we cannot forget to introduce the Pathfinder window which can be found in the menu Window > Pathfinder. The Pathfinder can be used for combining shapes into a new, more complex one. You can see groups Shape modes and Pathfinder inside the window. A shape mode will create one object from more source objects. The final object will be combined according to selected option.
- Add To Shape Area - connects selected shapes. The final shape will be filled with the color of foreground object.
- Subtract from Shape Area - cuts overlay areas from the bottommost object.
- Intersect Shape Areas - leaves only the area of the lowest object which is trimmed by common (overlapping) areas from all objects above.
- Exclude Overlapping Shape Areas - trims those areas from the bottommost object which are overlapped by the objects above.


The second group of buttons inside the Pathfinder window is explained here:
- Separate - separates selected objects to more sequences.
- Crop - crops shapes below which are overlaid by any shape above them.
- Merge - merges objects into one.
- Outline - divides objects to outline paths. In case that there are intersections points on these paths, the paths are divided using the same way as by the Scissors tool.
- Subtract background - overlay areas of background objects
are removed from the object in foreground.


Individual Task:
Try to draw the following image using shapes and the Pathfinder window. In case you do not how to get the following result, you can follow the video below the image.

Video Umbrella
Fills of Objects
So far we have used only solid colors for filling an object. We can also use
another fills in Adobe Illustrator (gradients, patterns, textures). Predefined
fills can be found in the Swatches window. You can load additional fills from
libraries inside Adobe Illustrator - click on the button Swatch Libraries Menu ( ).
Then you can choose from a large list.
).
Then you can choose from a large list.
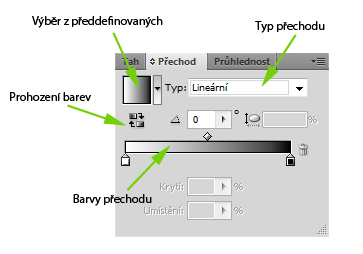
You can also use a gradient to fill an object. There are two types of gradients - radial and linear. In case that you apply a gradient you can adjust it inside the Gradient window or using the Gradient tool (G).
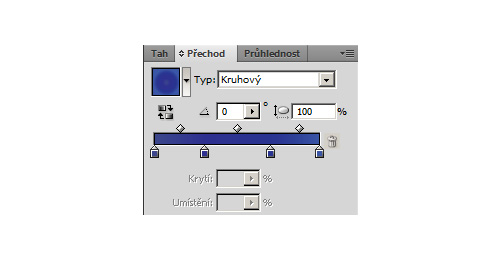
You can change the color of gradient, its type, blend mode and more inside the Gradient window. You can also add colors after clicking on the strip or delete them after dragging any square away.
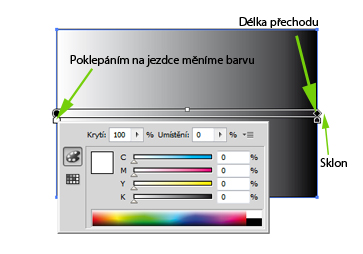
You can fill a shape using the Gradient tool. You place the beginning of gradient with the first click and the end of gradient when you release the mouse button. Then you can change properties using the Gradient tool or the Gradient window.
In case you filled your object using a linear gradient, you can change single colors of the gradient, its length and angle. You can see where you should click to make mentioned changes in the following image:
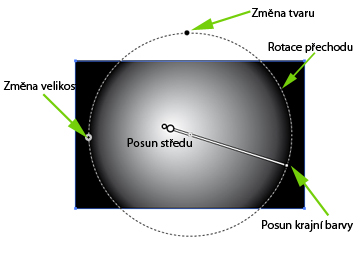
The radial gradient offers more settings, but the color and rotation remain the same. Then you can change the size, offset of the default color and offset of the border color. You can also change the shape of gradient to ellipse.
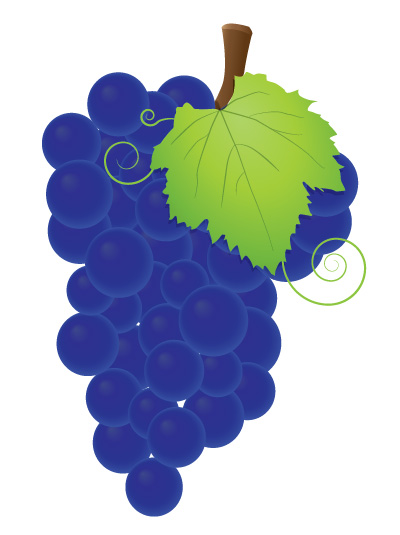
Preview of the final image.
Select the Ellipse tool and draw a circle using the Shift key. Set stroke color to none and choose any gradient from the Swatches window.
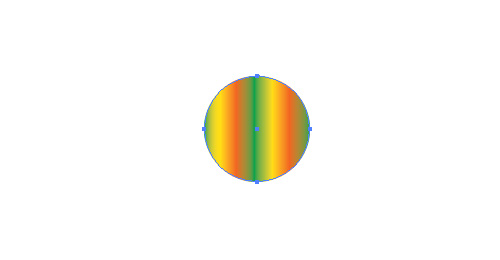
Change the gradient settings in the Gradient window as shown in the following image. You can adjust colors as you want.
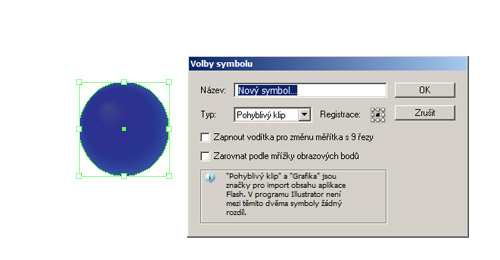
The final object should look like the one in the image. Choose the object and drag it inside the Symbols panel. A window with settings will appear - set the name and select the type as Graphics in the list (this is used for Flash which also uses symbols). After confirming the dialogue your symbol will be added to the library. You can drag it to the workspace and create another instance.
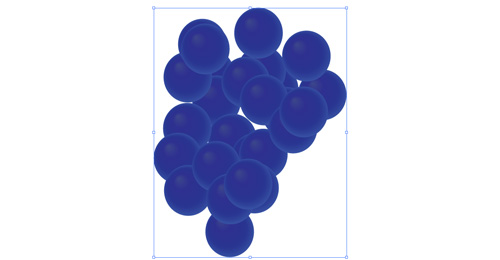
Select the Symbol Sprayer tool  and click on the symbol you have just created. Now you can spray it on the
canvas using this tool. Create a shape similar to grapes. You can see that all
berries are of the same size.
and click on the symbol you have just created. Now you can spray it on the
canvas using this tool. Create a shape similar to grapes. You can see that all
berries are of the same size.
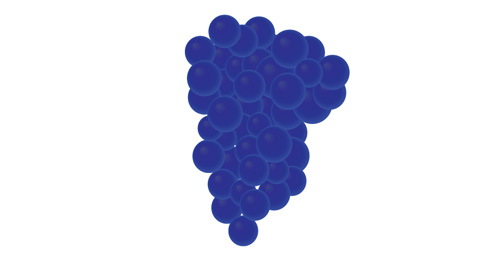
You can change this using the Symbol Sizer tool. Hold the Alt key to reduce size.

To decrease spaces between single berries you can use the Symbol Scruncher tool. This tool will help you to move berries in the required shape of grapes.
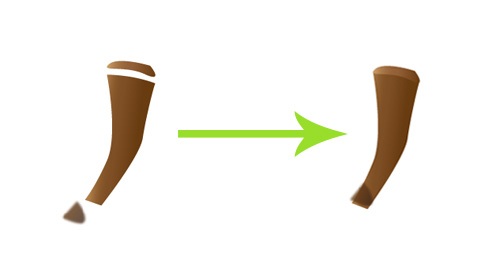
Grapes are completed; we will use the Pen tool to create the stem of grapes. Fill it using a gradient. You can blur the shadow using the Gaussian blur effect inside the Effects window.
Insert a photo or an image of leaf inside a new layer and lock it. Use this pattern to draw an outline of the leaf using the Pen tool and fill it with a suitable gradient. The veins on the leaf can be drawn using the Pen tool with a different stroke type.

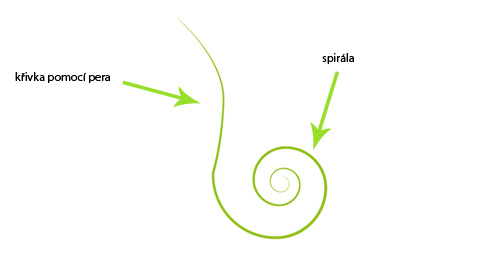
The tendrils can be created using the Spiral and the Pen tools. Select the Spiral tool and adjust it by arrows. Complete the uncurled part using the Pen tool.
Grapes are completed.