
Basic Tools I
 Content of the lesson:
- Creation of New File
- Tools for Selection
- Pen and Pencil Tools
- Text Tool
- Additional Tools
Creation of New File
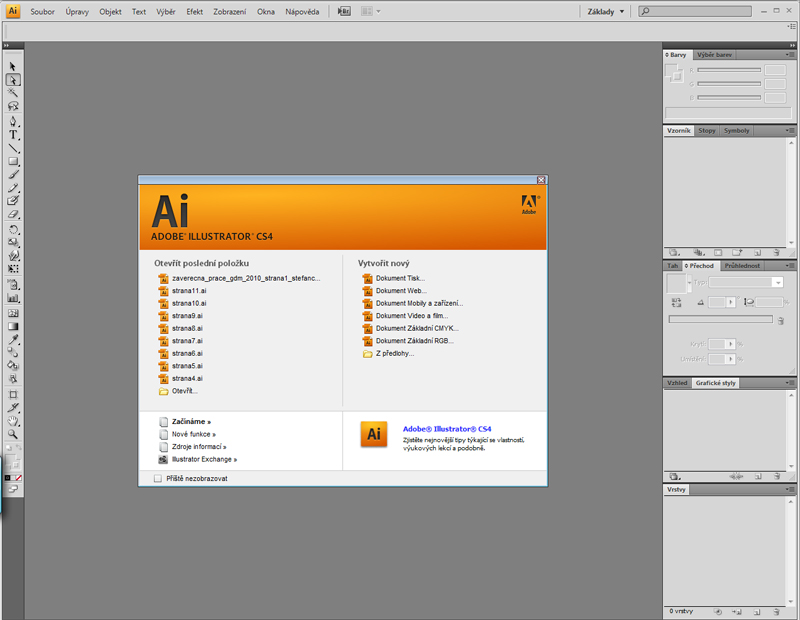
The following window is displayed at first when you launch Adobe Illustrator. You can choose from several options (Document for Printing, Document for Web, ...). We will use the Document for Print command.
After pressing the button, you can set properties of your new document in the following dialogue window. You can set parameters like name, size, bleed, or you can get more possibilities after clicking on the Advanced button. You can see defined color mode, raster effects (usually 300 ppi) and preview mode option in the Advanced part.
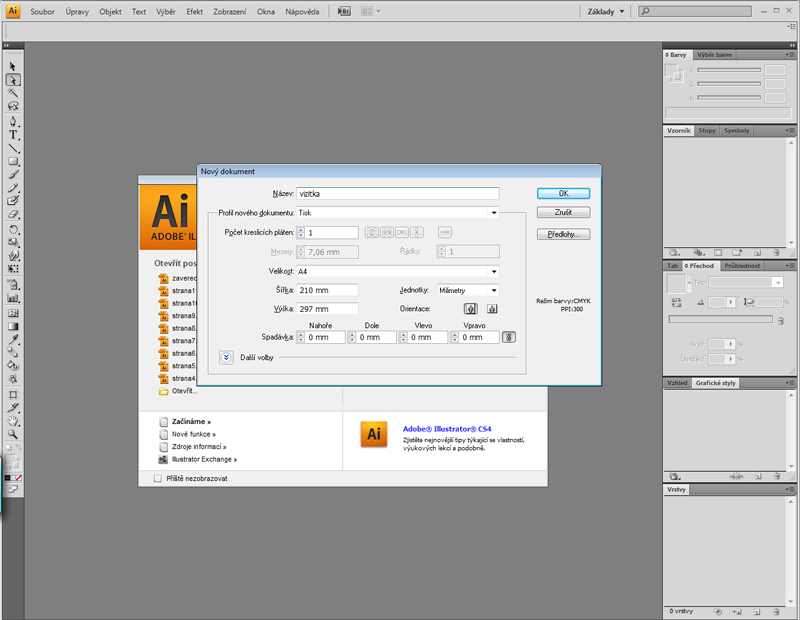
Do not change anything and click on the OK button.
After confirming this dialogue window you will see the workspace which is quite similar to the one in Adobe Photoshop. We will be interested in the toolbox panel which is usually located in the left part of your screen. (In case you do not see it, you have to choose the command Window > Tools inside the menu.)
Most of the tools contain hidden options - you can change them after double clicking on the icon of a tool.
Tools for Selection
 Selection
Tool (V) - this tool can be used to select an object. In case that this
object is a part of a group, the whole group is selected - if you want to select
that object only, use the following tool
Selection
Tool (V) - this tool can be used to select an object. In case that this
object is a part of a group, the whole group is selected - if you want to select
that object only, use the following tool Direct
Selection Tool (A) - you can select points (anchor points) of path
segments using this tool
Direct
Selection Tool (A) - you can select points (anchor points) of path
segments using this tool Group
Selection Tool - this tool is grouped with the previous one. It will
select the whole group after clicking on a single object or path
Group
Selection Tool - this tool is grouped with the previous one. It will
select the whole group after clicking on a single object or path Magic
Wand Tool (Y) - this tool will select all objects of the same color as
the selected one
Magic
Wand Tool (Y) - this tool will select all objects of the same color as
the selected one Lasso
Tool - this tool is similar to the Lasso Tool inside Adobe Photoshop.
You can add to selection when holding Shift key or remove from selection when
holding Alt key.
Lasso
Tool - this tool is similar to the Lasso Tool inside Adobe Photoshop.
You can add to selection when holding Shift key or remove from selection when
holding Alt key.
VIDEO - Tools for Selection
Brush and Pencil Tools
Both tools can be used to draw curves by hand, the Brush tool for creating drafts unlike the Pen tool which is more accurate.
You can activate these tools by clicking on their icons. You will see the following panel after double clicking on the icon (see the image below):
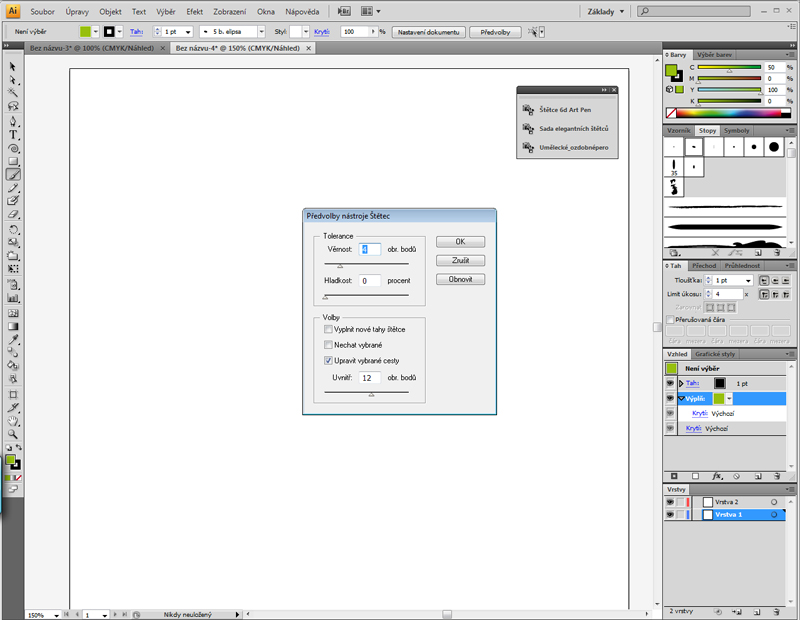
- Fidelity - this option sets the accuracy of the line which traces mouse movement. The higher number, the smoother line will be drawn - fewer anchor points will be used.
- Smoothness - the higher number, the smoother curves will be drawn
- Fill new brush strokes - after you finish a path, it will be filled with color
- Keep selected - the created path is selected after finishing it
- Edit selected paths - every following stroke which is headed near the selected path will affect the path
VIDEO - Pencil Preferences Panel
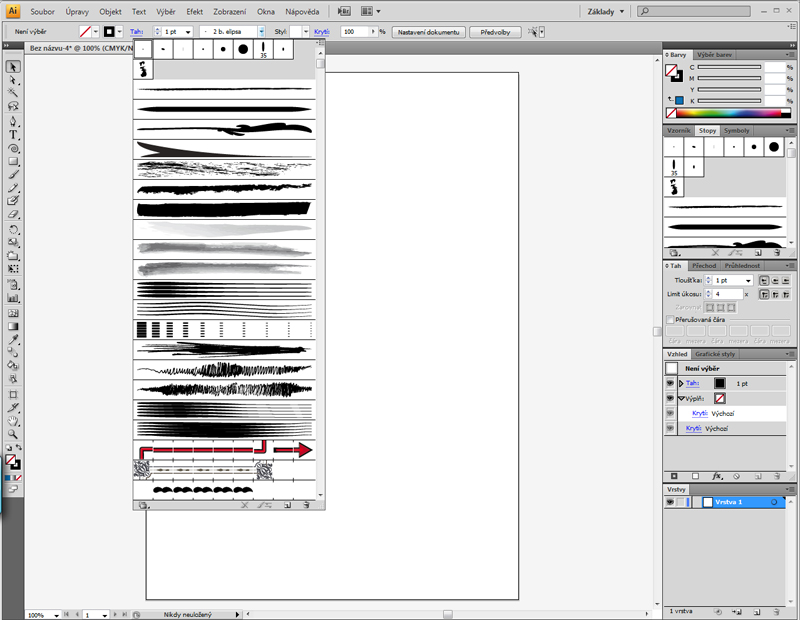
You can change the style of brush when using the Brush Tool (see the image). Adobe Illustrator offers you many predefined brushes. You can find them inside the Brushes window (F5). In case you double click on a brush you will get a window where you can adjust it.
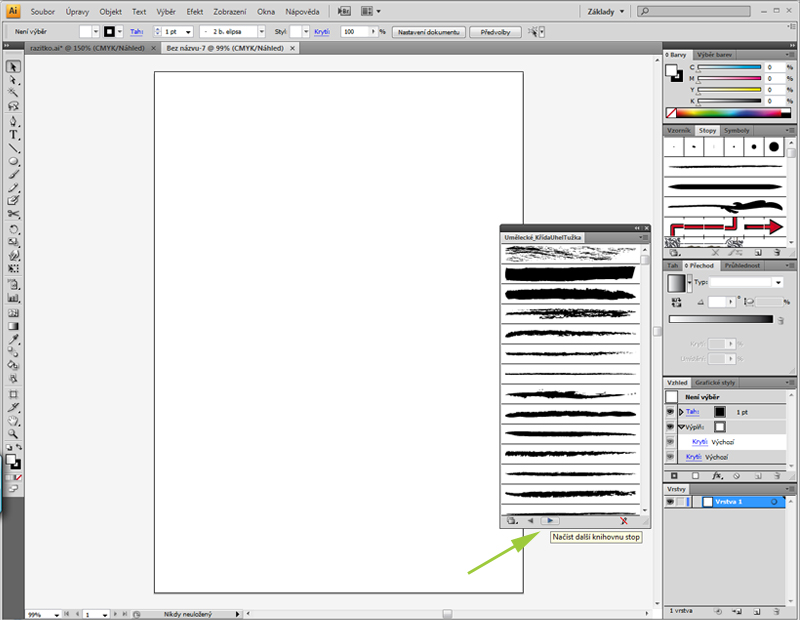
In case you want to use brushes which are not in the current selection panel, you can look into the Brushes window. There you can click on the icon Brush Libraries Menu and change the library. You can use the arrows to list through all available libraries. All brushes which you use will be added to the current list of brushes.
Brushes usage example

Text Tool
Adobe Illustrator contains three tools for creating text. (All three tools can be found in the submenu of the Text tool). The first one is the basic Text tool. You can click anywhere inside the canvas and set the beginning of your text. After you start writing, the text will be added without limits - also outside the canvas. However, you can hold the button and create a rectangle to close the text. Then the text will not overflow this area. In case that the text is longer and cannot fit inside the rectangle, a red plus sign will appear. You can click on it and select or create another area where the text will continue.
The other tools for creating text are Type on a path Tool and Area type Tool. You can achieve a situation when your text will copy a particular path or fill a non-masking path (path without filling). In case you want to write on a path, select the tool, click on a path and you can start writing. In case that you select this path using the Selection tool, you will see 3 pull bars. Two of them can be used to move the beginning and the end of the text, the third one can be used to move the whole text or to invert it to the other side. You can try this in the following sample. We will create a fictive stamp of our school.
Create a new file for printing. Choose the Ellipse tool and draw a circle
while holding the Shift key. Fill the circle with green color and set a 1px wide
stroke (use black color to be able to see the circle). Choose the Type on a path
Tool and click on the created path. Write the name of our school and the
address.
*In case that the text does not fit inside the circle, decrease its
size and try to manipulate with it using the pull bars.
Download the file [logo-kniha]. (This logo was created using the Rectangle tool - you can try it). Take the logo from this file and place it in the center of our circle. You can do this by opening the file logo-kniha and dragging the logo to your workspace. Then you should select both objects (logo and text) and click on the circle one more time so the path is highlighted. Then you can use the command Horizontal Align Center and Vertical Align Center in the top panel. Our stamp is complete.
Additional Tools
- Pen - similar to the Pen tool in Adobe Photoshop but its possibilities are greatly extended
- Line - a tool for creating straight lines, you can find Arc and Spiral tools grouped with it
- Rectangle - Ellipse, Star and more tools are grouped to this tool
- Rubber - you can use this tool to delete parts of objects or whole objects
- Eyedropper - you can get any scene color using this tool
Additional Texts
Questions
- Explain differences between selection tools.
- Try to explain the functionality and usability of 3 additional tools which were not mentioned.