
Basic Tools II
 Content of the lesson:
- Geometric Objects
- Blend Tool
- Fillings of Objects
Geometric Objects
Line Segment Tool and Other Tools
- Line Segment Tool (\) - This tool can be used for creating line segments. In case you hold the Shift key, the segment will be drawn under the angle of 45°.
- Arc Tool - This tool allows you to draw concave or convex segments. You can change the curvature of the arc with up and down arrows. If you double click on the icon or click on the canvas, a dialogue window with settings for this tool will appear. You can change directions from axis (x, y), the option text will set the type of arc - in case that it is closed, it will be bordered so you can apply the Area type Tool.
- Spiral Tool - You can create a spiral. The number of twists can be changed using up and down arrows. If you click into an empty area the dialogue window with settings will appear.
- Rectangular Grid - This tool can be used to draw a rectangular grid. You can set the number of rows by up and down arrows and the number of columns by left and right arrows. This tool will be used when creating the sample with flag.
- Polar Grid - This tool creates a grid which consists of concentric ellipses and lines. You can change the size of the grid by dragging it (in case you hold the Shift button you will get a circle result). The number of segments (ellipses or radial lines) can be changed using arrows. Up and Down - number of ellipses. Left and Right - number of lines.
Find a suitable image of Czech flag.
Create a new document for printing. Select the Place command from the menu and find the file you have just downloaded. Click on the Place button and the image will be added on the canvas. Choose the Selection tool and resize the image (*Hold Alt+Shift for uniform transformation.)
Create a new layer - click on the button New layer (![]() )
inside the Layers window. Lock the layer with flag - by clicking into the
square next to the icon of eye. (*We should lock the layer to avoid moving
the background layer or selecting it by mistake.)
)
inside the Layers window. Lock the layer with flag - by clicking into the
square next to the icon of eye. (*We should lock the layer to avoid moving
the background layer or selecting it by mistake.)
Switch to the empty layer and select the Rectangular grid tool. You can find this tool in the submenu of the Line Segment tool. Set the filling color to transparent (none) and the color of stroke to black.

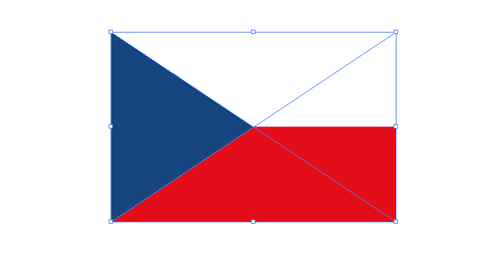
We will create the grid. To get the exact dimensions of the blue part which should reach half of the length of the flag we will divide our grid to 4 parts (that means 2 lines will be inside). Click into the left top corner of the flag, drag the line and try to hit the right bottom corner. Do not release the button and use arrows to get the two mentioned lines. Then you can release the button. Our grid is completed.
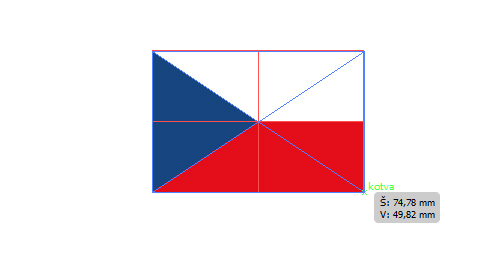
Switch to the Layers panel and unpack the layer with grid. After unpacking the layer and the Group you can see that it is created from a rectangle and two line segments.
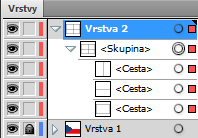
Lock the horizontal line and click on the vertical one. Select it and use the Pen tool to add an anchor point in the intersection area of both lines. (*For higher accuracy use Ctrl+"plus" keys to zoom the image.)
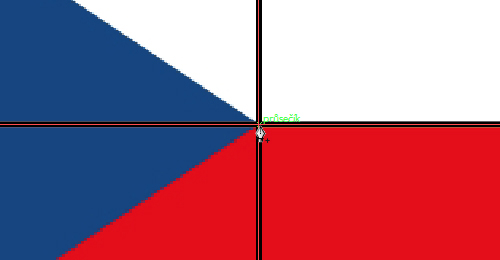
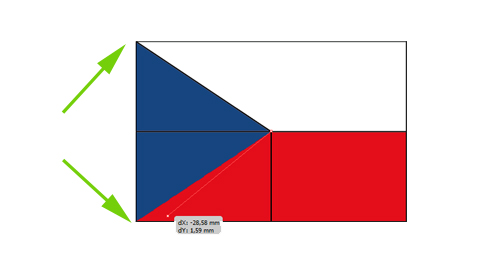
Zoom out your image again. Switch into the Layers window and lock the Rectangular shape. Only the layer with vertical line should remain unlocked. Select the tool for direct selection and use it to select the top anchor point of the vertical line. Drag it to the top left corner. Do the same with the bottom point - drag it to the bottom left corner.
Unlock the layer with horizontal line and lock the layer with the vertical one. Use the selection tool to select the horizontal line and then switch to the Scissors tool (*Scissors tool can be found under Rubber tool or activated by the C key). Zoom the image again and click on the intersection point. You can see that a new anchor point was created. This tool divides line in the point where you click and creates two separated paths. Then you can use the tool for direct selection (A), select the left part and delete it by Delete key. (*It is better to move it outside the flag at first to be sure you will not delete anything else.) Unlock all paths in the layer with the shape of flag.
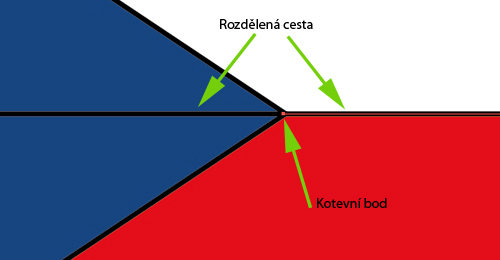
The outline of flag is complete. Hide the layer with the downloaded flag (click on the eye in the Layers window). Select the whole outline of your flag by clicking on the circle next to the layer.
Use the Live Paint Bucket tool (K) and click on the selected outline to create a group for live paint. Then you have to select colors and color the flag using the right colors.
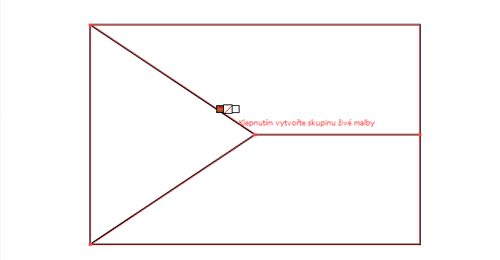
(*Tip - if you look at the cursor of the Live Paint Bucket tool you will see 3 squares of different colors. These are colors from the current color palette. You can change them by clicking on the color in the Swatches window but this procedure is slow. You can also change the color using arrows which is much faster.)
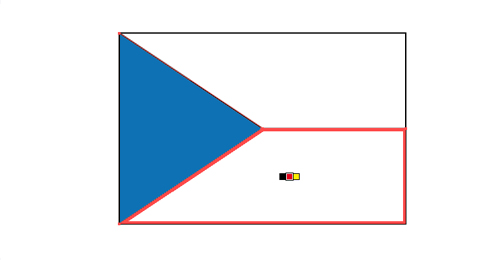
Video - Flag
Blend Tool
This tool will complete a gradient from one object into another one - it will create gradual changes. Look at the following image for better imagination . It can also be applied on more objects.
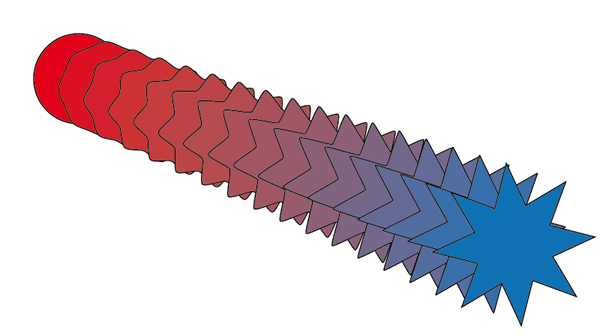
Blend Options
You can display these options by double clicking on the icon or from the menu Object > Blend > Blend Options.
- Smooth color - the number of steps is automatically computed. In case that objects have different borders or they are filled with different colors, an optimal number of steps is computed so the gradient will be gradual. In case that both colors are identical, the number of steps is computed from the changes in the shape.
- Specified steps - you can set the number of steps
- Specified distance - this will set the distance between single steps. The distance is computed from the border of one object to the border of another one.
 Align
to Page - objects are oriented vertically to the x axis
 Align
to Path - objects are oriented vertically to the path
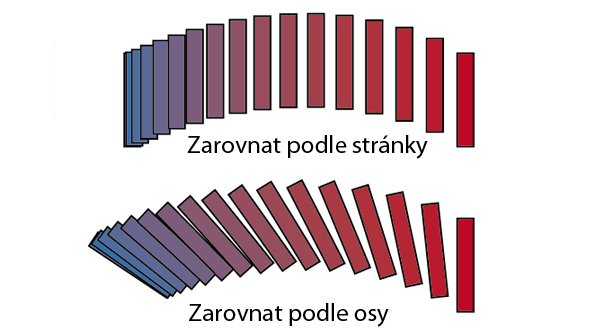
You can see these options in the blend menu:
- Release - disables blending
- Divide - each step will be converted to a single shape
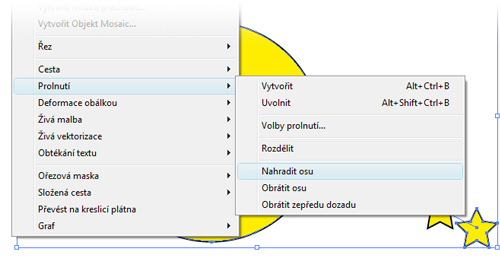
- Replace axis - you have to select the blended group and any path which will be used as the axis before using this tool, then the x axis will be replaced with the selected one
Create a new document for printing. Select the Star tool and use arrows to change the number of tips to 5. Choose yellow color for the filling.
Leave the Star tool selected and click on another place in the work area. The window with settings will appear. Leave everything without changes (*parameters are used from the previous step) and click on the OK button.
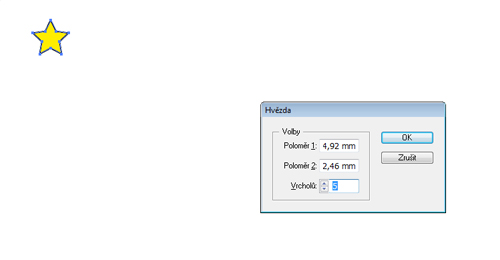
Select the Blend tool ( ).
Set the Specified steps in the preferences window and write 11 in the bottom
field. Set the Align to Page option.
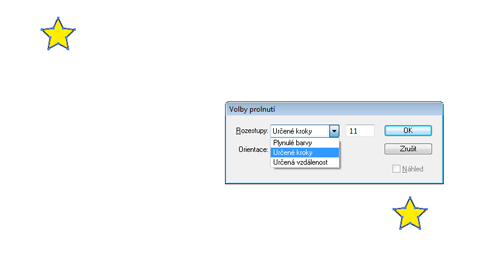
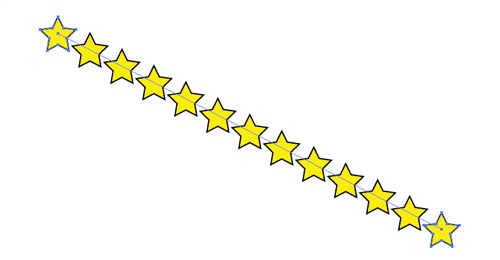
Click on the first star (x will appear at the cursor) and then click on the second star (+ will appear at the cursor). Stars will be added after this step.
Select the Ellipse tool and draw a circle while holding the Shift key. Select points and the circle using the Selection tool and choose the command Replace axis from the menu Objects > Blend.
You can see that stars do not copy the circle all around. You will have to select the Scissor tool (C) and click on the top anchor point of the circle. You set that the axis should begin and end at the same point. Stars will be distributed around the whole circle. The border stars are overlapping which was the reason to set the number of steps to 11.
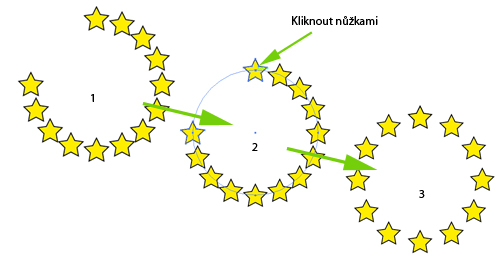
Completed.

Video EU
Additional Texts
Questions
- How can you use the Rectangular grid tool?
- Is it possible to transform one object gradually into another one in several steps?
- How would you create more complex shapes (like a spiral or an arc)?