Renovation of Historic Photo
 Content
of the lesson:
Content
of the lesson:
- Retouching the Source Photo
- Adding Borders
- Highpass Filter
- Converting to Black and White Photo
- Photo Highlighting
- Individual Task
Lesson Objective
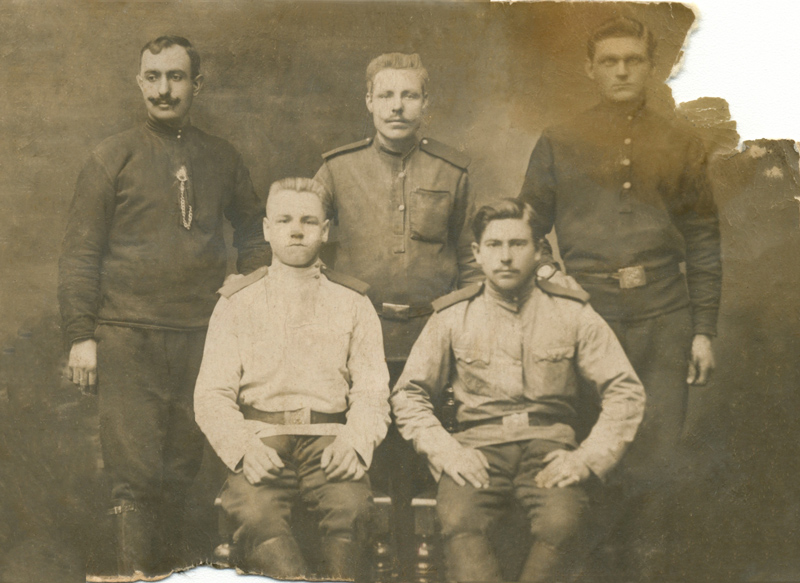
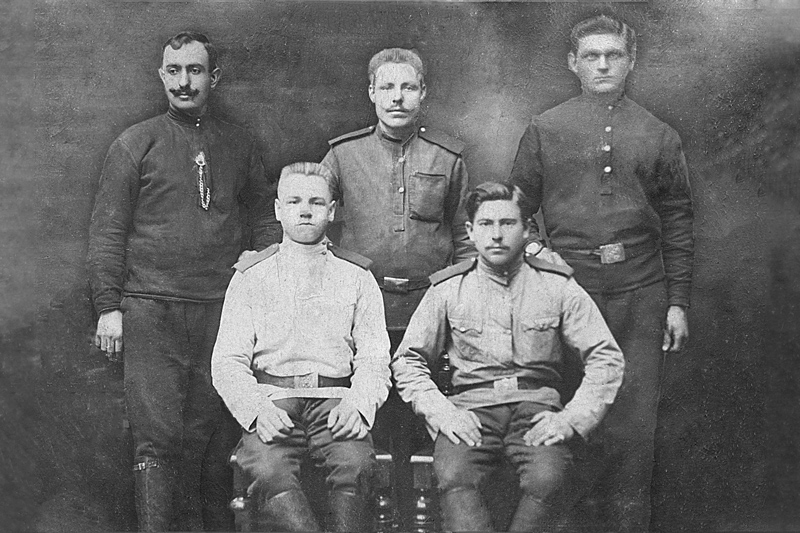
We will try to renovate an old black and white photo from a war which was damaged. We do not have any other form of this photo of course. This procedure is being used in graphical studios where graphic designers will repair, tone and print your photo for a particular fee.
Do not forget to save the file regularly and make all adjustments into new layers to prevent loss of data. It is also a good idea to rename all layers to be able to orientate into them.
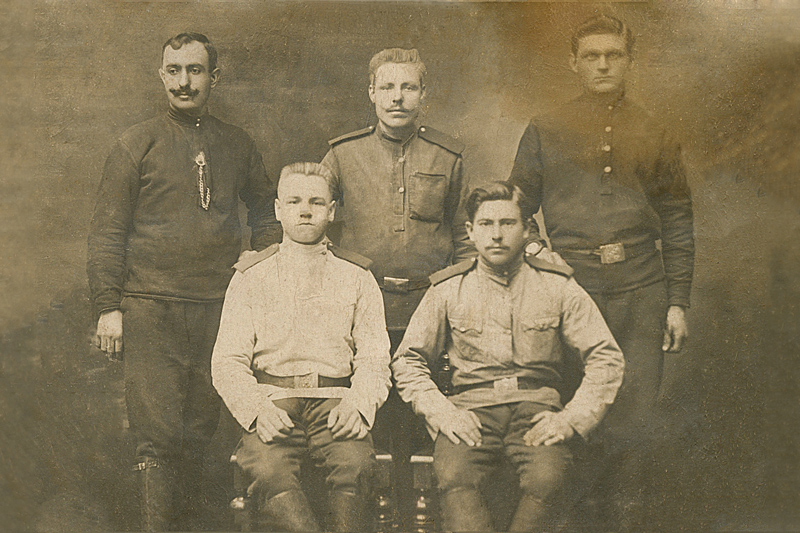
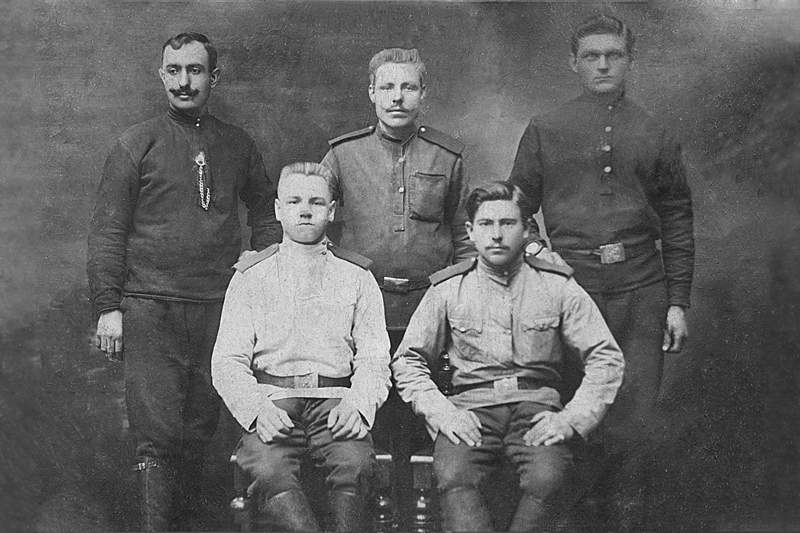
The source photo was scanned, you can download it here: vojaci-rusko.

You can see that the photo is in a poor condition - a corner is missing, it is cracked, colors are faded, there are damaged (scratched) areas and it is also partly painted in the bottom part.
Retouching the Source Photo
At first you have to remove all dirt particles and cover all wrong areas. You can use retouching tools for this purpose. It is a good idea to begin with smaller things (dots and smaller areas) and then continue with the larger ones. Change the tools, not all of them are suitable for every purpose.
- Clone Stamp Tool – it adds parts of image according to the selected area, we will use it for hair, chops, boots and bottom parts of chairs. We should use the Clone Stamp tool everywhere where we need to retouch gradients (edges, borders) because the other tools would probably fail for this purpose. You should set a lower opacity to make gradual changes.
- Spot Healing Brush Tool – it computes the center area from the surrounding areas, it is suitable for abrasions in case that the surrounding area has the same color (several smudges, spots).
- Healing Brush Tool – an analogy of retouching brush but it allows you to choose an area which will be used for calculating the center area (you can keep the texture). A good example of usage is the sleeve in the following video where we wanted to keep the direction of the gradient.
- Fill by Content – using a selection and the keys Shift+F5 the program automatically fills a selection according to the surrounding areas. This is a fast method but not fully reliable. In case you use the Spot Healing Brush and set its type to Content-Aware, you will get two identical tools.
- Patch Tool – this tool allows you to select an area at first and then move it to the place which should be used to replace the selected area. It is similar to the Spot Healing Brush but can be used for retouching larger areas.
The following video illustrates these tools:
- Pattern Stamp Tool – this is an advanced tool which can be used to define a pattern from as large area as possible and then use it to draw a background which will get a texture. In case you use only the simple Clone Stamp Tool, the background will be partly blurred which might not be desirable. The usage is illustrated in the following video.
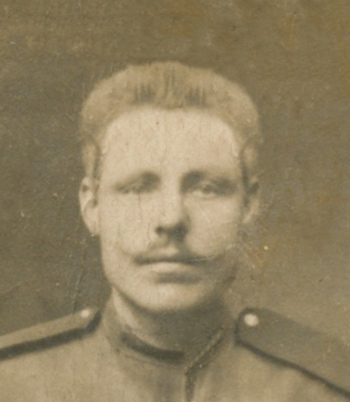
Problematical will be especially the areas around heads of soldiers where several parts of hair are missing. You have two possibilities - you can use the Clone Stamp tool precisely and draw the hair or you can duplicate the other side of head, flip it horizontally and clean it (using the mask) to look realistically. The source is in the left image, the result is in the right one.

The same procedure will solve the problem of head of the second standing soldier.
Another problematic place is the belt of the middle sitting soldier - there is a scrape above it. For this step we will use the Quick mask tool which can be found in the tools panel under the colors. The Quick mask will help us to define the area which will not be affected by the retouching. We will mask the belt and retouch the area above it into the final appearance. To finish the adjustments we will use the Spot healing tool to be able to define the area which will be used for the calculations.
You might also use the Magnetic Lasso tool which automatically selects areas according to edges - it depends on the fact which tool is better for you.
Keep on retouching the whole image gradually till you are satisfied. You do not have to solve the borders now; they are described in the next chapter.
Adding Borders
Adding borders will not be a great problem, we will use the Fill tool (Shift+F5) which fills a selected area using the surrounding areas. After finishing this step we will do one more thing - adjust the format of photo to be able to print it correctly (that means to ratio 3:2). That means we have to increase the width and complete borders.
We will start with adding the left, upper and bottom part of the border where nothing prevents us from selecting the area using a selection tool and pressing Shift+F5 to fill it. In case that any gradient will not be ideal, you can use the Clone Stamp tool and adjust it.
The photo should look like the following image after this step:
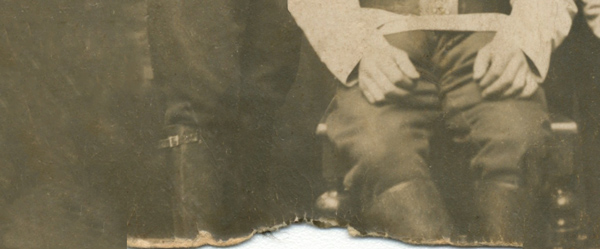
The bottom border and the right upper corner were not solved on purpose because they are more difficult. You can use the Fill tool for the bottom border and clean the result using the Clone Stamp tool (it is necessary to correct the boots and the chair). The situation before is above, the situation after using the Clone Stamp tool is below in the following pair of images. A viewer must not be able to recognize that there was an error in this section.

The situation in the right upper corner is worse. There is no place to take the background from because the whole corner is missing. A suitable procedure is to use a defined pattern, draw the corner to a new layer using the Pattern Stamp tool, then copy everything merged into a new layer, clean the corner using retouching tools and finally add the Color balance layer to adjust the hue and the saturation. The whole procedure is shown in the following video:
The whole retouching is completed after this step, you only have to change the width using the Canvas size tool because we need the ratio of width/height to be 3/2 - use a calculator. The borders can be filled using suitable tools. The final photo after this step can be seen in the image:

Highpass Filter
We will slightly sharpen the photo. Copy everything merged, create a new layer and apply the Highpass filter on it. Change the blend mode to Linear light. You can additionally adjust the opacity. You can also experiment and try to get more aggressive sharpening. The result can be seen in the following image:
There is not much to do after this step, we will "only" adjust colors, contrast etc. and also slightly highlight the people inside the photo.
Converting to Black and White Photo
Most of old photos are colored to yellow. This is not because of bad material in the past or because of photographers who took yellow photos. This was done by the age of photos because the material has gradually changed its properties.
To convert the photo to black and white we could use the command Image > Mode > Grayscale but this operation is considered as imperfect. Much better procedure is to use the Channel Mixer. Check the option Monochromatic and the photo is converted to black and white. You can move the sliders to get a better result, an ideal setting is: R +40%, G +40%, B +20%.
The result after this step:
Then we add Levels because we want to adjust the squalid contrast of the photo. Notice that there are three eyedroppers in the left part of the panel with settings. These eyedroppers can set the lightest (white) and the darkest (black) color of the photo. Because we want to get the best result, we will use these settings. How can we find the lightest and the darkest part of the photo?
We will use another adjustment layer called Threshold for this. Using this layer you can aggressively darken or lighten the photo. We can start with finding the lightest point in the image. Move the slider to right up to the limit when you will see only white points on black background on the canvas. These points represent the lightest points of the photo. Zoom any of these points and place guides to be able to use that point later.
Now you can switch to the Levels layer, hide the Threshold layer and choose this point using the bottom eyedropper. This will set the lightest point in the photo.
Use the same way to move the slider inside Threshold layer to the left up to the level when black points on a white background appear. Select that point using the first eyedropper in Levels layer.
Do not forget to hide the layer Threshold to get back our photo. Now we can adjust the Levels as needed with the advantage that the border values correspond with our photo.
If you remember, there was a smudge of another color around the head of the right standing soldier - it was partly corrected after converting the photo to black and white one. In case you wanted to do more adjustments, there is no problem to add other adjustment layers (Levels, Channel Mixer or Color Balance), apply a mask and try to improve the corner.
These changes are small but can play a role in the whole impression from the photo. Pay attention not to overstate your adjustments.
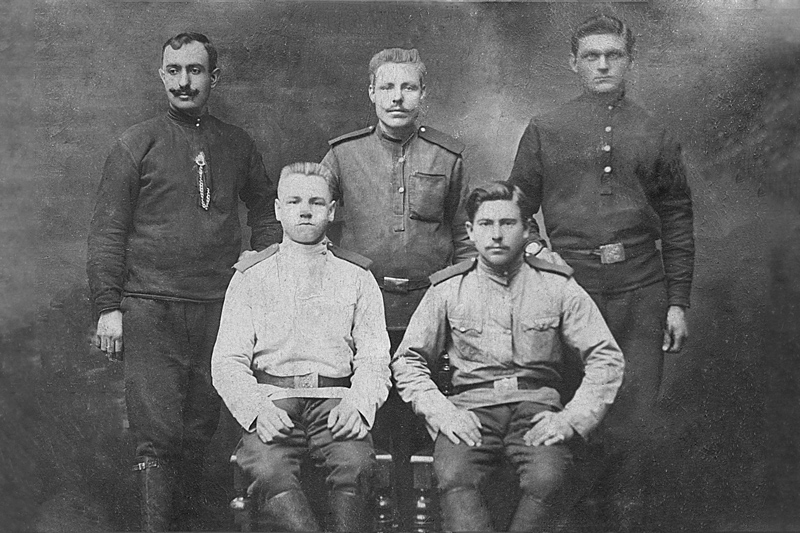
Photo Highlighting
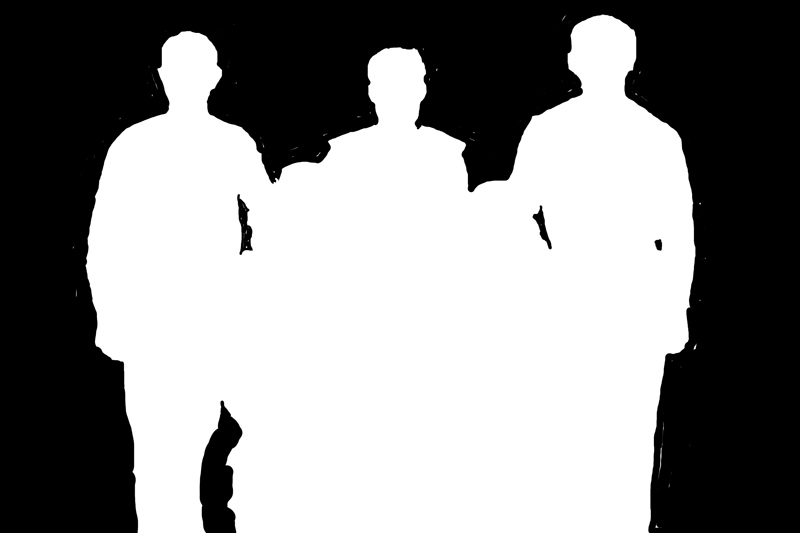
The last step which will make the photo more interesting is remaining. Duplicate all into a new layer, apply a mask and choose only the soldiers using the mask (you can use Brush tool, Magnetic Lasso, Pen or other tools). The mask can look like the following one:
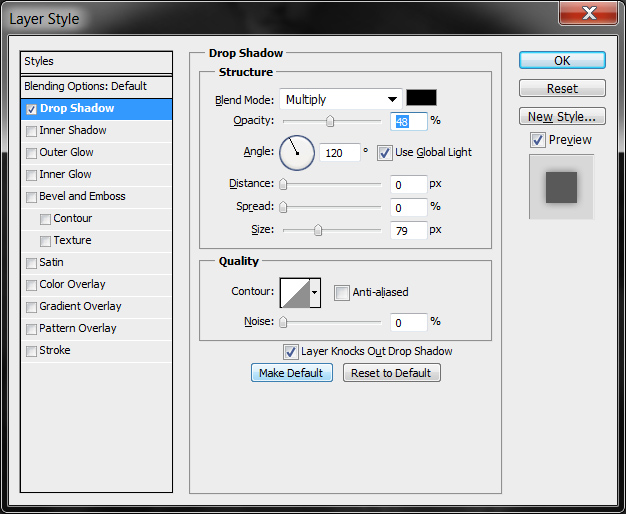
We will add a light shadow to this layer which contains the soldiers. The shadow will improve the whole impression from the photo. Use milder values, for example:
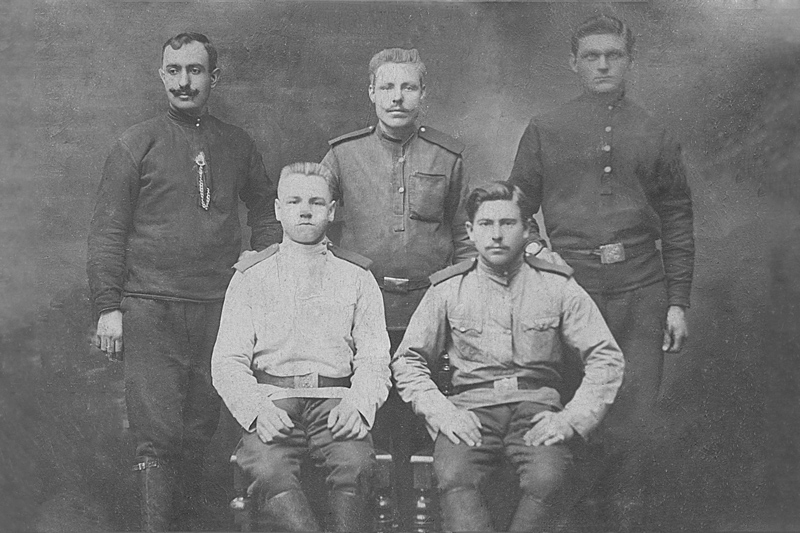
The whole photo is completed, if you want, you can insert it into a border or adjust it anyhow. The result can be seen in the following image. The photo is not absolutely same as the original one but when printed on a small paper nobody should recognize anything.
Individual Task
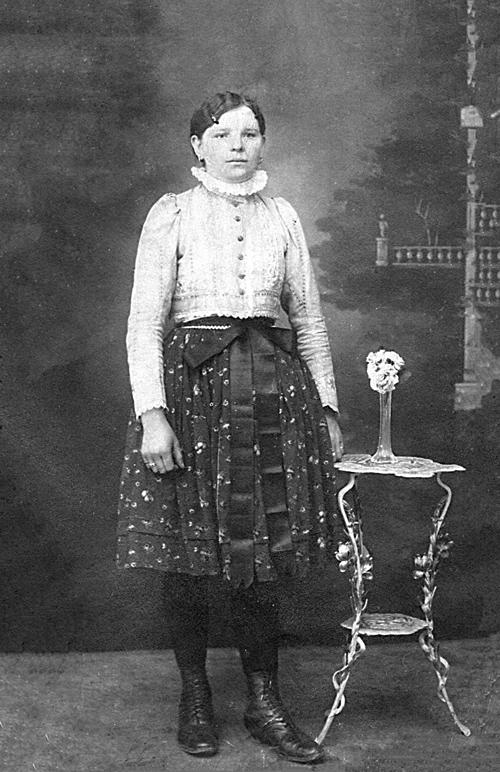
Apply the same procedure on the following photo.
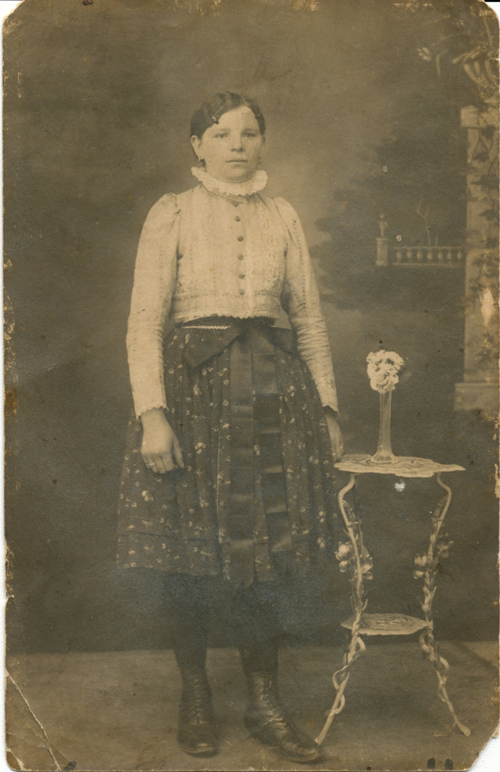
At first you have to cut the photo from the scanned image and then you can continue. Try to get the best result, similarly to the following image: