
Project Foundation and Presets,
Program Environment Introduction, Media Import
 Content of the lesson:
- Adobe Premiere CS4 with a Standard Project Preset
- Other Possibilities of a Project Presets
- Program Environment Introduction
- Media Import
Launching Adobe Premiere CS4 with a Standard Project Preset
Before we start, we can mention just for the beginning that it is good to preset your project in the way to be able to adjust it to the source media and not to the requested output. tI is good to do it this way to avoid complications. It is also true that if we combine different types of media with a different side proportion it is good to adapt a project to prevailing types of media. It is also important to know that what we set at the beginning cannot be changed in some cases.
After launching Adobe Premiere CS4 a window appears with a list of the last opened projects with 3 big icons in its bottom part.
Icons meanings:
- New Project - new project foundation
- Open Project - opening a created project
- Help - on-line help to the program
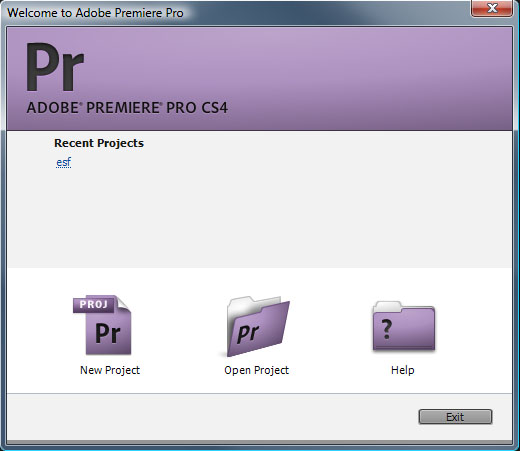
Start screen 01
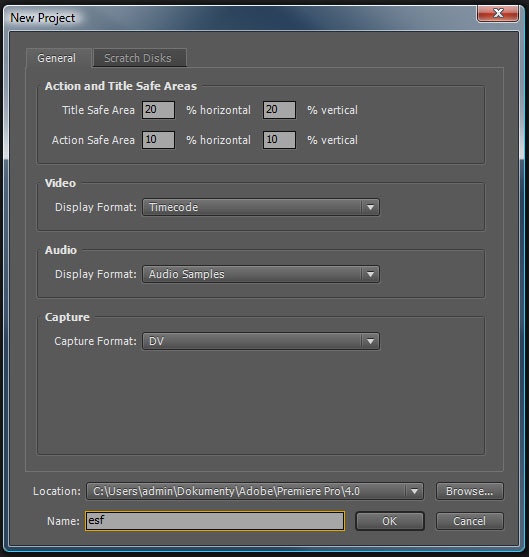
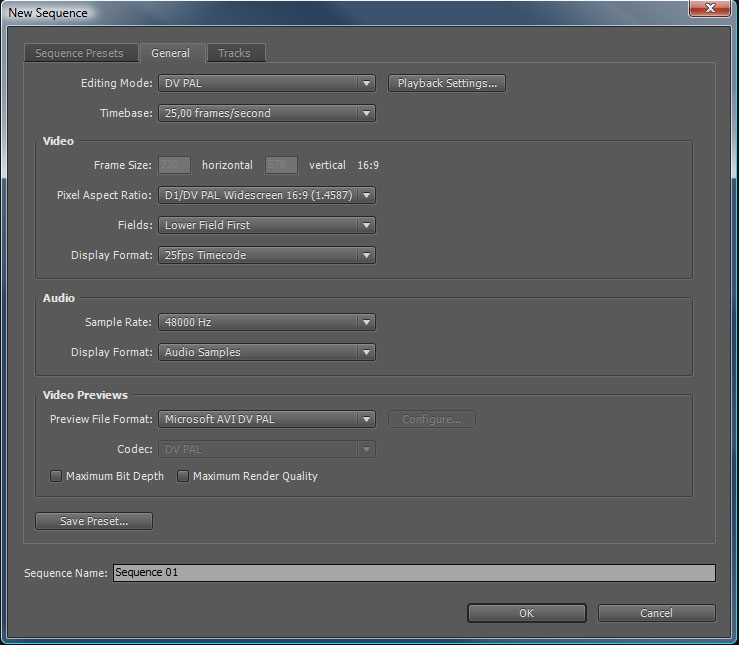
Starting a New Project - Window 1 (General)
- Action and Title Safe Area - with the help of this setting we define subsidiary frames in a program which we can depict during our work. These frames are used to locate safe area for subtitles and the clip itself. For example; in the TV it could happen that we cannot see marginal parts of a video because of the cropping, or the subtitles will be cropped or will be too close to the edge.
- Video (display format) - it is a preset that influences the time format of the inserted video. For example, if we want to measure its length in hours, minutes, and seconds or in feet and the number of shots or only in the number of shots.
- Audio (display format) - it is a preset that influences the time format of the loaded sound on the timeline. We can measure the sound by the help of audio samples or in milliseconds.
- Capture - preset of capturing a video. We can choose from DV or HDV; this means we can choose from a digital recording of a video in high resolution.
Start screen 02
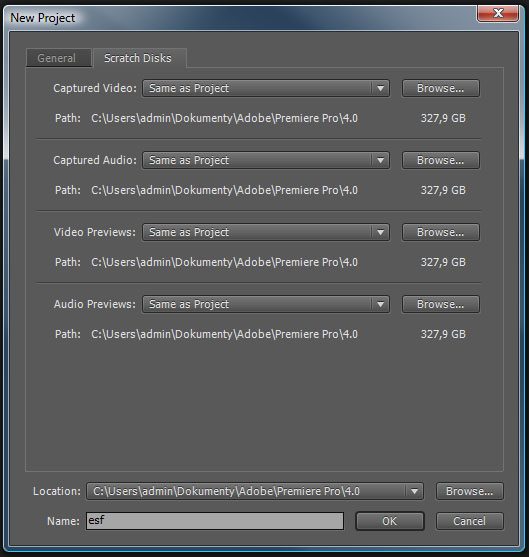
- Scratch Disks - it is a preset of the place on a drive of computer where Adobe Premiere stores video and audio recorded by “File->Capture” and files created during rendering previews or exporting a finished video. These files are always stored together with the project by Adobe Premiere.
Start screen 02
Creating a New Project - Window 2
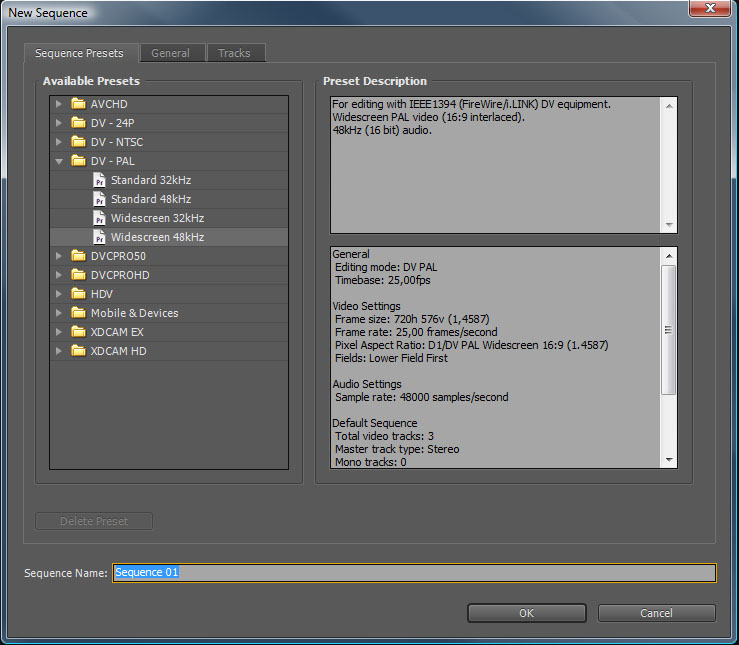
Sequence Presets
This bookmark includes preset packets that can be used for the majority of media. In the “Preset Description” section information about presets of these packets are shown.
- DV - NTSC - (National Television Standards Committee). It is a full-color standard for analog television broadcasting. This standard uses 525 lines of an image in an interlace mode, the snapshot frequency is 29.97 shots per second. A digital image transferred in the NTSC system has the resolution of 720x480 pixels. It is used in the USA, Canada, Mexico, part of South America, in South Korea, in the Philippines, and in Japan.
- DV - PAL - (Phase Alternating Line). It is a full-colour standard for analog television broadcasting. This standard uses 625 lines of an image in an interlace mode. The snapshot frequency is 25 shots per second. A digital image transferred in the PAL system has the resolution of 720x576 pixels. It is used in the Czech Republic and in major part of Europe (except for France), nearly all Asia, Africa, South America, and Australia.
- HDV - (High Definition Video). Preset for a video in high resolution. HDV records images with the side proportion of 16:9 in the resolution of 1280x720 (progressively, i.e. 720p) or 1440x1080 (interlaced, i.e. 1080i, with rectangular pixels with the side proportion 4:3).
- Mobile & Devices - a project preset for a video from mobile phones or portable appliances such as, iPod.
Start screen 03
- General - this card allows you to change of the package of project presets. Change it only in case that no presets match the source media.
Start screen 03
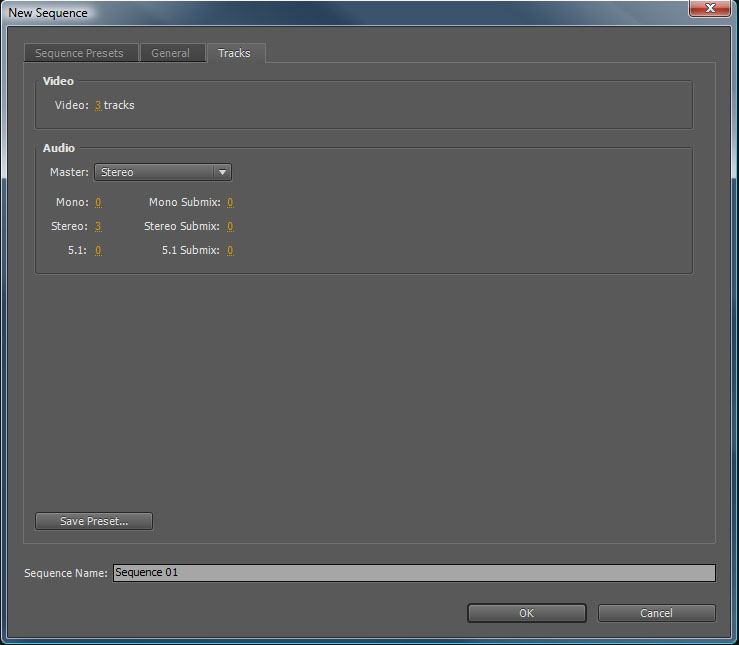
- Tracks - tracks presets. The number of video and audio tracks displayed on a timeline.
Start screen 03
Introduction to Program Environment
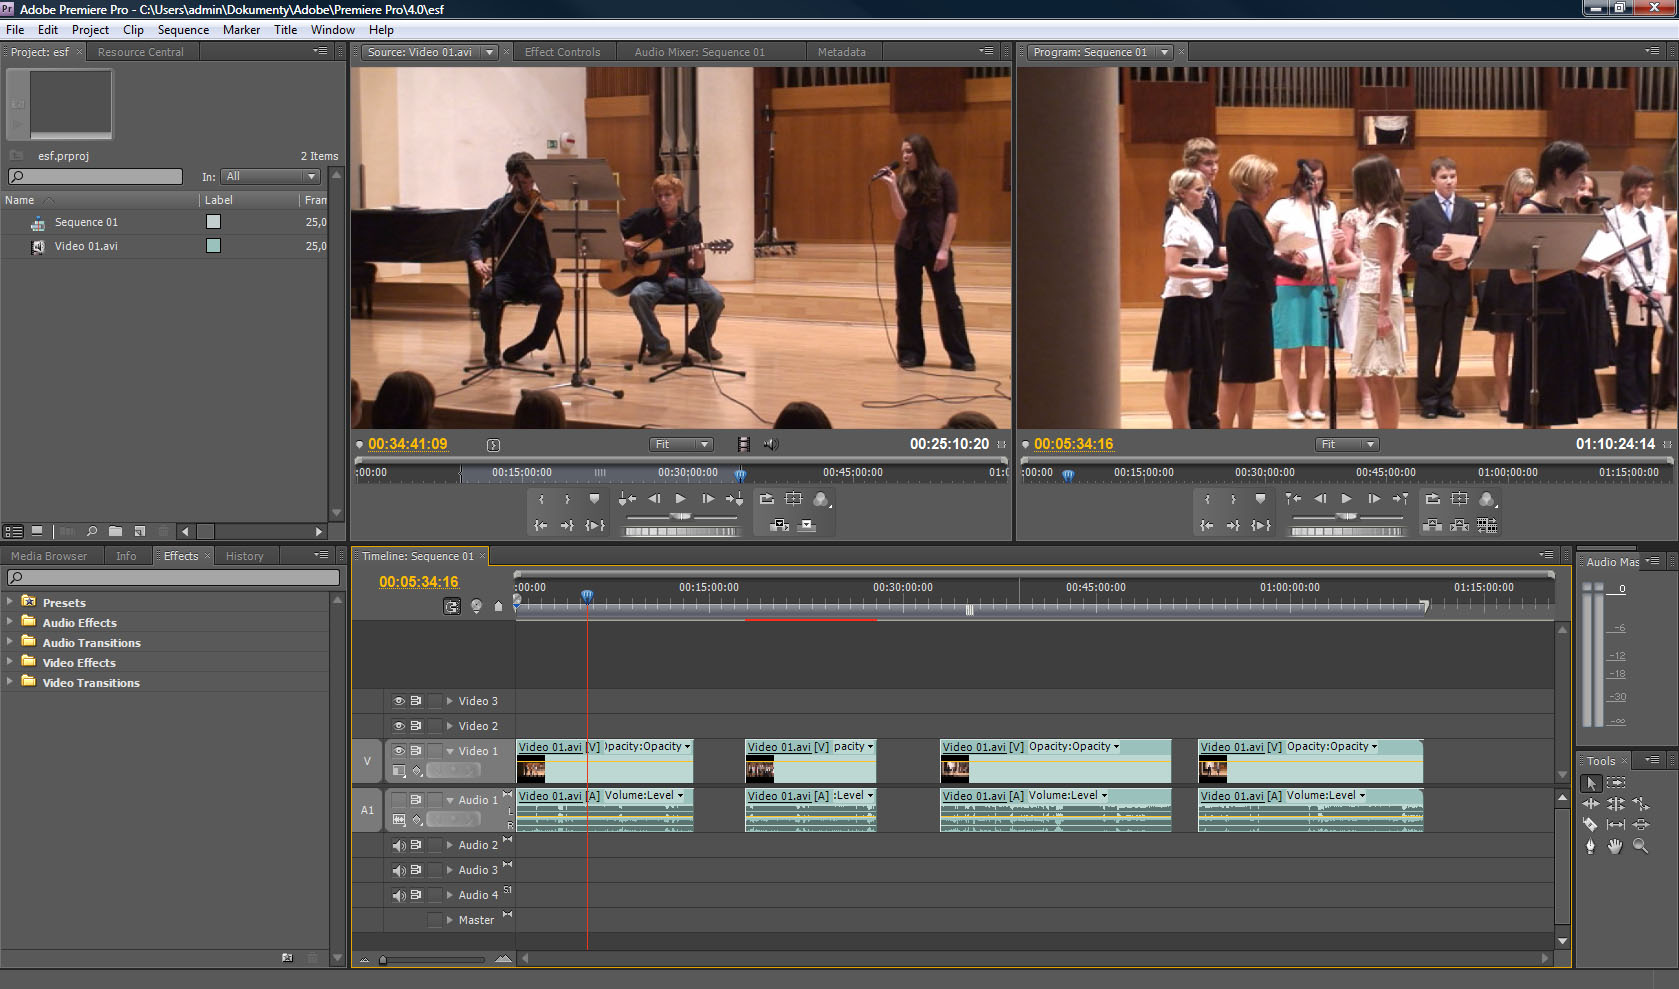
Adobe Premiere CS4 working environment
Pracovní plocha
- Project panel – this panel displays resource media link labels (the media we are going to work with are imported into the project here)
- Monitor panel (Source Monitor, Program Monitor) – this panel has two parts; the left one is used to display and edit resource media, and the right one is used to display edited blocks on a timeline or a result of the finished work
- Info panel – if we click on some resource medium in the “Project Panel”, different information such as, resolution, number of shots per second, or sound track frequency is displayed there.
- Timeline panel – this panel is used to work with edited blocks of resource media (rough edit) where the edition is trimmed, transitions and other effects are applied.
- Tools panel – tools panel for working on a timeline
- History panel – using this panel we can return some of our steps
- Effect Controls panel – this panel is used to set up effects for individual blocks of an entered video. In the basic part we can adjust for example, the position of a video and its angle, size, and also its opacity. This panel also displays the setup of added affects. If you add some effects such as color presets or brightness into a chosen part of a video, you can adjust the settings in this panel.
- Audio Mixer panel – is used to preset sound in individual sound tracks
- Effects panel – also in this panel different effects that influence features of a video or work with an entered video can be found. There are also different fadeout effects which edit transitions between cuts in shots. There are effects for adjusting sound as well.
Media Import
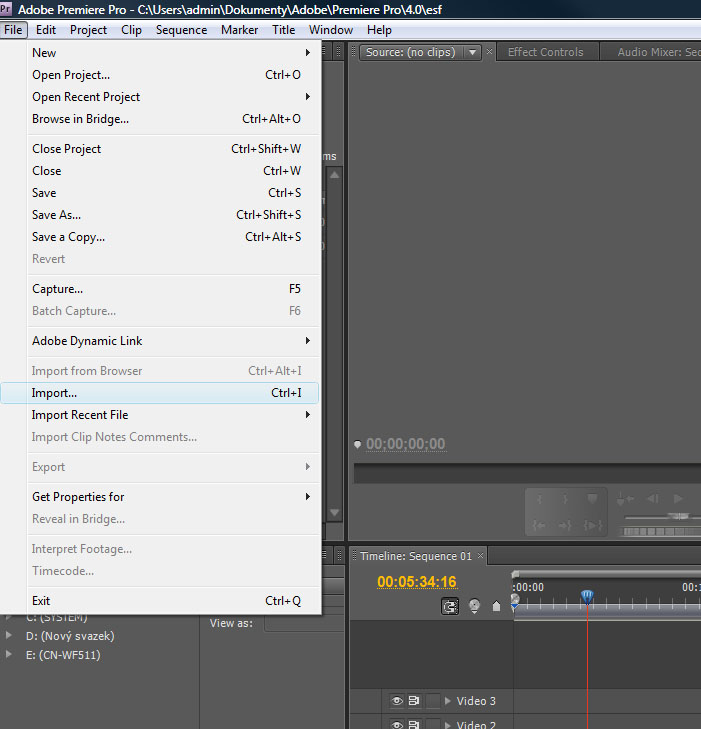
Import of media can be done in several ways:
- First Way – click “File” in menu and choose “Import...” from the offered list. At this time “Import” window is displayed through which we can search the drive of a computer and find a file we want to input. When a file is chosen, click “Open” (or double click the chosen file) and the input is done.
Import through menu
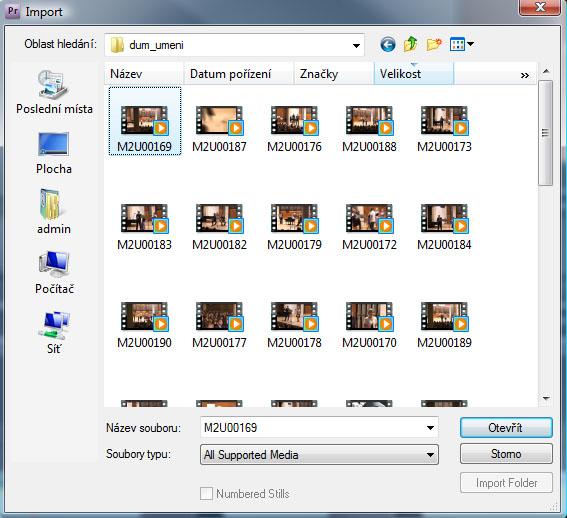
Finding a file to input it into a program

File import
- Second Way – it is easier to get a mouse into the “Project” window and invoke the same “Import” window by a double click.
- Third Way – there is also a possibility to search out a file using any file manager, drag it by a left button (keep the button pressed), and move it into the “Project” window (release the button). The chosen file is then input into the program environment.
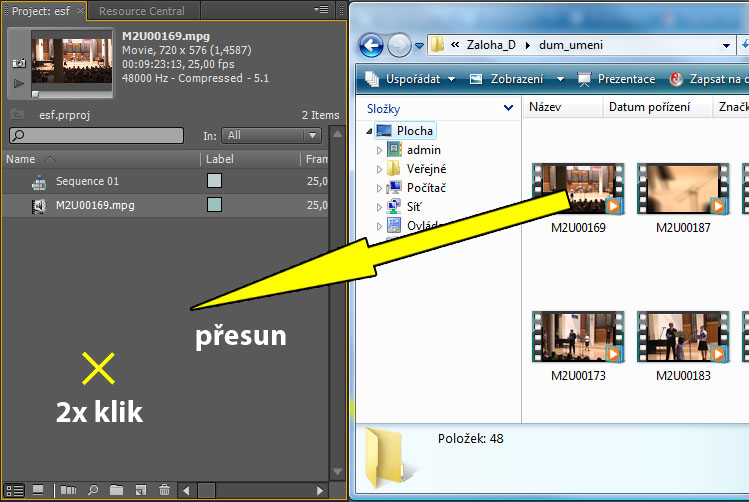
Importing a file by a double click or dragging
Task
Set up a project for HDV with 25 shots per second. Aspect ratio will be 16:9 in the 1280x720 resolution. Prepare 5 video tacks and 2 audio (stereo) tracks.
Additional Texts
Questions
- How can you set a new project?
- Which video standard should you use for our country?
- What is the purpose of "Monitor Panel"?
- Where are the cut passages inserted?
- Describe several ways of importing media into project.