
Digital Photography II
 Content of the lesson:
- Process of Taking Photos
- Exposure - Aperture, Time, Sensitivity (ISO)
- Depth of Sharpness
- White Balance (WB)
- Exposure Value (EV)
Process of Taking Photos
The light which enters an objective is lead through a set of lens to the sensor. When you press the trigger, that light is converted to electric charge using the sensor. This charge is strengthened and measured separately for each pixel. This signal is then converted to ones and zeros using an analogue-digital converter (AD converter). At the end the digital information is processed by a processor unit inside the camera and the final image is saved to memory card.
When talking about colored photos, you should know that there is one more mask inside the camera which consists of red, green and blue filters. The green color is represented more times because a human eye is more sensitive to green color.
Example: 4 MPix contains 2 mil. of points for green color, 1 mil. of red color and 1 mil. of blue color.
Compact
The light which enters an objective is lead through a set of lens to the sensor. This sensor (chip) does not work with a mechanical shutter but with an electronic one. This means that the sensor computes the captured light only in the selected time interval.
Reflex Camera
The light which enters an objective is lead through a set of lens to mirror and then to viewfinder. After pressing the trigger this mirror is lifted, mechanical shutter is opened and the light can get to the sensor. Shutters can be combined - a device can have mechanical and electronic shutters. Electronic ones can be used for very short times - times which cannot be used in case of mechanical shutter. Several reflex cameras can divide light between viewfinder and sensor.
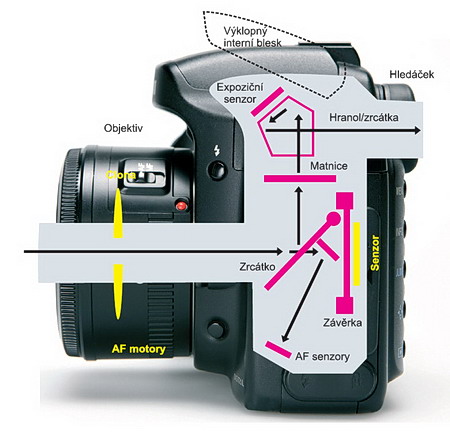
source: www.fotografovani.cz
Exposure - Aperture, Time, Sensitivity (ISO)
The procedure of taking photo is quite simple - light travels from all objects from the scene inside the objective and is processed by lens inside. Then it falls on the sensor which records it. The settings of sensor, time of recording, size of visor and also sensitivity are all together called as exposure. You can get a bright or a dark photo according to these settings. The right combination of settings will give you a photo with ideal contrast. The whole secret is the amount of light which falls on the sensor, otherwise the sensor is kept in darkness.
Quick summary of factors in exposure:
- Aperture = size of circle visor in the middle of objective
- Shutter time = the time how long light falls on the sensor
- ISO sensitivity = electronically controlled sensitivity of sensor
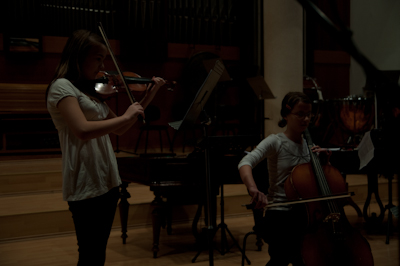

under-exposed photo (too dark photo); over-exposed photo (too
bright photo)
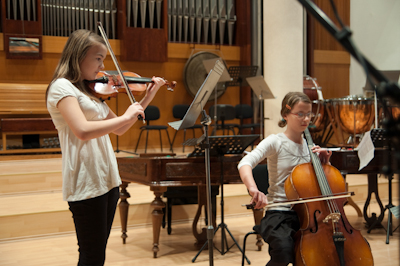
correct exposure
Aperture
Using the aperture you can control the amount of light which enters the objective and falls on the sensor. It is a set of thin plates made of metal which are located in the middle of objective. These plates move according to control signals from the camera and they create a smaller or a bigger visor for light - they regulate the amount of light which travels to the sensor.
The aperture is a ratio of captured light in objective and released light to the sensor. You can see for example f2.8 on a camera - this means ratio 1:2,8. This value tells that the sensor will get only 1/2,8 of captured light. For example value f16 means that the sensor will get 1/16 of captured light. Aperture is marked by the letter f (or F) which is followed by the number. You can see that values near 1 will enlarge the visor as much as possible. On the other hand, high values which defines high ratio and also high aperture value will reduce the size of visor.
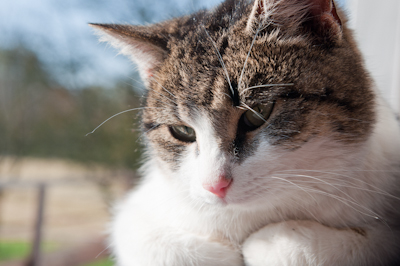

a cat (aperture: f 8; time: 1/400 sec.; ISO: 200); MacBook (aperture: f 5,6;
time: 1/160 sec.; ISO: 200)
Luminosity of objective = The smallest available value of aperture.
Examples of aperture values: 1.0, 1.4, 2.0, 2.8, 4.0, 5.6, 8, 11, 16, 22, 32, 45, ...
Which aperture value should be used?
In general, the most sharpened photos can be taken when you set a middle value. The aperture value is very closely linked to the shutter speed (time) and also affects the depth of sharpness. If you use zoom and enlarge an object from the scene, you will need to set bigger value to get higher depth or sharpness.
Time
Another way to control the amount of light which travels to sensor through objective is to set time values. This means the time while light is falling on the sensor. The sensor records data for a particular amount of time when shutter is opened. Otherwise it is kept in dark.
Values are usually fractions of seconds like 1/60, 1/100, 1/500, ... Usually this number is shortened to 60, 100, 500.

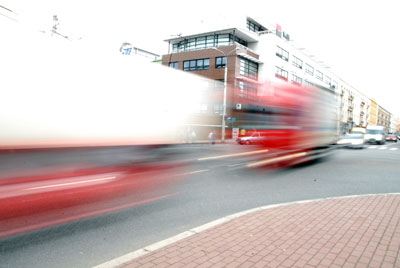
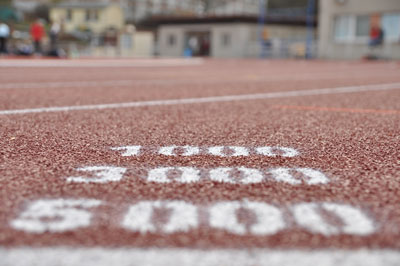
falling blob (aperture: f 2,8; time: 1/200 sec.; ISO: 200); cars (aperture: f 32;
time: 0,6 sec.; ISO: 200)
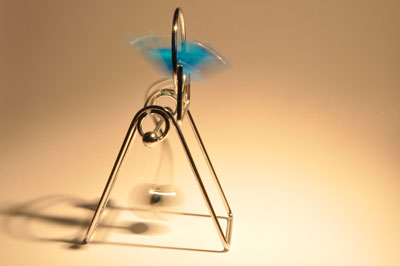
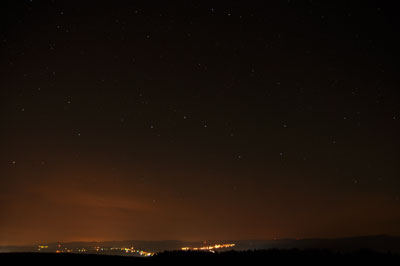
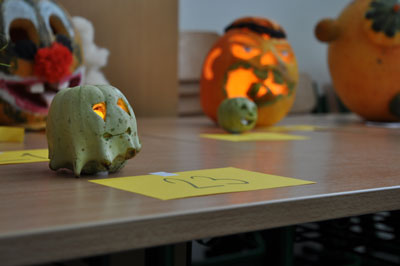
paper weight (aperture: f 32; time: 0,4 sec.; ISO: 200); night sky (aperture: f 2,8;
time: 30 sec.; ISO: 200)
Examples of times: ..., 8, 4, 2, 1, 1/2, 1/4, 1/8, 1/15, 1/30, 1/60, 1/125, 1/250, 1/500, 1/1000, ... seconds
Which time value should be used?
Using the recommended value is not the best way in all cases because you should consider the light conditions and your intention. Usually you are able to use values up to 1/60 without using a tripod to be sure that the result will not be blurred. Scenes have to be static or minimally dynamic to be able to use value 1/60. If you want to photograph countryside, you can use 1/100 but if you plan to photograph moving objects of people, you should rather use 1/250 sec. Ideal time values for sport activities are shorter than 1/500, for rally you cannot use longer times than 1/1000 for example. You can shorten the time value by using flash - a flash can change the value 1/15 in a dark room to 1/80. There is a rule that the time should not be longer than the inverted value of focal distance of objective.
Sensitivity (ISO)
In case you set the sensor to be more sensitive you will not need so much light to fall on this sensor to get a bright and contrasting photo. This sounds like a miracle so you would have unlimited possibilities when taking photos. You could take photos in dark rooms and set shorter time to get sharp and nice photos, you also would not have to use tripod, you could set time to be able to hold your camera in hands.
However, there is a problem. In case you increase the sensitivity you can see that more noise will appear inside photos. It is clear that your task is to use as low value as possible to get nice photos without noise and increase the sensitivity only in special cases.
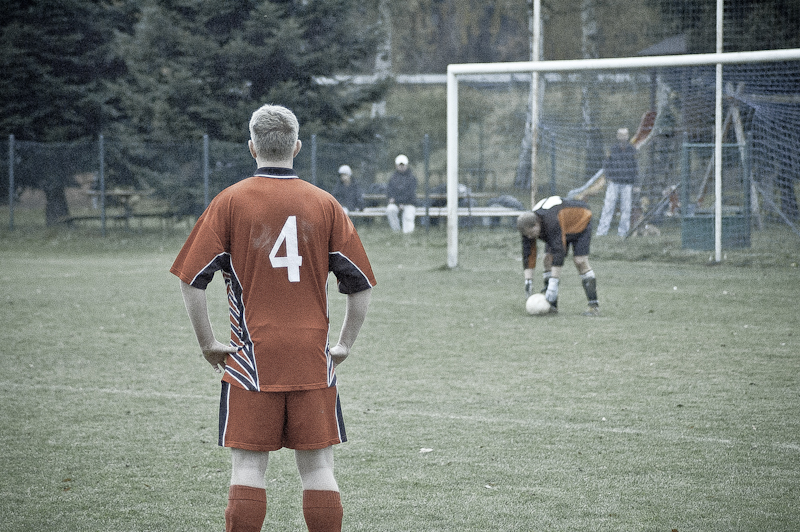
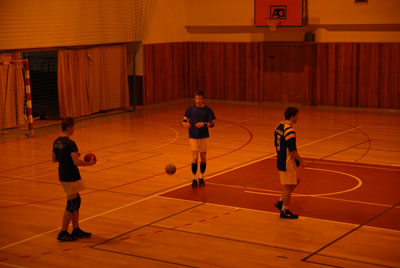
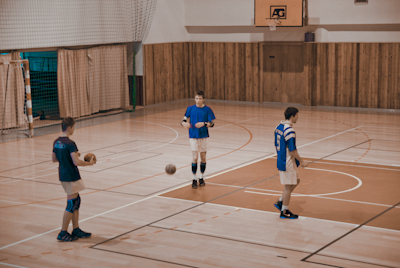
football (aperture: f 4,2; time: 1/400 sec.; ISO: 1400)
Examples of ISO values: ..., 50, 100, 200, 400, 800, 1600, 3200, ....
Examples of ISO values for particular situations:
- 50 - snow, good light conditions, static objects (low noise), deep colors
- 100 - exterior photos without tripod, photos with flash
- 200 - room with light without flash, compromise between sensitivity and quality of photos
- 400 - short times for moving objects, room with weak lights (high noise), reduced sharpness
Optimal ISO value is 200.
Depth of Sharpness
Depth of sharpness is huge when almost everything is sharp in a photo (the main object is the sharpest one). On the other hand, the depth of sharpness is small when only the main object is sharp and background is blurred (you can separate the main object from the other items).
In other words, the depth of sharpness is a range of sharp objects. It is not a technical parameter; it was introduced as an agreement. There are no given borders which separate sharp and blurred objects. The size of photo is also very important - you will not mention any differences in a small photo.
small depth of sharpness (zoom + low aperture value)
What affects the depth of sharpness?
- Focal distance of objective - When using a zoom objective (35–105 mm) and setting it to the bottom end of focal distance (35mm), the depth of sharpness is higher than in case of full zoom (105 mm).
- Aperture of objective - The smaller visor is used (the higher aperture value is used) the higher depth of sharpness is acquired. In case you open the visor maximally you will get minimal depth of sharpness.
- Distance from object - The closer you get to photographed object, the bigger depth of sharpness is simulated compared to the background - in case there is free place behind the object.
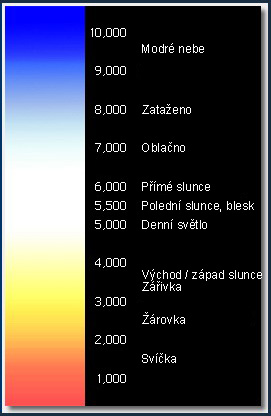
White Balance (WB)
White balance is a very important function. When taking photos, you can face different light conditions. You can take photos in a bright sunny day during summer, or you can go out when snow is falling or when the sky is cloudy. This affects the final photo very much so you have to set the white balance.
The temperature of photographed scene affects the white balance. Each light condition has its value shown in Kelvins. Your camera has to be adapted to these conditions to be able to produce a faithful result - you should try to get the same scene as you see.
Example:
Imagine you want to take photos inside an office which is lit by fluorescent tubes. These tubes produce light which is colored to yellow. You can take a photo and after developing it you will see that everything is colored to yellow. Everything is all right because the camera captured the scene like a normal outdoor scene. Similarly, you are now outside the room and see another environment than inside the office - human brain adapts to different environments. In case you want your photos to be adapted you have to tell the camera to suppress yellow color in case you do not want to get photos colored to yellow. By changing the white balance, you decrease sensitivity for a particular color so this color will be recorded no so strongly. The final image will be precisely balanced.
example of white balance
source: www.fotografovani.cz
Which possibilities can you use for white balance?
- Automatic white balance (AWB) - The camera tries to compute the value of colors from acquired data about the white balance.
- Presets for concrete light sources - These modes
can help the camera to know which situation should be used.
- Bulb - also suitable for sunset, candle, fire, ...
- Fluorescent bulb - in offices, shops
- Daylight
- Flash
- Sunny
- Cloudy
- Shadow - in shadow or outside direct light
- Manual concrete temperature - In case you know the temperature of colors you can set the white balance manually at some cameras.
- Balance to middle grey - Very exact method which is done by measuring neutral color (white, grey - 18%) and setting these values.
- Later in computer from RAW file - In case you save photos in the RAW format, you can control the white balance and adjust it anytime inside computer.
Exposure Value (EV)
Absolute EV
It is the absolute amount of light which is used for a concrete scene. It does not depend on cameras; it is like a value in °C.
Absolute EV from the View of Device
EV = 0 => exposure time 1 second, aperture of exposition f/1, ISO = 100 (people agreed on this in past)
This value mathematically expresses the amount of light which falls on sensor. Not enough light means low EV value. Too much light means high EV value.
Samples from the technical view (absolute value of EV):
- EV 10 - for ISO 100 = exposure 1/125 and aperture 2,8
- EV 11 - for ISO 100 = exposure 1/125 and aperture 4
- EV 12 - for ISO 100 = exposure 1/125 and aperture 5,6
When taking photos you do not have to take care about this values. You can change it by changing the combination of aperture, time and ISO sensitivity.
Relative EV
When using values like +1EV, -0,7EV, +0,3EV, ... we do not speak about absolute EV anymore. This is a relative expression of EV. You have a scene which has its absolute EV but you do not care about it. It is important whether the result is too bright or too dark. Using EV you can say that you want to correct the exposure. The correction can be done by changing aperture, time and ISO but if you set -1EV you will get the same result as when you lower the water level in a tank. It is not important whether the water was released by a pump or took out by buckets. You care about the result - lowering the water level by one meter.
Examples of relative EV:
- Photos of snowy scenes - Add from 0,3 to 0,7 EV = raising aperture of shortening the time, or lowering the ISO sensitivity.
- Photos of night scenes - Reduce from 1,0 to 2,0 EV = opening the aperture or adding time, raising the ISO sensitivity.
Calculating exposure values on-line
Additional Texts
Questions
- Describe the procedure of taking photos.
- What is exposure and which factors affect it?
- Describe the term depth of sharpness and tell which factors affect it.
- How can you use the white balance?
- What is an exposure value?