
RAW Format and Its Properties II
 Content of the lesson:
- Adjustments in Adobe Camera RAW
Adobe Camera RAW
Try to adjust the following photo fotografie-raw-1.nef as well as you can in Adobe Photoshop. In case you have installed Adobe Photoshop with the Camera Raw module, you are able to open the file inside it.
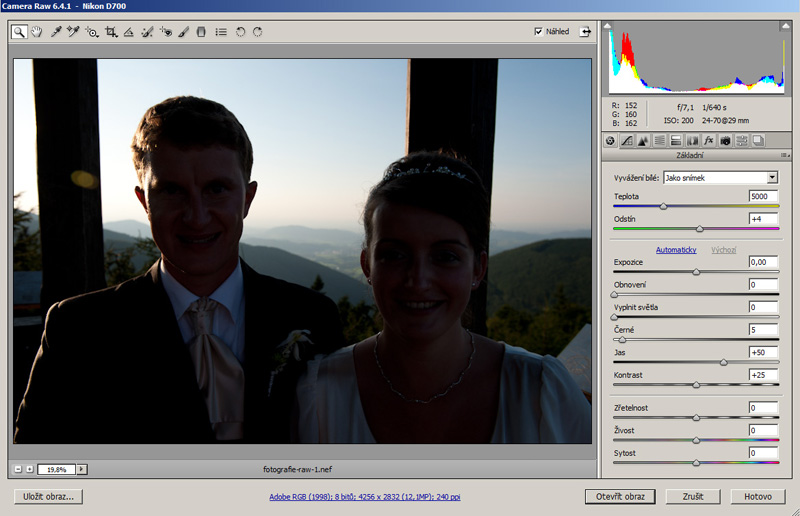
Step 1: Exposure
Exposure is simply the time while light is falling on the sensor. The longer is it, the more light will get to sensor. In Raw conversion the exposure should be changed maximally to +1,5-2,0. Using higher values is not recommended. You can see that the image was brightened after this adjustment.
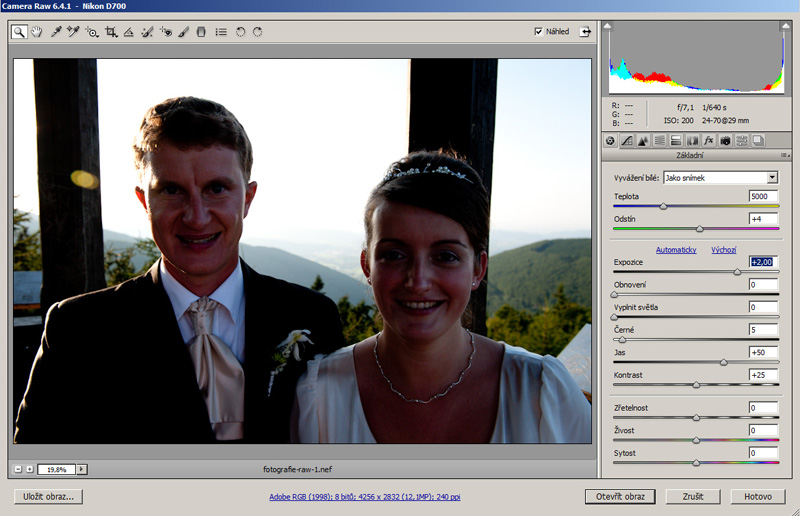
Step 2: Recovery
This means recovering places which are too bright (overexposed) - recovery of white places. In case there are not overexposed data in Raw, you can highlight them using this option. In our image we should recovery the background hills behind the photographed people.
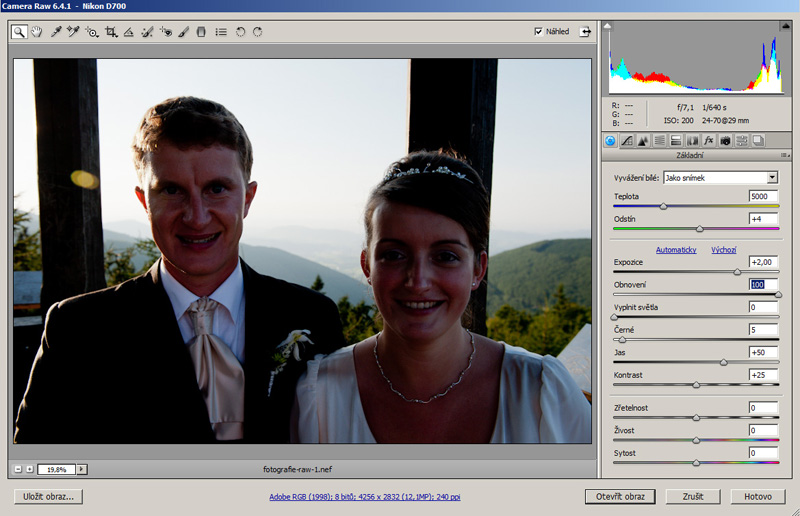
Step 3: Fill Light
This option is also called "digital flash". It lightens dark areas of photo - adds light to them. Very useful function.
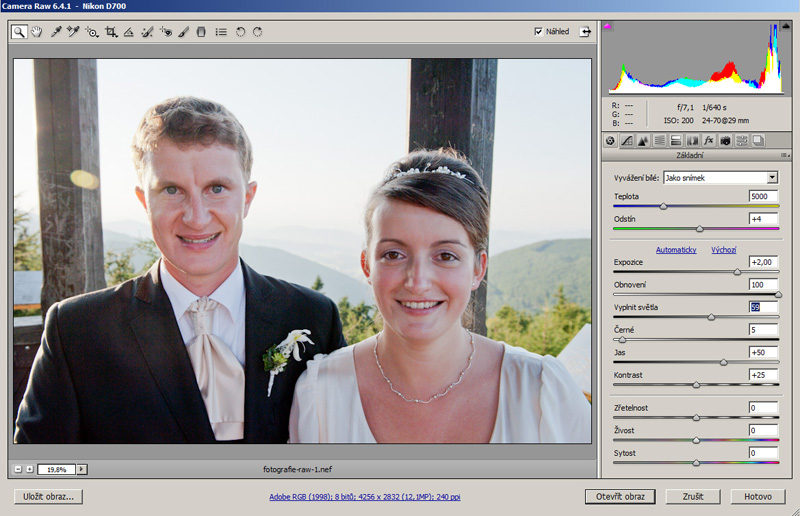
Step 4: Blacks
This adjustment is not necessary but you can darken dark areas using this option.
Step 5: Brightness and Contrast
Using these sliders you can increase brightness and contrast. We will make a small subjective change.
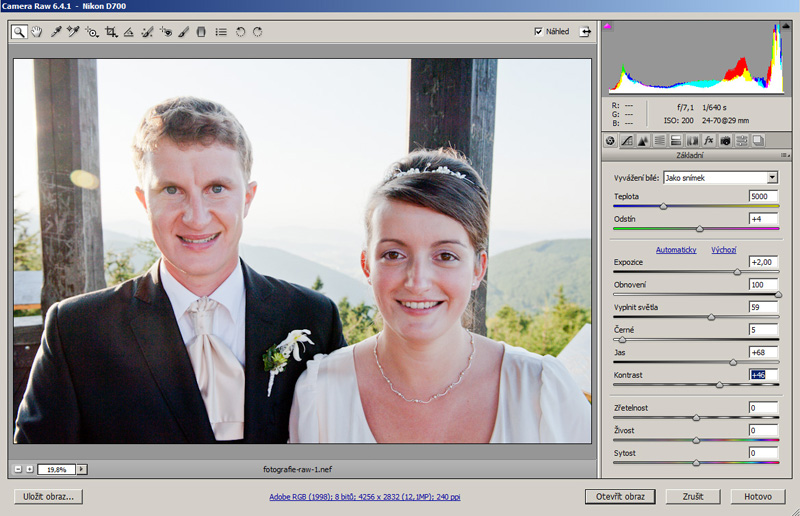
Step 6: Vibrance and Saturation
This options work with the color balance of photo. There is an essential difference between them. Saturation saturates or desaturates all colors in the whole photo. Null saturation means black and white photo and in case of increasing saturation you risk overexposed colors (you will see clipping and colors will look strangely). Vibrance only saturates colors which are not saturated yet. Not saturated colors are saturated more than the saturated ones so you cannot get overexposed colors so easily. This is very often tool for adjusting the color of face.

Step 7: White Balance
One of the essential advantages of RAW format is to change the white balance in computer. You can choose from predefined options or you can manually set temperature and hue of colors. The automatic option tries to balance the white color according to the real temperature and hue of light.
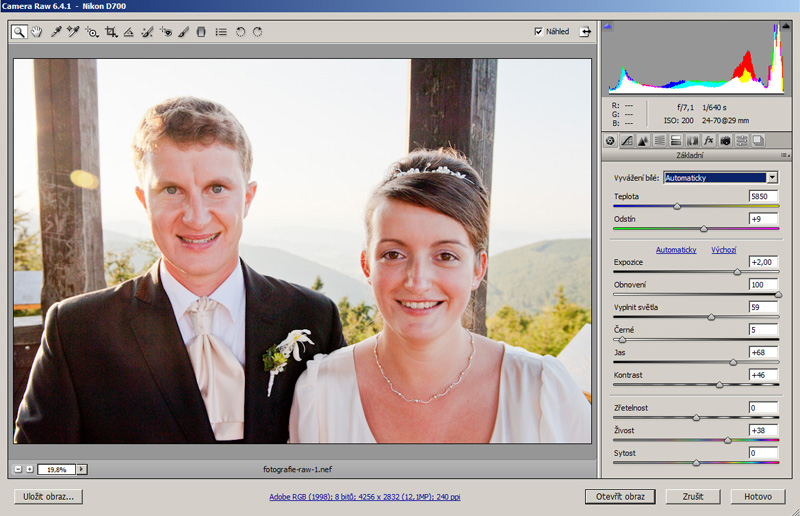
You can do the previous steps in any order and adjust the final photo according to your client.
Homework
Process at least 5 different photos in Adobe Camera Raw and present the difference between original photos and your adjusted versions.
Additional Texts
Questions
- Characterize all single options inside Adobe Camera Raw.