
Adobe Bridge III - Test
 Content of the lesson:
- Assignment of Test Tasks
- Solution of Test Tasks
Assignment
- Download the archive foto_test.zip into your computer and extract it to any folder. You will find photos inside the archive and the file seznam.txt which contains their descriptions. View the folder inside Adobe Bridge.
- Create keywords according to the file seznam.txt and apply them on your photos.
- Add titles of photos into metainformation (File Info panel).
- Rename all photos as: Foto_TitleOfPhoto_CreationDate_TwoDigitID.jpg.
- Create a new collection which will contain all photos from your folder and name it "Foto".
- Then create an automatic collection "Selection" which will contain files from your folder with the keyword "Turecko" and width lower than 1000 px.
- Create a PDF file with layout of 2*2 photos per page from the collection "Selection". There will be photos and the names of files without extensions (font Arial, 15px) in the document. Use black background and white font.
Solution
1. Save the archive foto_test.zip into your computer and extract it to any folder. You will find photos inside the archive and the file seznam.txt which contains their descriptions. View the folder inside Adobe Bridge.
You should create a new folder for this task (we used the path "D:\foto" in this solution but you can use any other folder of course) and place all files from the archive "foto_test.zip" into it. To extract files from a zip archive you can use a part of Windows or any external program (like WinZip).
image 1
Once the folder is created launch Adobe Bridge (see the image 1) and find the path to your folder inside the Folders panel (marked with red in the following image). Then you should see the content of the folder inside the Content panel (marked with green in the following image).
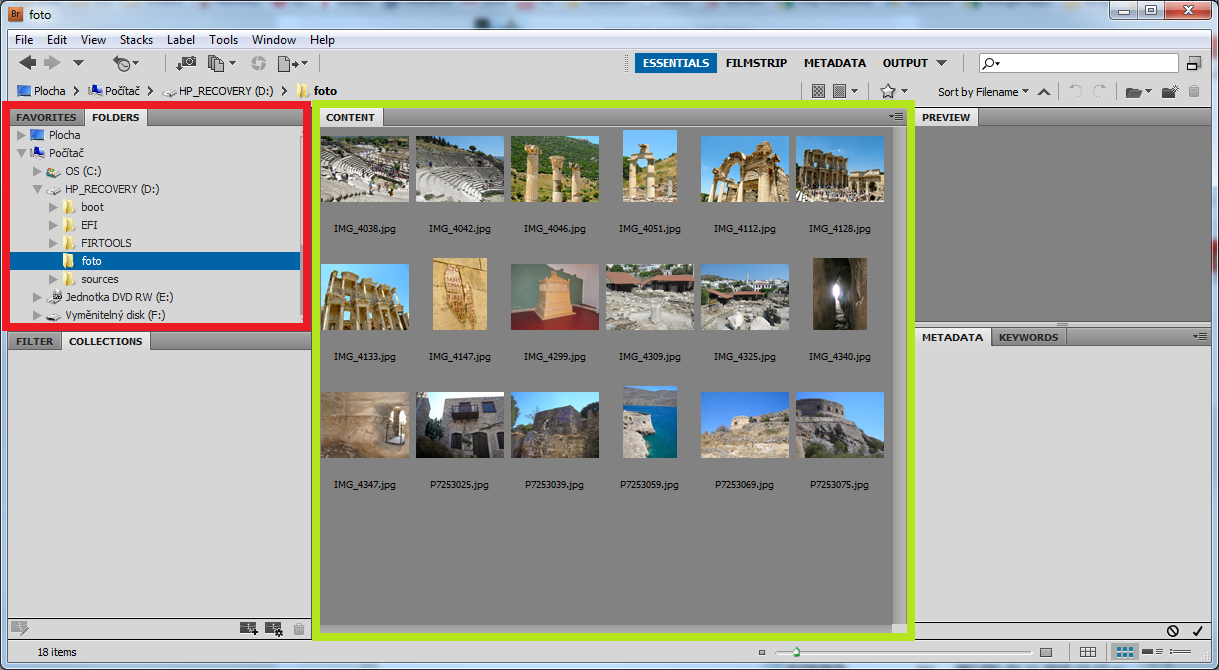
image 2
2. Create keywords according to the file seznam.txt and apply them on your photos.
You need to set keywords for all photos in this task. If you look inside the file seznam.txt you can see that 4 keywords are used for all photos (bullets represent their hierarchical structure):
- Places
- Turkey
- Greece
- Crete
Note: The keyword "Places" might be available inside Adobe Bridge because it is one of the default keywords,.
You can create new keywords to speed up your work and then set the keywords for each photo by ticking the right checkboxes.
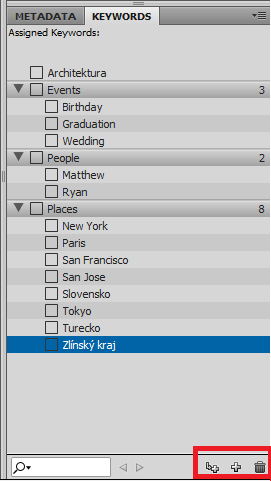
image 3
Keywords can be managed inside the Keywords panel which is located in the right bottom part of the program window. For creating and removing keywords you can use the three buttons which are highlighted with red color in the previous image. They are ordered in this way:
- New keyword which will be a sub-item of the selected keyword
- New keyword
- Remove the selected keyword
In case of creating a new keyword which will not have a parent keyword you will use the second button - "New Keyword" and then enter the title of this keyword.
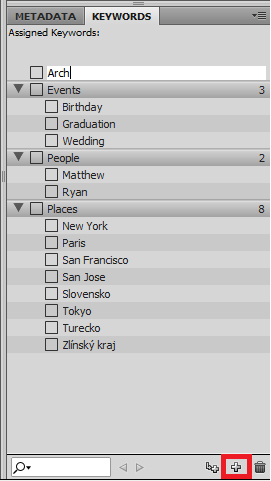
image 4
In case you want to use sub-categories, that means you want to create a
keyword which will be inserted as a sub-item of a parent keyword (for example
"Places" > "Turkey"), you have to choose the keyword where you want to add the
sub-category and click on the first button. Then you can enter the title of
this keyword.
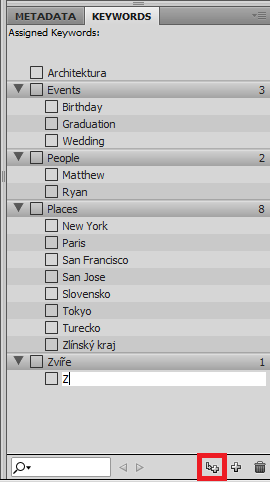
image 5
The list should look like the following one after adding all keywords. Newly added keywords are highlighted.
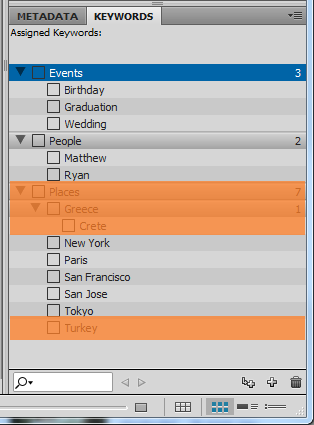
image 6
To choose the keywords you have to gradually select each photo and tick the right keywords for it (see the image 7).
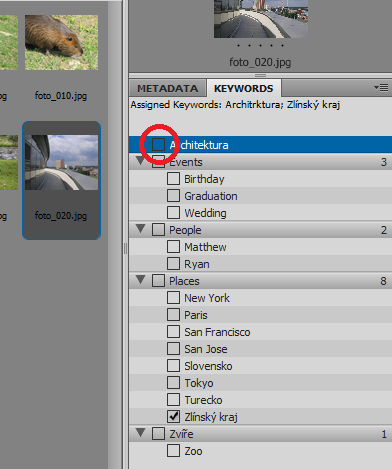
image 7
3. Add titles of photos into metainformation (File Info panel).
To set additional information about photos you need to use the dialog "File Info" which can be displayed after clicking on a file using the right mouse button and selecting the item "File Info ..." (see the image 8).
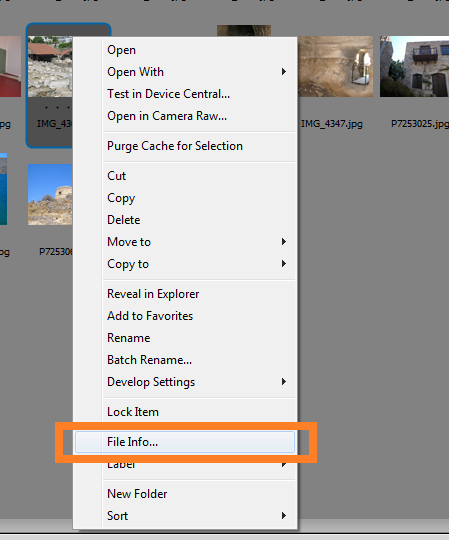
image 8
You can set information about the photo inside the dialog (as Title, Author, Keywords, ...). We will be interested into the item "Document Title" (see the image 9). You will change this item for all photos according to the file seznam.txt.
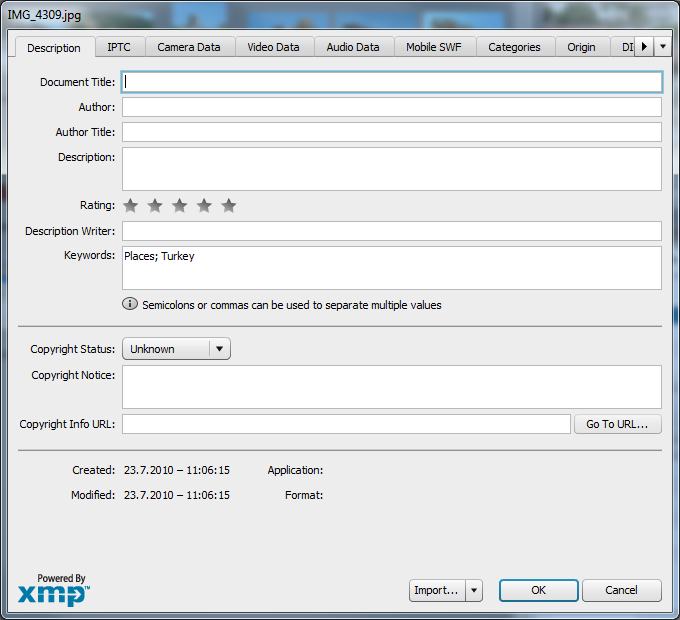
image 9
4. Rename all photos as: Foto_TitleOfPhoto_CreationDate_TwoDigitID.jpg
Foto_TitleOfPhoto_CreationDate_TwoDigitID.jpg
Once you set all metainformation you can batch rename all files. The name scheme of files should be as in the assignment (that means "Foto_" then title from the item "Document Title", Creation date and two-digit number which will be automatically increased).
The file name can look like this one: Foto_Efes_20100812_01.jpg
You have to select all files for batch rename (you can use the shortcut CTRL+A) and then choose the command Tools>Batch Rename from the menu.
The following dialog will be shown. You can set where to save the renamed photos and then set the format of the file names.
The dialog with required settings which correspond with our needs should look like the following one:
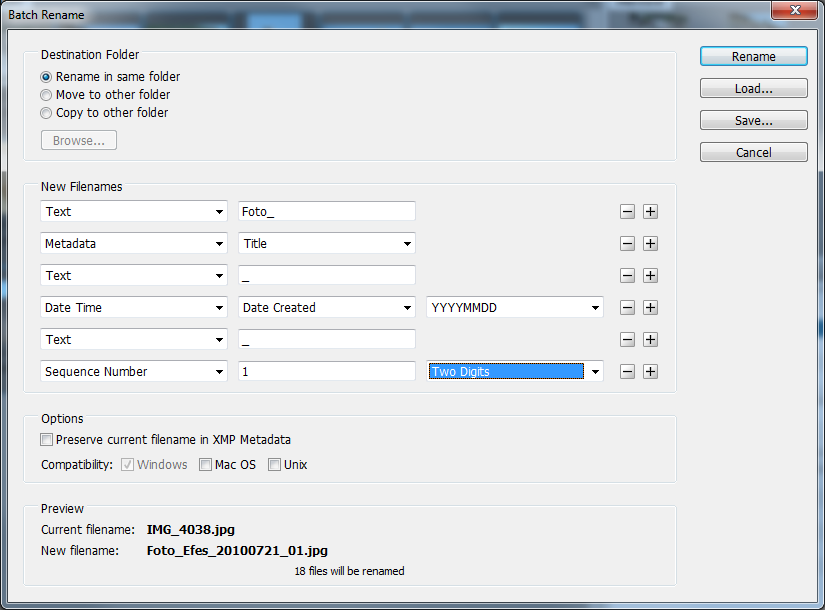
image 10
After clicking on the button "Rename" all files will be renamed.
5. Create a new collection which will contain all photos from your folder and name it "Foto".
You have to select all photos which were extracted in the first task. You can achieve this by pressing the keys CTRL+A or by selecting the command Edit>Select All from the menu.
The you should click on the button "New Collection" (see the image 11) in the Collections panel and answer the question whether the selected photos should be inserted into this new collection. Then you can add the title of this collection.
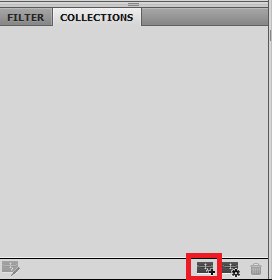
image 11
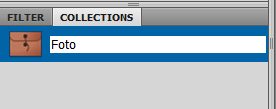
image 12
6. Then create an automatic collection "Selection" which will contain files from your folder with the keyword "Turecko" and width lower than 1000 px.
In this task you will need the tool "New Smart Collection" which can be found in the Collections panel as the button which is highlighted in the following image.
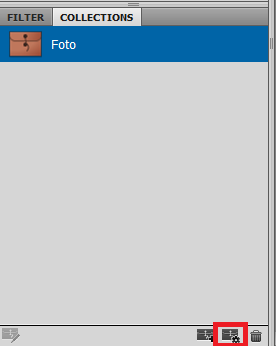
image 13
The following dialog window will appear and you will have to set the conditions for your new collection. Set the path to files (choose the "Browse" item inside the "Look in" list and specify the path to your folder) and then set the condition for photos (in our case "Keywords" > "contains" > "Turkey" and "Width" > "is less than or equal to" > "1000"). Leave the other settings as they are and confirm the dialog by pressing the button "Save".
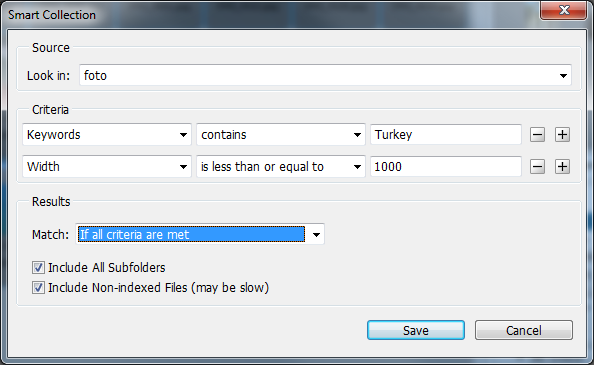
image 14
Then you can specify the name of collection and the selection is finished.
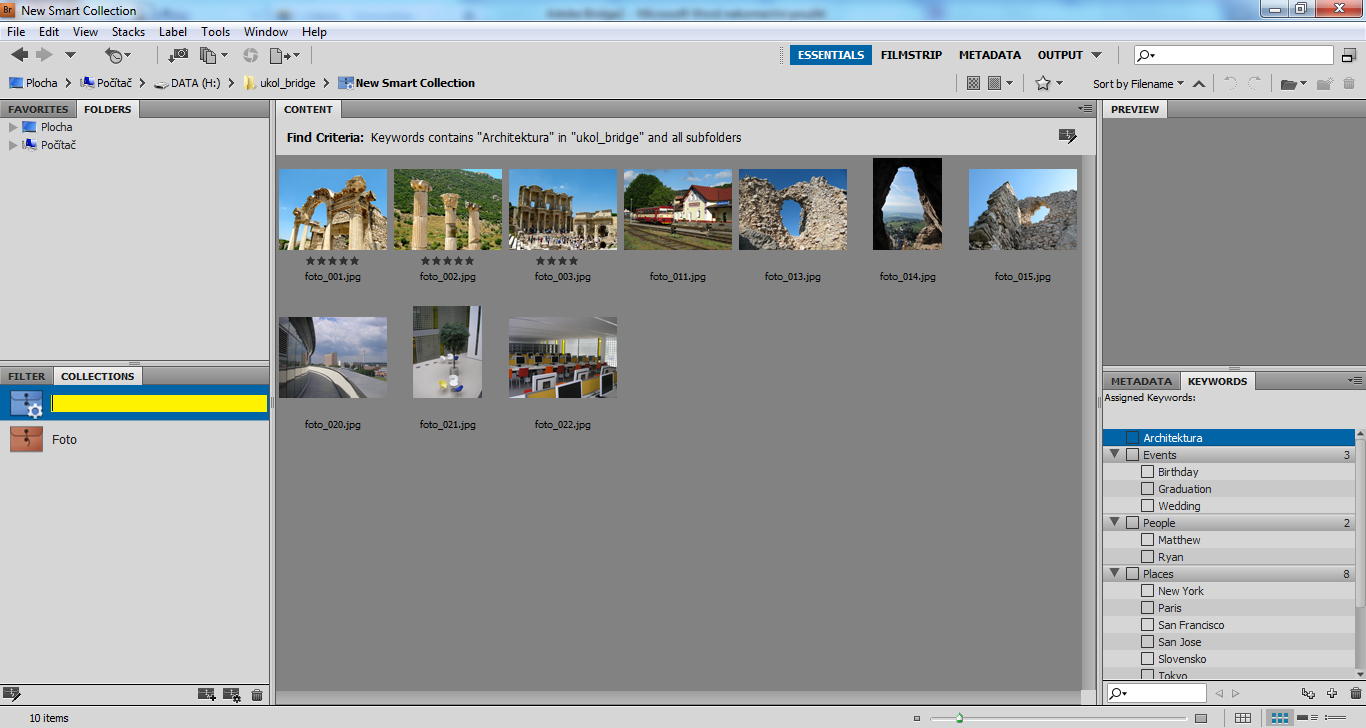
image 15
7. Create a PDF file with layout of 2*2 photos per page from the collection "Selection". There will be photos and the names of files without extensions (font Arial, 15px) in the document. Use black background and white font.
To create a PDF document you should switch into the collection "Selection" which was created in the previous task.
- To create a PDF document you can use the button "Output" (see the image 16) where you can see one command only - "Output to Web or PDF". After selecting this command a side panel will appear and you will be able to use additional settings.
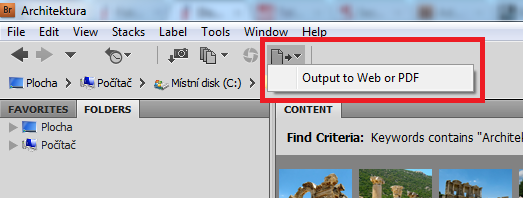
image 16
You can choose a PDF document or a web gallery in the side panel. We will use the PDF document option and the following settings:
- Template: 2*2 Cells
- Turn off all settings in the section "Playback"
- Set black background in the section "Document"
- Turn off displaying the extensions in the section "Overlays" (leave only the file names) and set the required font.
Then you can save the final PDF file using the button "Save ...".
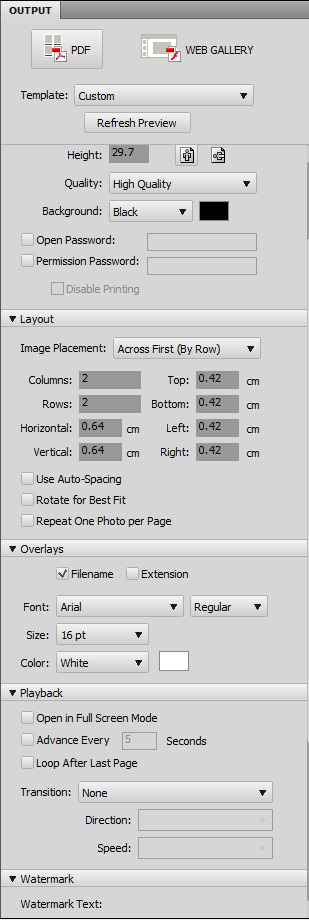
image 17