
Portrait retouching and toning II (part 2)
 Content
of the lesson:
Content
of the lesson:
- RAW Photos Processing
- Skin Retouching
- Eyes Editing (magnification, removing mascara, pupil adjustment)
- Removal of Wrinkles and Imperfections
- The Liquify Tool
- Removing Hair from the Forehead
- Editing Teeth and Lips
- Hair Coloring and Recovery
- Editing Shoulders and Completing the Retouch
The first part of the lesson is available here.
Step 5: The Liquify Tool
The next step is to slightly enlarge the pupils using the Liquify tool. Select everything and copy merged to a new layer. Select the Filter > Liquify tool from the menu and a new window will appear. Activate the Bloat tool (with the icon of an ellipse surrounded by arrows), set the Brush size to 150, Density to 23 and Rate to 51.
Click once or twice in the center of the pupils (make a short click) and let them be enlarged slightly. Confirm by clicking on the OK button.
The last thing to do is sharpening the eyes. Use the Sharpen tool, set a smaller Strength (30 %) and smaller Hardness. Click on the eye several times and let the pupil and iris be sharpened. Pay attention not too sharpen them to much, otherwise you would destroy the area.
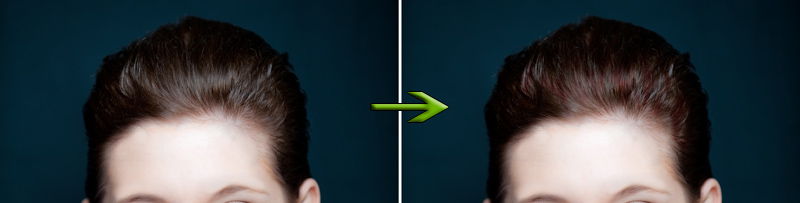
Step 6: Removing Hair from the Forehead
The hair can be removed using the Clone Stamp tool with a higher size, minimal hardness and lower opacity (around 20 %). Set the mode to Lighten. There should be no hair on the forehead after this step.
We can use the same procedure for the eyebrow to stress it. You should experiment because it is not possible to show an ideal values and procedures - this step is quite subjective.
Finally create a new layer, use the Brush tool and raise the eyebrow. Set the mode to Soft Light or Overlay, set a lower Opacity and tune everything using a Mask or a Rubber tool.
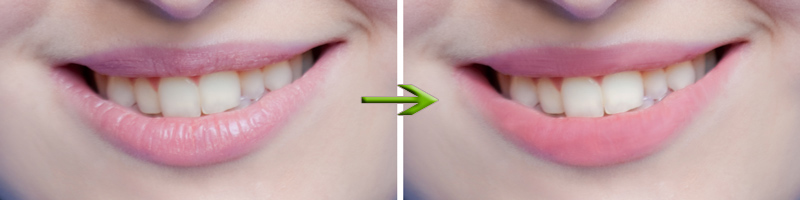
Step 7: Editing Teeth and Lips
The next step is whitening the teeth and correcting the lips.
Select teeth using the Magic Wand and copy them to a new layer. Using the Lighten tool (set the Exposure around 20 %) lighten the teeth as much as possible to look naturally.
The lips can be corrected using the Clone Stamp tool (lower Opacity and Hardness) where we set the mode to Normal. The lips should then look naturally and there should not be any repeating parts after using the Clone Stamp Tool. You can edit the lips not to lose the reflection if you want.
We finish editing the lips by creating a new layer, drawing the shape of the lips using a suitable pink color and setting the blend mode to Soft Light, you can also lower the Opacity. To be able to change the hue add the Hue and Saturation adjustment layer and use a mask for it to change color only of lips and not the color of the whole face.
Step 8: Hair Coloring and Recovery
The hair will look more interesting if we color them (part of them or all of them). Create a new layer and draw strips or other shapes using the Brush tool and experiment with blending mode and opacity until it looks as you wish.
Step 9: Editing Shoulders and Completing the Retouch
The shoulders should not be horizontal; they should be rounded to the bottom to look naturally. We can achieve this effect by selecting a rectangle from the bottom border to the shoulder (see the video) and applying the Edit > Transform > Warp tool. You can move the grid and correct the shape of the shoulders.
The last thing which can be done is narrowing the face. You can achieve it by transforming the whole photo while holding the Alt button to change the width symmetrically. Then you should draw the missing borders using the Clone Stamp tool with a Normal mode.
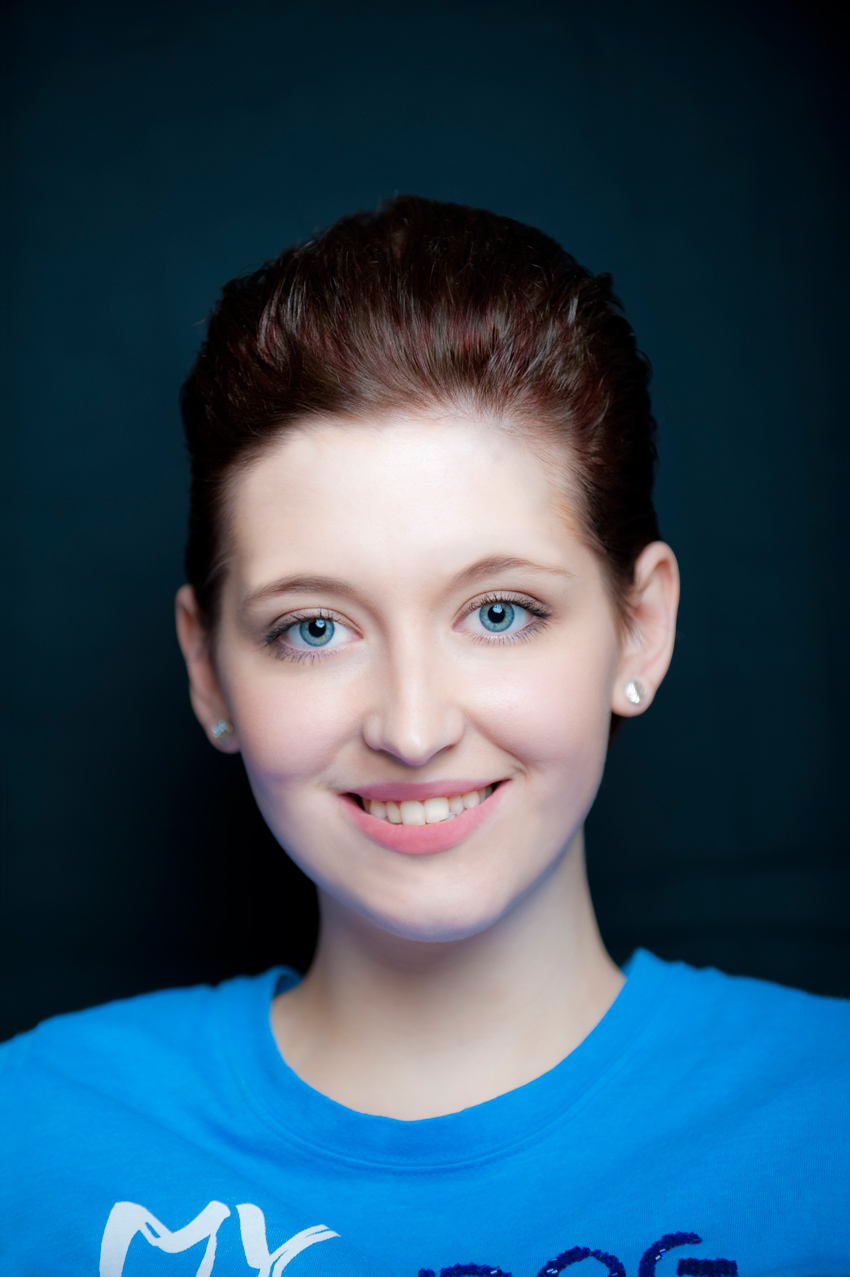
The final photo should look like the following image:
Additional Texts
Questions and Exercises
- Describe shortly the procedure of retouching a photo.
- Where can we use retouching?