
Animation (getting clips to move, key frames)
 Obsah lekce:
- Effect Controls
- Key Frames
- Animation Examples
- Creating an Animation Tndividual Task
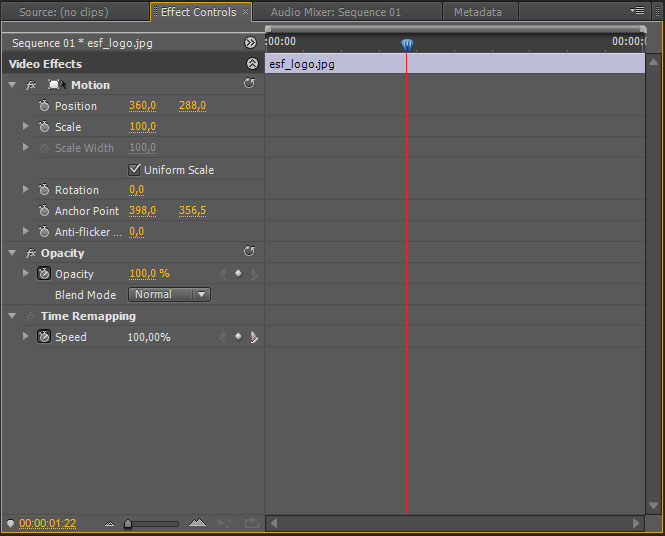
Effect Controls
If we click a media block, a caption, or a transition effect on a timeline, we have a possibility to change time using key frames. Then we mark some of the mentioned parts (click left button of a mouse pointer) a have a look at the Effect Controls which is on the left side of a monitor. There in a basic part we can make changes in movement, transparency, and speed, and also in sound volume in audio. We can do this by using relevant items that we can see there (either by numeral setting or by using scroll bars they are displayed after clicking a small arrow that is at this place where we can see small stopwatch). The possibilities then can be extended by video or audio effects. That means adding them to a clip from Effects panel. Now let us have a look at the motion possibilities. Thanks to setups that may be changed we can achieve object animation.
Effect Controls
Motion
- Position - the change of a position of an object which we can see in the preview
- Scale - this setup changes the size of an object
- Rotation - rotation of an inserted object
Opacity
- Opacity - changes the transparency of an object
Time Remapping
- Speed - it is possible to slow down or speed up a playback of a clip (see Bullet Time Effect)
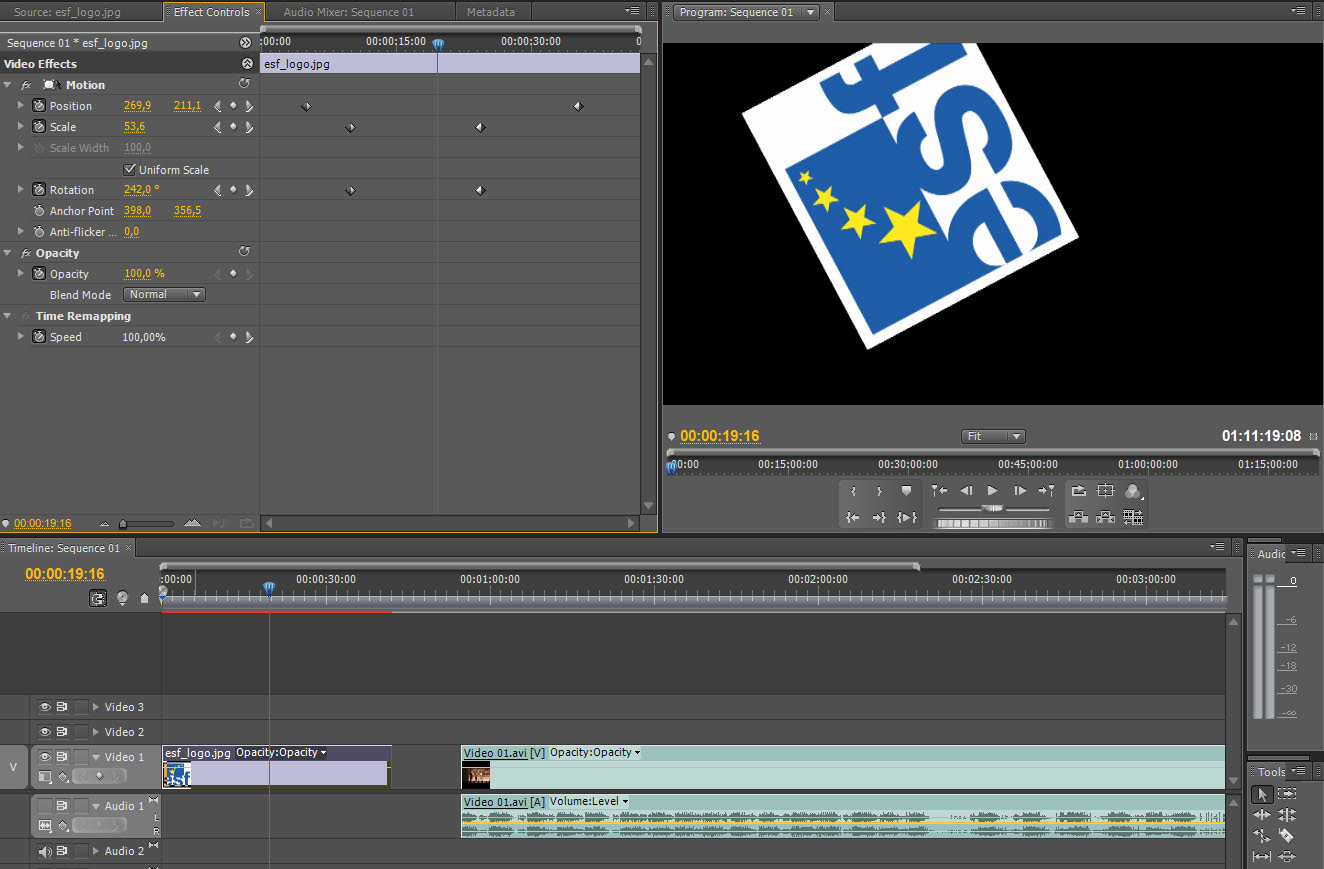
Key Frames
Now we know that thanks to changes of parameters, given modifications are made. We will take a look at how this setup works in combination with key frames. We set up a red scroll bar on a certain place on a timeline. We can this scroll bar and a chosen block of a video in Effect Controls bookmark. Now we can make modifications with the object and its position, angle, size and click Add/Remove Keyframe button. Using this button it is possible to insert a key frame and the program remembers what setup is selected for the given moment. Then we move the red scroll bar to another place and insert another key frame for which we create different setup. If we move the red scroll bar from the first key shot to the other and back, the setup will change continuously. This means it will change infinitely, for example, size and rotation (it depends on what change we made). This change will proceed linearly because the initial setup is like that. If we clicked the key shot using the right mouse pointer, we could change this setup (for example, by using curves that means non-linear changes).
Effect Controls

Extended track on a timeline you can see possibilities of setting up key shots in this place.
Animation Eexamples
An image to practice: esf logo
Position
Procedure
We are going to try an image animation now; to be precise the change its position in time. First we need to save the image and import it into the program. Then we put it on a timeline and we can start. We click on the image on the timeline and display the setup in Effects Control panel. Here we set up the picture using appropriate items so that it is in the middle of the left part in the way we can see it in the sample clip before it starts moving. Then we place the red cursor somewhere to the beginning of the block of a video (not exactly at the beginning) and at the Position setup we click Add/Remove Keyframe. Now the key frame with this setup is put in the place of the red cursor. Then we place the red cursor somewhere at the end of the video block (again not at the exact end) and put another shot and change the Position setup while not moving the cursor. We change the setup so that the image appears on the other side. And animation is finished. If we move the red cursor across these key frames in the given video block now, the image will move from the one side to the other.
Scale
Procedure
The procedure of creating this effect is very similar to the previous one. The only difference is that we will set up the changing size of the image. To start an image has to be placed to the centre and make it smaller. When the animation is replayed, it can be seen at its beginning. Then we work with the red cursor again. Place the red cursor somewhere to the beginning of a block of the video, then set up the key frame and then set up the other key frame at the end of a block of the video and adjust the Scale option. Doing this we change the size by moving the cursor. To revise: to obtain a change in the course of time, we use key frames with appropriate values. The setting without key frames is only static that means the size will be the same in the whole video. When using key frames, the settings and also the size of a frame change in the course of time. This happens between the key frames if they have different values.
Rotation
Procedure
The procedure is again very similar to the previous ones. Variable that influences rotation of a frame is changed this time. Place the frame into its initial position in the centre, place the red cursor at the beginning of the block of a video and then place the key frame. Then move the red cursor to the end of the block of a video, insert another key frame and make the rotation of 360¯.
Opacity
Procedure
A variable that influences the opacity of a frame is another variable to create subsequent animation. The beginning is similar as in the previous procedures. Put a frame on a required place, set the red cursor and insert a key frame. Then move the red cursor not to the end but to the centre. To be precise place the red cursor slightly to the left of the centre and insert another key frame. Set up the opacity of this key frame to 0%. Then move the cursor a bit after the centre and insert another key frame with the same setting. We put these two key frames almost at the middle of a video to make these frame disappear. When the red cursor reaches the place of the second frame with the opacity 0%, the frame disappears. The red cursor moves on. To keep the frame invisible for a while we insert another key frame with the same setting next to. From that third frame the frame can again be made visible. This is made by inserting the fourth frame at the end of the block of a video with Opacity setting 100%.
Creating an Animation Individual Task
Task
Create an animation in which there will be time changes in Position, Scale, Rotation, and Opacity.
Source image to practice: esf logo
Result
Procedure
Use a combination of the previous procedures.
Questions
- Where and in how you can set opacity of a block of a video inserted on the timeline?
- What are key frames and what are they used for?
- Explain the way of animating an image.