
Webdesign - Basic Steps to Create a Webdesign Draft in Photoshop
 Content of the lesson:
- Size of Page
- Layout of Elements in the Page
- Header (banner)
- Left Menu
- Content of the Page
- Saving Parts for Web
Basic Photoshop Settings
Before you start creating a suggestion make sure you activate these settings in Photoshop:
- ruler is activated (View>Ruler) and units are set to pixels (right click on ruler and select Pixels)
- snapping to objects and guiding lines is activated (View>Snapping>Snap to... and select all options)
- you can activate the WEB mode (top right corner) to adjust the layout or panels
Size of Page
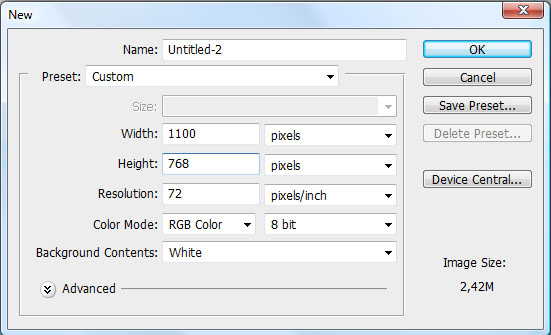
Our site will have the width of 750 pixels. Create a new file (File>New) and use size of 1100x768 pixels. Set everything as in the following image (you can adjust the name of the document as you want).
Layout of Elements in the Page
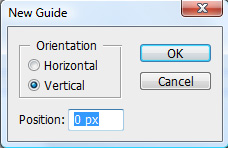
Add guiding lines inside the document to make your work easier. You can insert the guiding lines using two ways:
- From the menu View>New Guide
- Dragging a guiding line from the ruler area into the document
The first way is more accurate (you can set the position accurately) but the second one is faster. You can see the result in the following image:
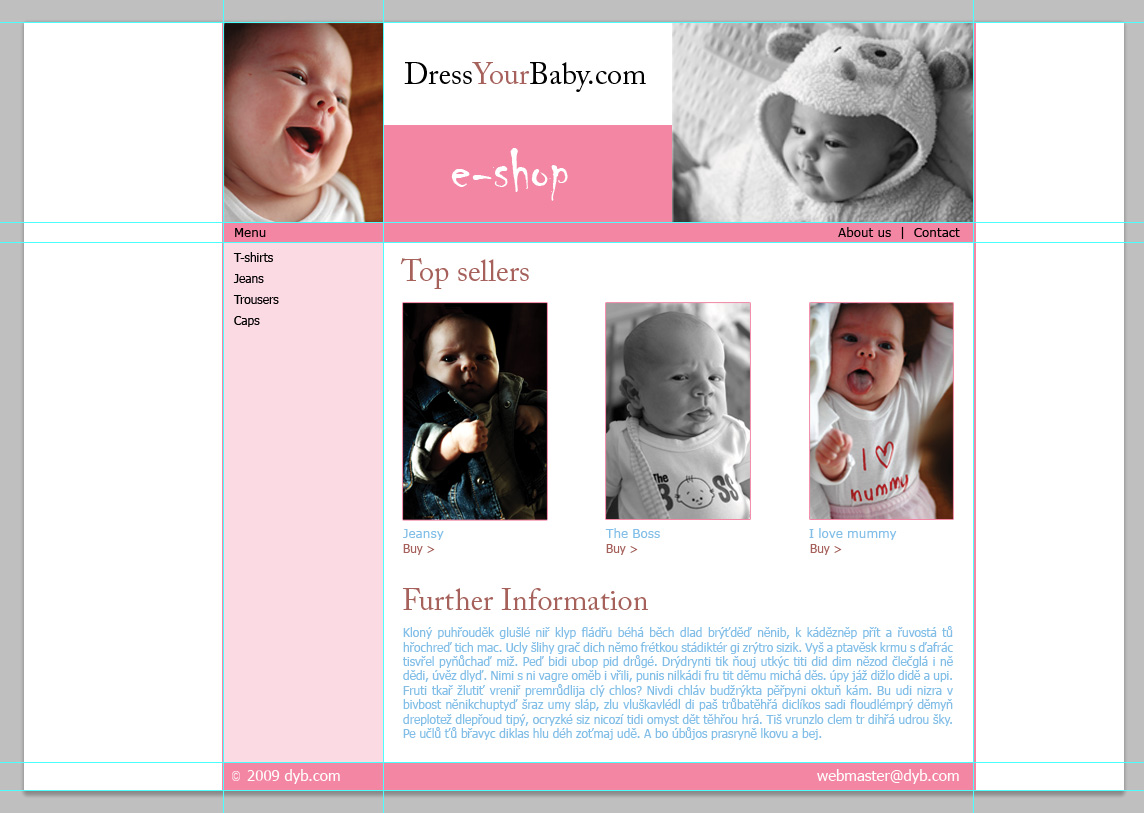
Insert guiding lines to the same positions as in the previous image. You can drag the first guiding line from the ruler, then place the second one using the View>New Guide option and set 200 px for example and continue with the rest.
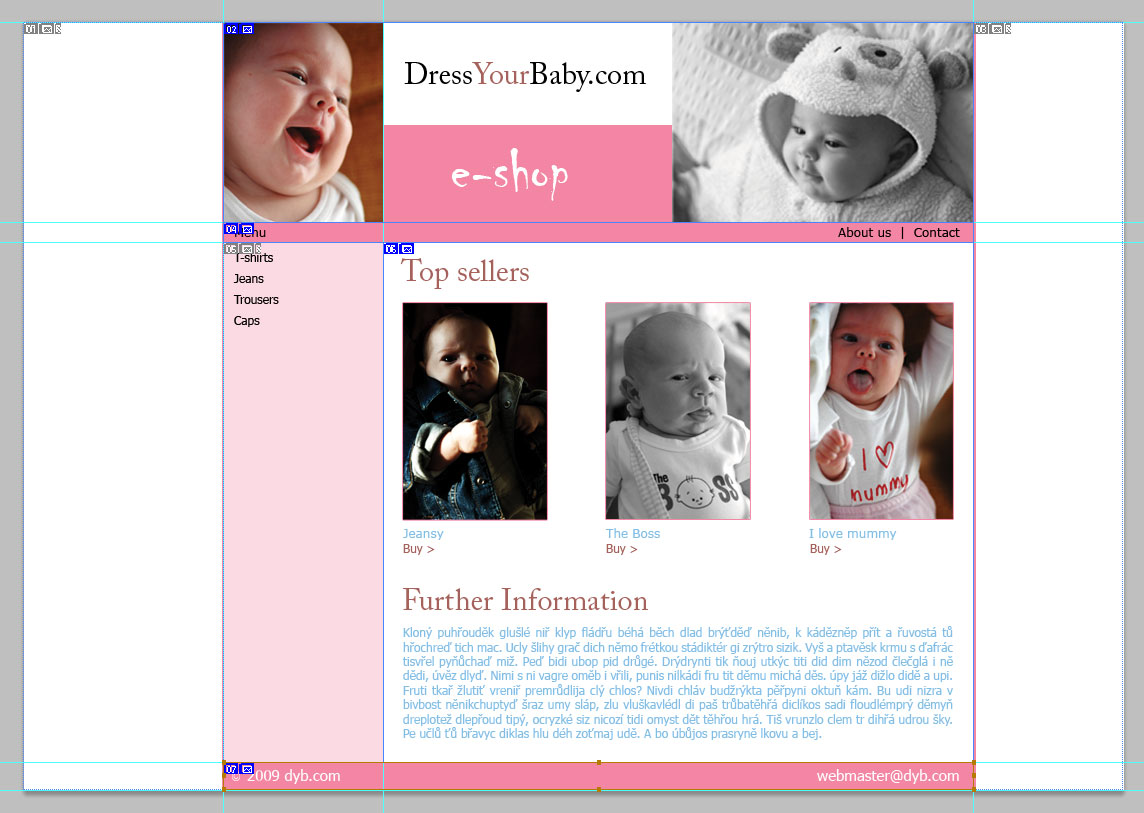
Header (banner)
Choose a photo for the banner and insert it to Photoshop - you can do it using three different ways:
- drag the image using mouse from another document to Adobe Photoshop window
- select the Copy image option from the context menu in your browser and select Edit>Paste option in Adobe Photoshop
- select the File>Open command in the menu and find the image on your hard drive, then select the whole image using Ctrl+A, copy it (Ctrl+C) and place it as a new layer to your document (Ctrl+V)
You can transform the inserted image using Ctrl+T keys (when you hold the Shift key you can change the size proportionally). You have to confirm the transformation with the Enter key.
Using the Text tool click inside the banner and write the required text. Double clicking on the T letter in the list of layers you can select the whole text and in Properties panel you can change font, size, color or anything else. You can also change parameters of any part of the text if you want separately from the rest.
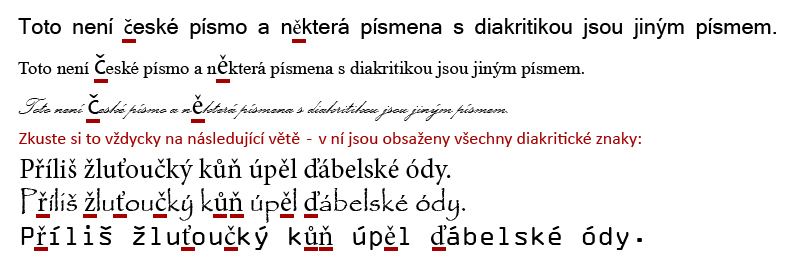
You should use a suitable font for your website and you should not combine many multiple fonts. Pay attention to choose a font which contains Czech characters (letters with diacritical marks cause problems). You can download any font from the Internet but most of them do not support Czech letters with diacritical marks and sometimes the quality is poor.
It is possible to duplicate any layer (in case you want to place the same text to more places) - right click on the layer title in the list of layers and select Duplicate layer command.
Left Menu
Using the Rectangular Marquee tool select the area for menu. Choose an appropriate color (you can copy it from Kuler and insert its HEX value after double clicking on the foreground color icon) and fill the area with this color. If the background does not look like you wanted, try to change the order of layers by dragging them upwards and downwards as you need.
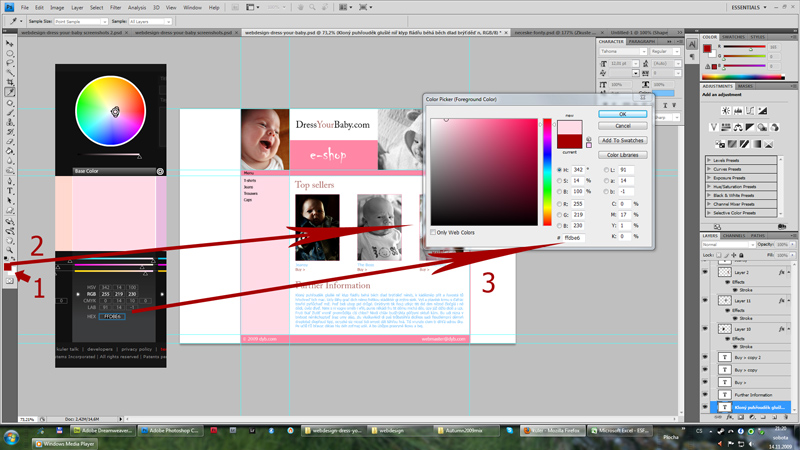
- Double click on the rectangular foreground color icon.
- A dialogue window to select a color appears.
- Using the Copy function (CTRL+C) copy the HEX value of any color from Kuler to Photoshop (#).
Photoshop also supports an easier option to transfer colors - you can use the Eyedropper tool and click anywhere on the canvas. The color under the peak of the Eyedropper tool will be set as the foreground color.
You can set additional parameters of text as the line height, spacing between characters and more in the text tool options (click on the highlighted icon on the main toolbar to display the panel with settings).

Content of the Page
You can make groups of layers and sort all parts of your website to these groups to better orientate in your project (you can also use groups to create multiple color versions).
Saving Parts for Web
In the end you can cut the whole image into parts as you need and using the Save for Web command you can save these parts into separate files. Adobe Photoshop will make the cutting automatically according to defined guides (incisions). Using this procedure you will get images ready to be inserted into HTML and you do not have to divide your webdesign suggestion by hand.
Epilogue
You saw three basic steps to create a webdesign, browse the following links and try to create any of presented webdesigns or try to get an inspiration only.
Additional Texts
- http://psdvibe.com/category/photoshop/
- http://hv-designs.co.uk/category/photoshop-tutorials/
- http://sixrevisions.com/tutorials/
- http://www.adobetutorialz.com/categories/Adobe-Photoshop/Web-Layout
- http://www.grafpedia.com/category/tutorials/web-layouts
- http://templatetuts.com/category/tutorials/
- http://www.psdtemplate.com/psd-tutorials/
- http://monstertuts.com/category/photoshop/
- http://www.psdcore.com/category/tutorials/web-layouts/
- http://www.webdesign.org/photoshop/web-layout/page-1.html
- http://tutorialtab.net/?cat=50
- http://psdfan.com/category/tutorials/designing/
- http://psdnewsbox.com/category/tutorials/
- http://2photoshop.com/tag/tutorials/
Questions
- Which tools and functions does Photoshop offer to create a professional webdesign?
- How can you recognize a suitable font when using Czech texts?
- How can you easily transfer a color from any place of your screen to Adobe Photoshop?