
PDF Packets (Combined PDF, Binders)
 Content of the lesson:
- Combined PDF
- Binders (PDF Portfolio)
- Secret Information
- Redacting
Combined PDF
Imagine a situation when you need to send several documents about a project to someone. We will consider one article from Word, financial calculations from Excel, several image attachments - scanned sheets, etc. This requires sending many files and there is a risk that someone will not be able to open something (he will not have the required software). You can prevent this situation with Adobe Acrobat using a simple procedure.
Prepare several different documents and images to be able to try this procedure.
- File 1 (Word) - download
- File 2 (Excel) - download
- File 3 (JPG) - download
- File 4 (InDesign) - download
- File 5 (HTML) - download
- File 6 (FLV) - download
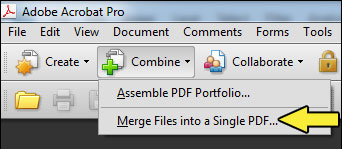
You can copy these documents in one directory to combine them together. To be able to begin the combination process, you should click on the "Combine" icon and select "Merge Files into a Single PDF..." command.
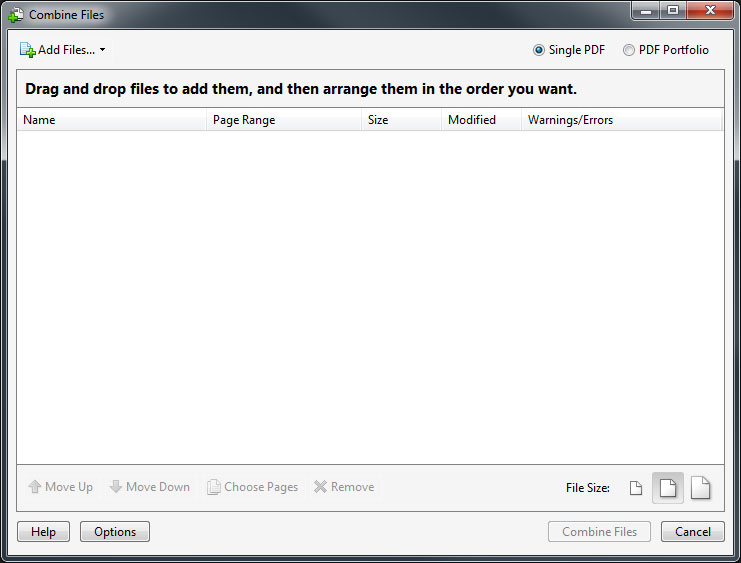
Then you will see a dialogue window where you will make the combination. There is a possibility to switch between Single PDF and PDF Portfolio in the top right corner. Select Single PDF because we want to create one final PDF file.
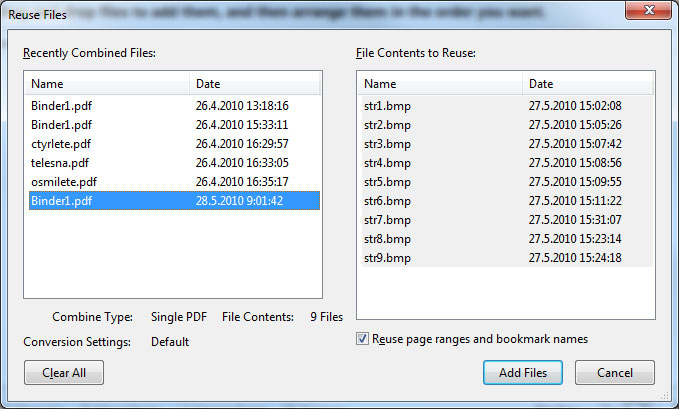
Take a look at the button "Add Files". After clicking on it you can see more options to add files differently inside the list. You can use already combined PDF files (see the following image) or use an opened document.
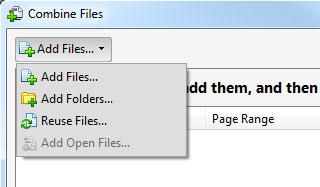
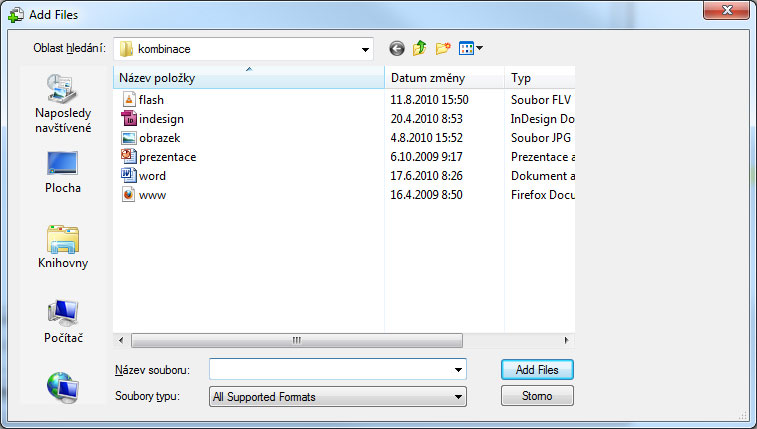
We will try the first option and select prepared files. You only have to find the folder with your files, select all of them and click on "Add Files" button. All files will be added to the list.
Now your files for combination are prepared. If you look at the information in the dialogue window, you can see file names in the column "Name", range of pages which will be used for combination in the column "Page Range", then you can see the column "Size" with information about the size of file and column "Modified" which informs you about the date of last modification. The last column is called "Warnings/Errors" and is empty. Any warnings or errors which occur during the combination process will be written here.
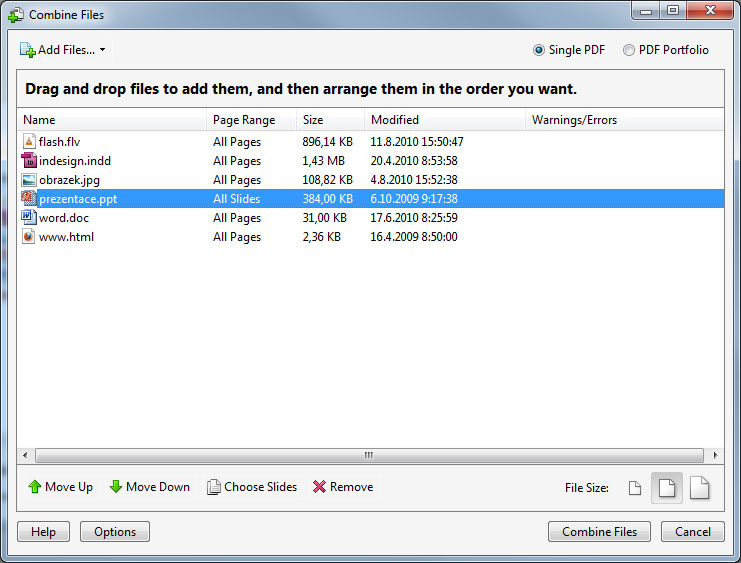
You can change order of inserted files as you want - that means you should place them in the order you want them to be merged together in the final document. You can use the buttons "Move Up" and "Move Down" for this purpose. You only have to select a file and move it using those buttons. The button "Choose Slides" can be used to choose pages which will be combined (for example from Word). The Word file has 10 pages so you can choose the first 3 for example. You can also choose the first 5 pages, place another document behind them and place the rest of Word article behind it. The button "Remove" can be used for removing any file from the list - select the file and click on the button.

- Move Up - move the file upwards
- Move Down - move the file downwards
- Choose Pages - choose which pages should be used
- Remove - remove the file from the list
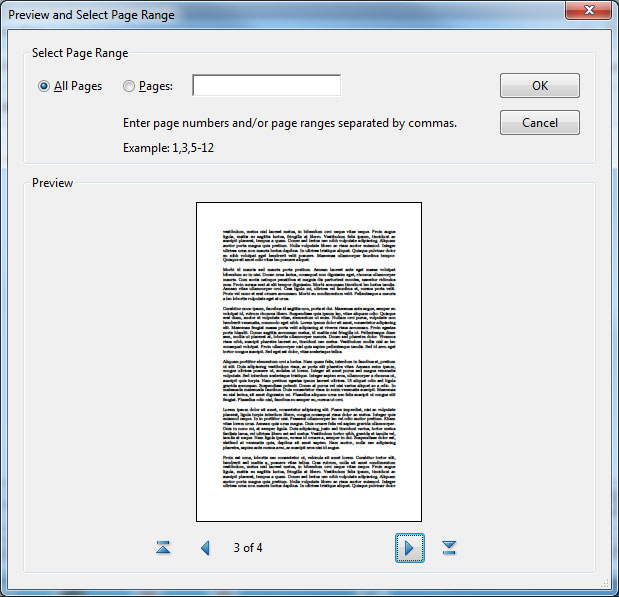
You can see the dialogue window for choosing pages from file in the next image. You can leave all pages, select concrete pages (separate them by commas) or a range of pages. When choosing from a PDF file you can see a preview and list through pages in the bottom part.
Result
- The final document (combined PDF) - download
Binders (PDF Portfolio)
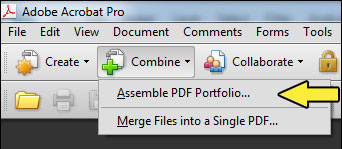
Binders are similar to combined PDF files. They have a special appearance and allow you to create a structure of directories from imported files. To be able to create a binder (portfolio in other words) you have to click on "Combine" and set the command "Assemble PDF Portfolio...".
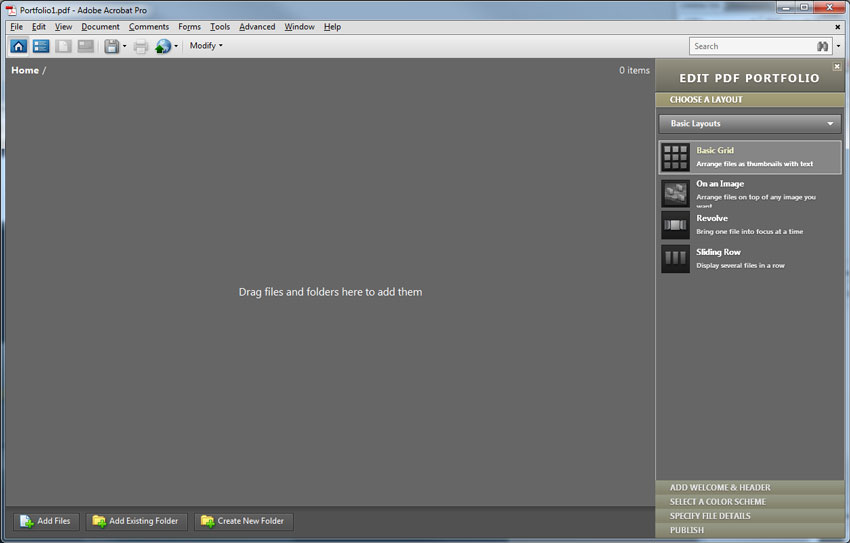
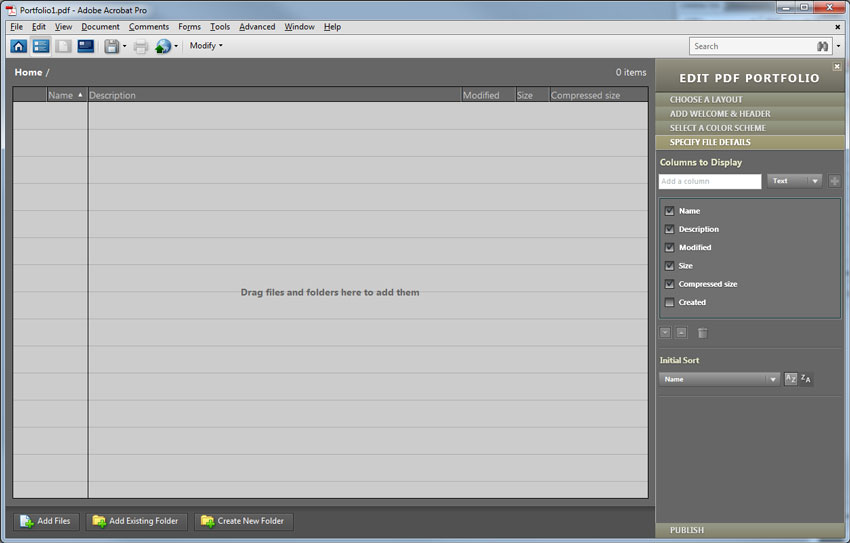
A new portfolio opens. You can see that new icons appear in the upper part - "Go Home to navigate through file visually" (icon of house) a more. We will talk about them later. Then you can see a large area with title "Drag files and folders here to add them". You will create the portfolio here, concretely place different files, create folders and divide those files into them. There are buttons "Add Files", "Add Existing Folder" and "Create New Folder" in the upper part. These buttons can be used for adding files (you can drag files and drop them into the area of portfolio), then you can add existing folders or create new folders to store your files. There is a panel to adjust the portfolio in the right part. This panel might not be visible but you can display it anytime to edit your portfolio.
You can switch your portfolio to mode for editing and back.

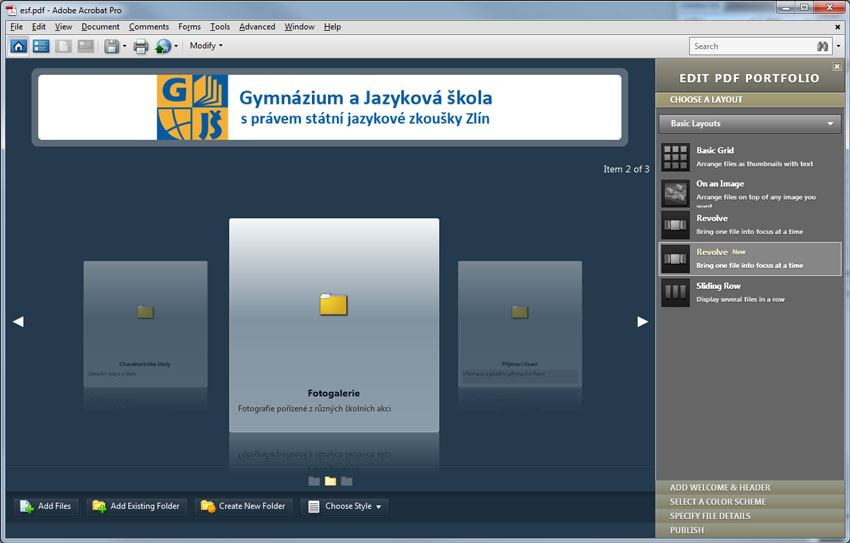
You can see a completed portfolio below this text. One of the predefined appearances was used - this appearance automatically created folders which are rotated after clicking on arrows (for example "Charakteristika školy" which is in the background will replace the folder "Fotogalerie". This appearance also tries to improve the impression by mirroring folders. There is a logo in the upper part which was inserted into this portfolio. You can choose logo, title or combination and then set the portfolio to display intro screen when opened. Setting an intro screen will be explained later.
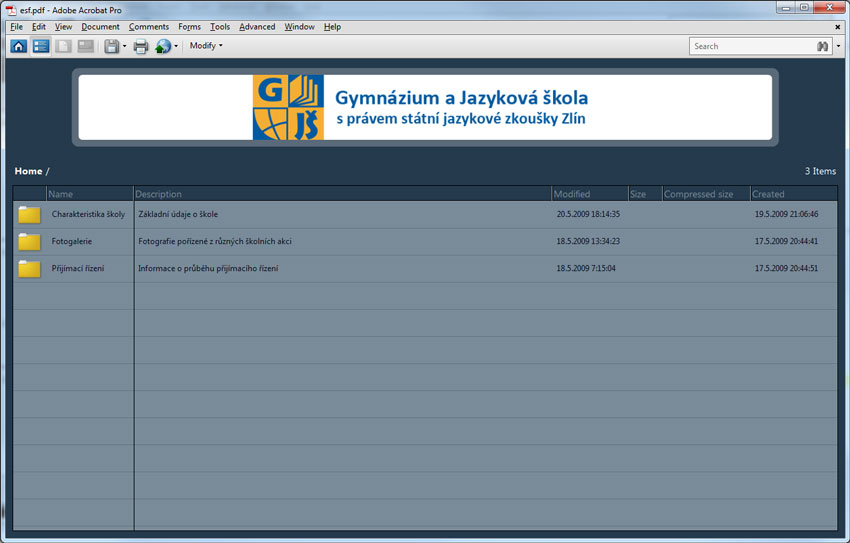
Get back to the icons in the upper part of our workspace. You saw the first one - icon of house. Try to click on the second icon (see the image). This icon switches the workspace to a structure where you can see names of folders and files in the first column, a column with description and other information. Using the rest of icons you can save portfolio, publish or print it and more.

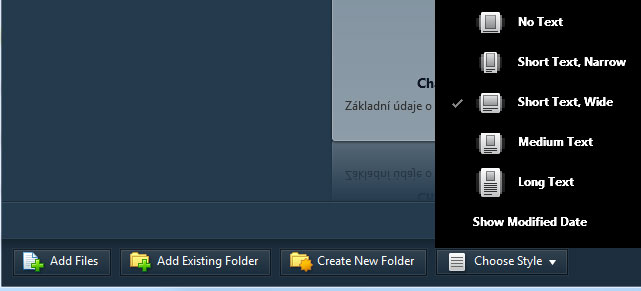
The following image illustrates the bottom part where buttons for adding files and folders are available. There is one more option "Choose Style" which is not accessible everytime - according to selected Layout. This option can adjust the appearance of portfolio.
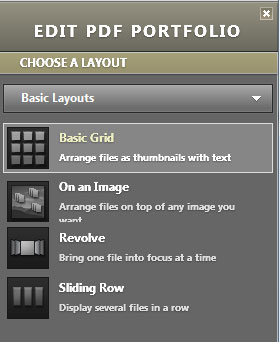
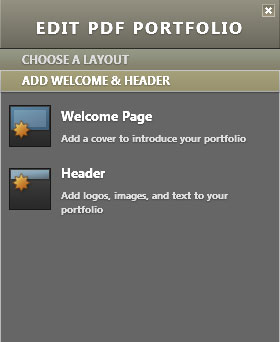
Now we will focus on the right side of the workspace where you can see tools for editing portfolio. Tools are divided according to their topics. You can click on a description and the appropriate panel will be opened. After this you will be able to use the options inside this panel. The item "Basic Layouts" offers you to set the appearance of portfolio - the way of displaying portfolio to others after publishing and layout of folders and documents. The second bookmark "Add welcome & Header" allows you to choose an intro screen which will be displayed when opening portfolio (this can be a message). You can insert a logo to the header as in the previous sample.
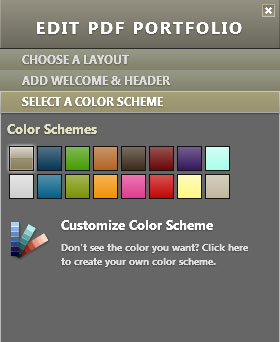
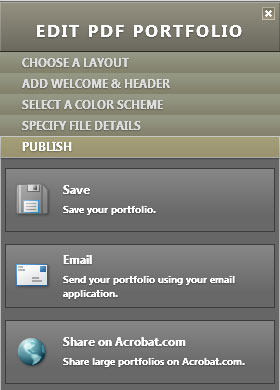
Other options are available in the panel "Select a color scheme" where you can set colors used for the portfolio. The next bookmark can be skipped but you should use the bookmark "Publish". This can be used for publishing a completed portfolio - you can save it, send by e-mail or share it via Acrobat server.
There is one more bookmark "Specify File Details". You can modify the order or items, add or remove details about title, description, size, ... You can also add new items. These changes are more significant when you switch mode using the icons from the upper part (from the icon of house to the next one, information is then displayed in columns).
Result
- The final document (PDF portfolio) - download
Individual Task
Create your own portfolio of your documents from this seminar. Add a header and divide your files to folders.
Secret Information
You can get to situation when you want to use (send, publish) document which contains secret information. You do not want to display this information to anybody else so you have to remove it. When speaking about printed or electronic information, removing such information can be a difficult task. The more documents you have the more difficult is it to remove all secret information. In case of a printed document, you can stick another paper over this information and copy the paper or you can delete it by a rubber. When working with an electronic document you have to deal with metadata which identifies the author of each document.
Removing Secret Information
Using Acrobat you can simplify the removing process. There is a tool called redaction (censorship). Whether you work with scanned PDF files or with electronic documents which can be converted to PDF, the PDF format will be the basic document in this case to explain the process of removing secret data.
Checking Hidden Content in PDF
Before redacting you should not forget about these details:
- Metadata - Metadata involves information about the document and its content as the name of author, keywords or information about copyright which can be used by searching programs. If you want to display metadata, select File > Properties.
- Linked files - You can add any attachment to your PDF file. In case you want to display all attachments, select View > Navigation panels > Attachments.
- Annotations and Notes - This part involves all notes added to PDF using the tools for notes and selection and also all files inserted as notes. If you want to display all notes, select View > Navigation panels > Notes.
- Fields of forms - This part involves fields of forms (also signatures) and all actions and computations connected to forms. If you remove this item, all data from forms will be merged with the content of the document and noone will be able to edit these texts or to sign your forms.
- Hidden text on pages - This item includes transparent text inside PDF, text hidden by other content or text with the same color as the background. If you want to view it, click on Preview. After clicking on any of buttons with double arrow you can get to the page with hidden text and choose the option to display hidden, visible or all texts.
- Hidden layers - PDF files can contain more layers which can be visible of hidden. When removing these layers from PDF, all remaining layers are merged. If you want to display layers, select View > Navigation panels > Layers.
- Bookmarks - Bookmarks are links with a representative text which are used to open several pages in PDF. If you want to display bookmarks, select View > Navigation panels > Bookmarks.
- Inserted searching index - This index makes searching faster. If you want to find out whether your PDF file contains this index, select More Options > Document processing > Managing inserted index. After removing this index, the size of PDF will be reduced but the time for searching will be increased.
- Removed hidden content or pages and images - PDF files sometimes store already removed content which is not visible - for example cropped or removed images.
source: Help for Adobe Acrobat 9 Pro
To find out this information use the function "Examine Document..."
Redacting - Properties
Example of tools for redacting.

Panel for redaction (the way to display it is described in this lesson)
Before starting the redaction we can take a look at the properties.
The following dialogue window allows you to cover any content using the selected color or text. If you want to use text, check the option "Use Overlay Text" and write a text like "CENSORED".
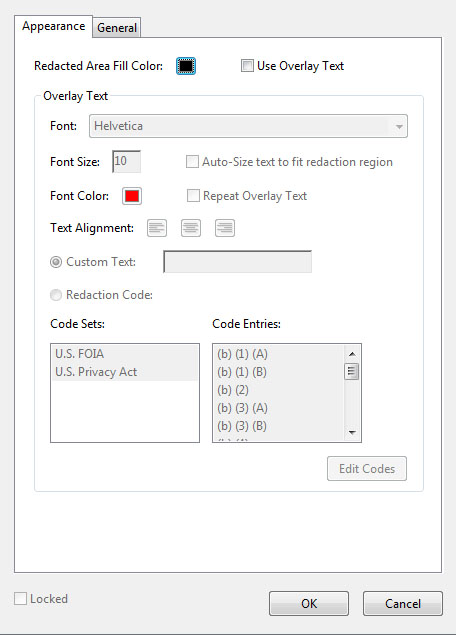
Properties of redaction
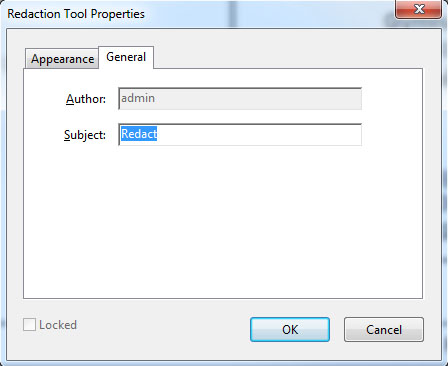
Properties of redaction
Redacting – Individual Task 1
Task
Replace the following information in this document.
Document for practicing: sample 1
- removing advertisement - use "no color" without text
- removing the word "Peugeot" - use yellow color, text "cenzura" (red color, adjust text, align to center)
- removing cars 10, 19, and 34 - background color "no color", text "cenzura"
Procedure
- removing advertisement - Inside the properties panel set the color to "no color", do not add any text and uncheck the option "Use Overlay Text". Use the button "Mark for Redaction" and the you can use the cursor as a tool for redacting. Select text or area (in case of images) to choose the area for redacting. When everything is selected use the button "Apply Redactions" and all changes will be applied.
- removing the word "Peugeot" - Adjust the background color in properties, choose font and write "cenzura" inside the textbox. Change the color and properties of the text. Once you have everything prepared, use the button "Search and Redact". A new dialogue window will appear to be able to find and redact. We want to search inside the current document so choose the option "In the current document" and we want to search for a single word so choose "Single word or phrase". Write the word "Peugeot" to the textbox and click on "Search and Redact".
- removing cars 10, 19 and 34 - Adjust all needed details inside the properties panel according to the assignment and use the same button as in the first case to display the whole menu. Then select the button "Mark page Range". This button allows us to redact the whole page (the current page or any other page).
Redacting – Individual Task 2
Task
Replace the following information in this document.
Document for practicing: sample 2
- removing all e-mails - use red color and black text "cenzura"
- removing the following pages: 9, 10, 11 - use black color and white text "cenzura"
Procedure
- removing all e-mails - At first you have to adjust all parameters as background color and text color. Do not forget to write "cenzura" in the textbox. Now you want to search for all emails so click on the button "Search and Redact", set searching only in the current document and select "Patterns". If you select this option, a new list will appear. You can find an option to find e-mail addresses inside the document. Then you only have to click on "Search and Redact" and the list of e-mail addresses will appear. Choose "Check All" and then click on "Mark Checked Results for Redaction". Using this tool every address inside the document will be marked. Then you only have to apply the redactions.
- removing the following pages: 9, 10, 11 - this is very similar to the previous task - you have to adjust properties properly and then use the same procedure to create redaction of these pages.
Redacting – Individual Task 3
Task
Replace the following information in this document.
Document for practicing:
sample 3
Document for practicing:
sample 3 - attachment
- removing poisonous mushrooms - use red color and text "poisonous"
Procedure
- removing poisonous mushrooms - Open the list of mushrooms which is available inside the sample 3. There are eatable mushrooms as well as poisonous mushrooms. All these are sorted alphabetically and are shuffled together. You do not want to make a complex search for each mushroom and check whether it is poisonous or no. We are going to use a much quicker procedure. Do not forget to adjust the properties of redaction according to the assignment. Click on the button "Search and Redact". We want to search inside the current document. Choose the option "Multiple words or phrase" and click on "Select words...". You could write all poisonous mushrooms here and then apply the redaction. However, you can import the file with poisonous mushrooms. Click on the button "Import..." and choose the file with their list. Poisonous mushrooms will be added to the list and you can confirm the dialogue window by pressing the "OK" button - after this all poisonous mushrooms will be automatically selected. Then you have to apply the redactions.
Redacting – Individual Task 4
Replace the following information in this document.
Document for practicing: individual task
- removing all e-mails - use red color and black text "cenzura"
- removing the following pages: 9, 10, 11 - use black color and white text "cenzura"
Questions
- Why would you want to use a combined PDF?
- Show an example of creating a combined PDF.
- Why would you want to create a PDF portfolio?
- Show how to begin creating a PDF portfolio.
- Set the header to contain your name inside a PDF portfolio.
- How can you change the color scheme of PDF portfolio?