
Keying, Keying in Practice
 Content of the lesson:
- Keying – Demonstration
- Keying – Explanation
- Keying – Individual Work
Keying – Demonstration
Keying – Explanation
We discussed keying in one of the lessons of Adobe Premiere program earlier and the technology was described in there. The keying will be tried also in the Adobe After Effects and we will find out what are the differences it brings in comparison with other editing programs.
To be able to start working we have to create a new project and a new composition. Then we import the video prepared for practice. As soon as we have done this, we can start.
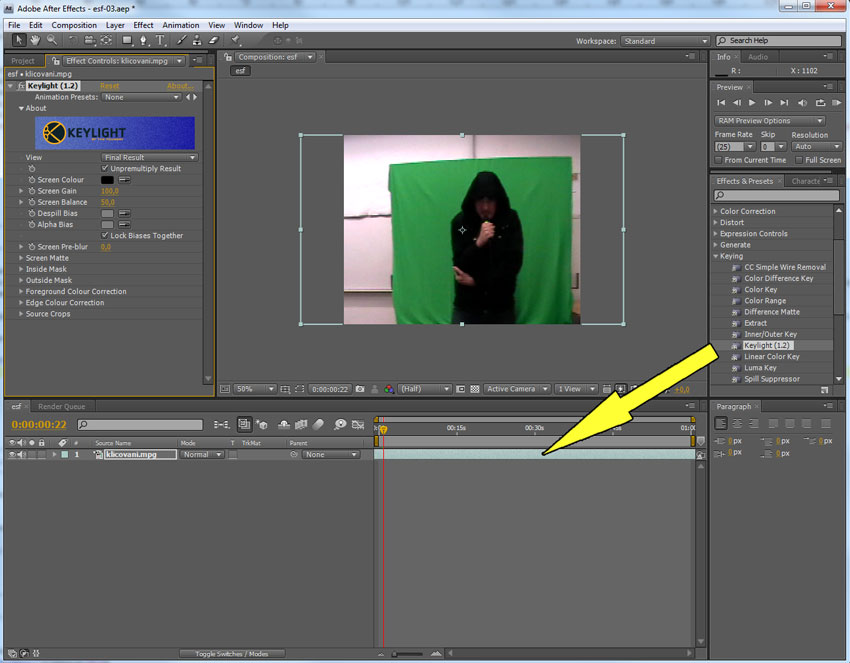
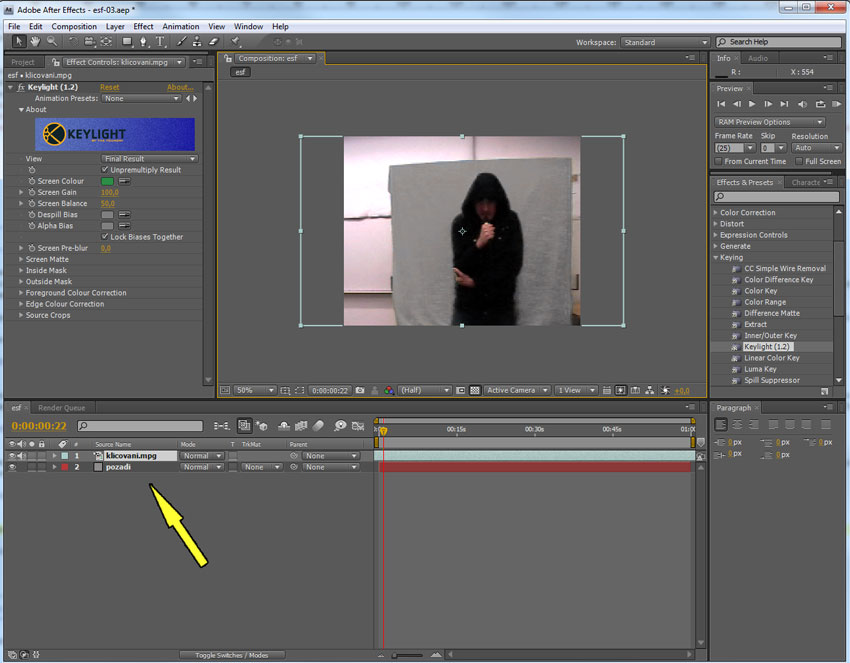
Insert the prepared video onto the timeline and choose “Keylight” (1.2) in section “Keying” in the “Effects & Presets” menu. Insert this effect into the video on the timeline. And now we are prepared to do keying. We can try different settings of this effect that enables us to take away a certain colour from a scene so that the area is transparent instead. By this way we can unhide the layer beneath and create interesting scenes in composition.
Preparation for keying
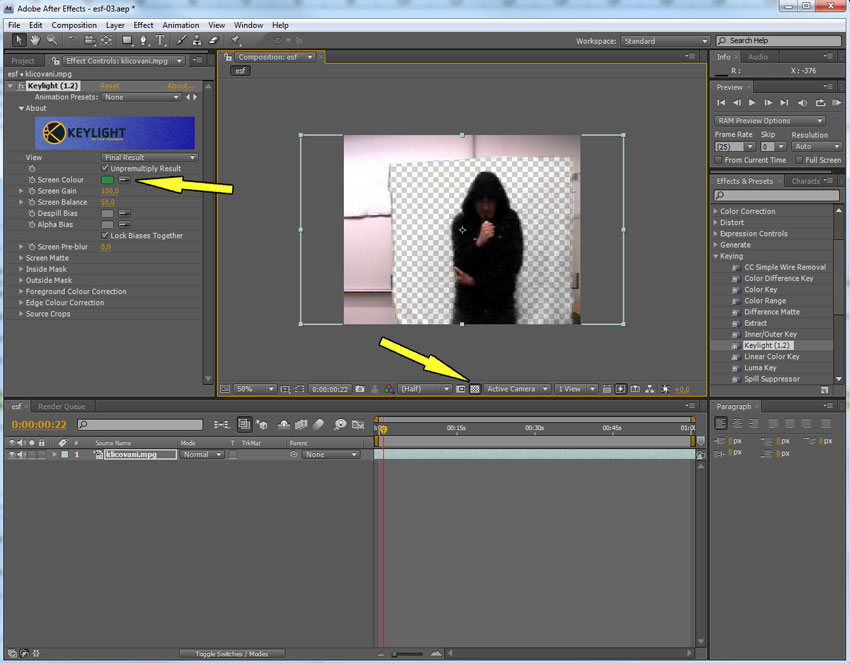
Choose the green screen in the shot by the eyedropper in “Screen Color” item. By doing this we tell the effect which colour we want it to remove/make transparent. As there is not any other layer on the timeline yet, the transparent area is black. To make sure the background is removed, we can click the “Toggle Transparency Grid” button.
Removing the green field, making it transparent
Now we continue with inserting another layer onto the timeline. We can do this by menu where we choose “Layer” item and “New”. There we choose “Solid...”. We can also get the same menu by clicking the right mouse button into the area of the timeline.
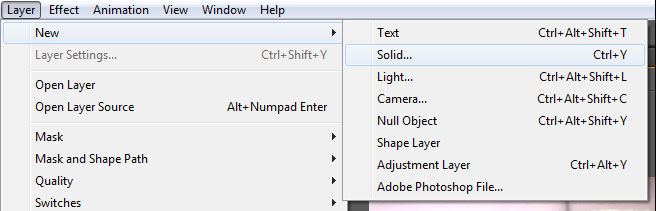
The menu for inserting another layer onto the timeline
After choosing “Solid...” a dialog box with a setting of the object appears (we name this object and choose the greyish colour for it) and by confirming it we insert it onto the timeline as another layer of solid type. It will appear as a grey field over the whole scene.
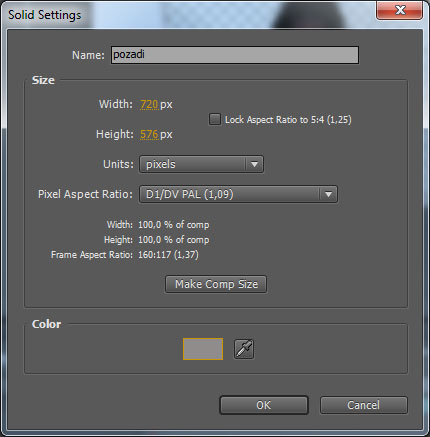
“Solid...” parameters
As soon as this layer is inserted on the timeline we need to set the right order of the layers. The first layer will be the one with keying field and the other layer will be the grey one. If we preview what the keying process looks like, we find out that its quality is poor around the figure and that there is strong disturbance in the area. This is connected with further settings of the added keying effect. But let`s remove the unwanted parts of the scene before the explanation how to improve the appearance. We use masking effect to do it.
Layers in the project and a demonstration of the grey field in the area of the keying screen display
Masking effect is discussed in one of our previous chapters. To revise, there is a fast procedure how to get the right result. Choose “Pen Tool” and click four times around the keying screen so that you get a square inside which there is a figure in front of the keying field. This will trim other parts of the scene. After switching off the contours of the mask by “Toggle Mask and Shape Path Visibility” button, it will look like the figure is in front of the grey field only. But we can see defects in the form of disturbance and shapes of the clamped green screen.
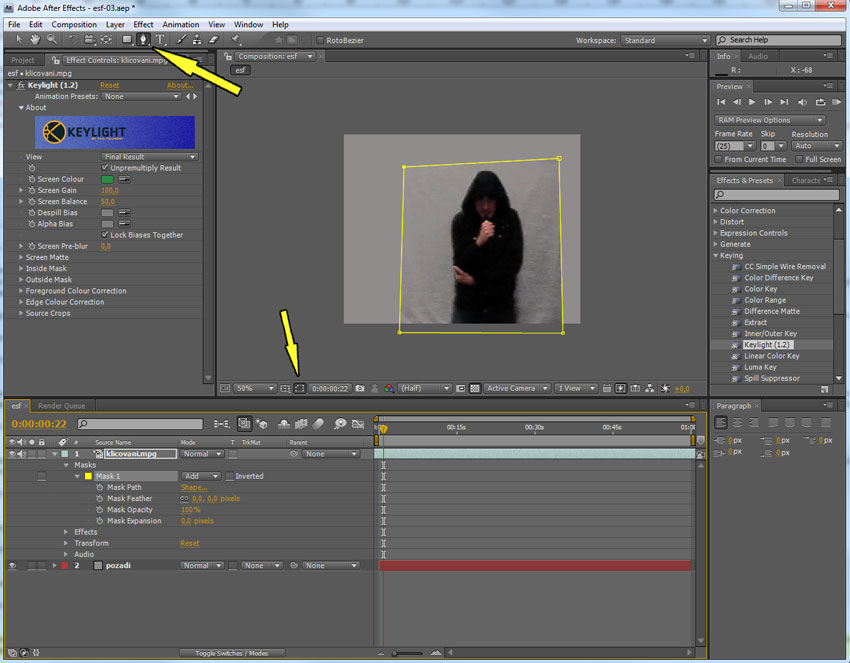
The usage of a mask
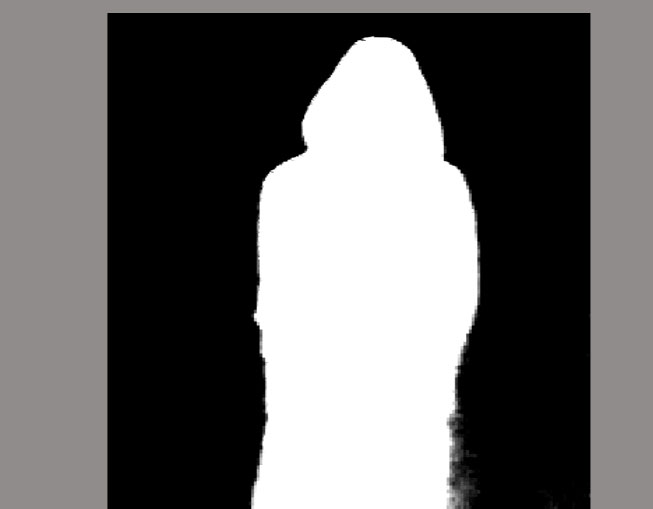
Let`s go back to the improvement of the keying itself. We can see that the effect for the keying process has a lot of settings. It is very useful to change the display before we try out different settings. We do it in “View” where we set “Screen Matte”. The keying field changes its colour into black by this and the figure in front that will not be keyed changes its colour into white. Now we get a strong contrast that will show us where and in what way the keying process runs and how it is set. Then we are better able to find out which setting is the best and most effective when changing the settings.
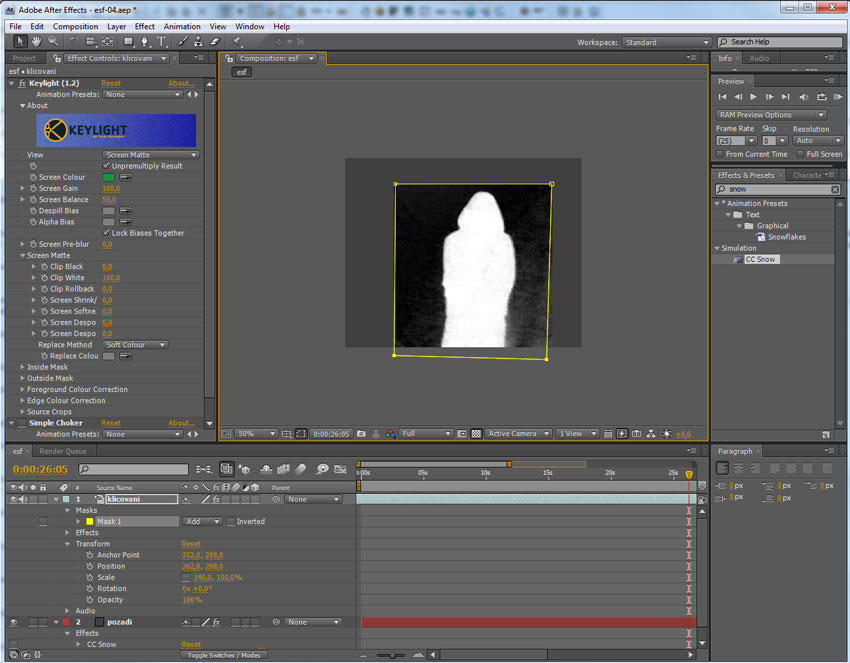
“Screen Matte” display
In the pictures below we can see how the setting of a keying effect can influence the display of the green screen and the figure itself. It is clear that when we choose a suitable setting, the scene cleans up so that the green keying field is transparent but the figure in front is influenced by the keying as few as possible at the same time.
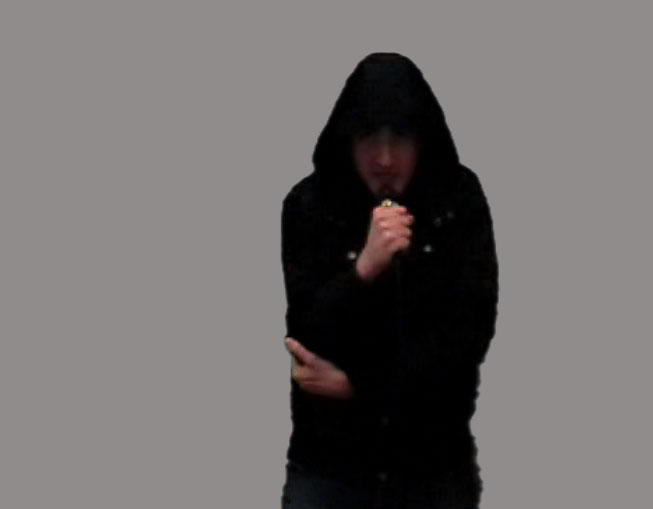
Before adjustment of the setting of the keying effect
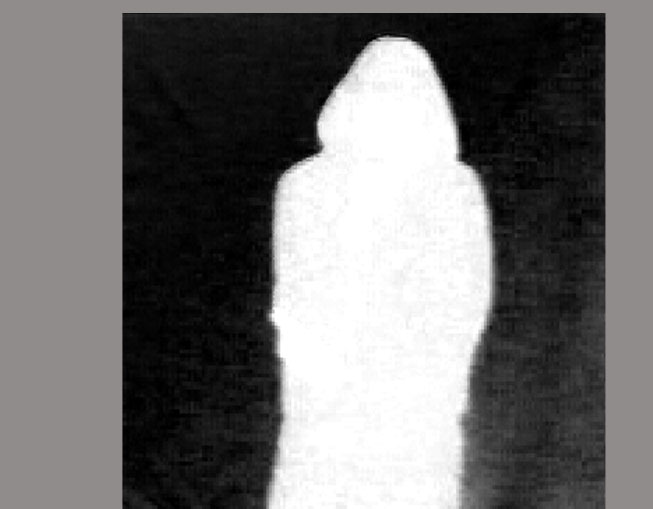
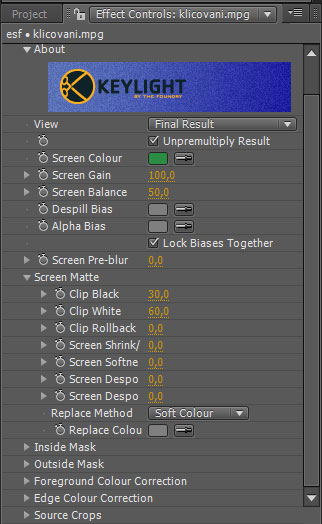
This setting was reached by the change of the following parameters. “Screen Matte” item, Clip Black was set on to 30, clip White was set on to 60. Then it is possible to try to change other settings and by observing changes, it is possible to decide which setting is the most suitable one. Each scene can be different, shot differently, in different conditions and that is why the setting is always different and it is all about experimenting and looking for suitable combination.
After adjustment of the setting of the keying effect
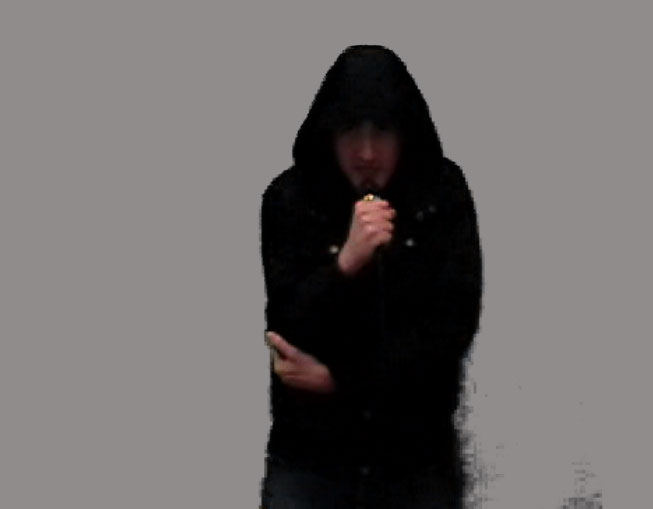
We can see that even if we changed the setting there is still a mild fade in the right bottom corner and the shape is not clear in this place. We will try to remove this by another effect.
Demonstration of the setting of the keying effect
Switch to “Final Result” from “Screen Matte” via “View” in the setting of the keying to be able to see the result. Further on choose “Simple Choker” effect from “Effects & Presets” menu and insert it in to the video with the keying field as well.
Before “Simple Choker” setting adjustment
Change the setting; “Choke Matte” to 3,00 and take a view of the result. This effect cut the keyed figure and the disturbance around so that the shape looks much better than before. Actually, the remnants of the keying colour on the contours have been removed. This effect removes flickering of edges around the keyed object. However, the result depends on the used camera and lightning of the keying field in a great extent.
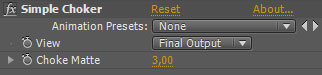
Setting the “Simple Choker” effect
In this case we were limited by the technology, but we got a relatively good result.
After “Simple Choker” setting adjustment
Levels or colour adjustment can be used as the next step to improve the picture after keying. Let`s have a look how the video changed after adding “Levels” effect and after some small adjustment of its values.
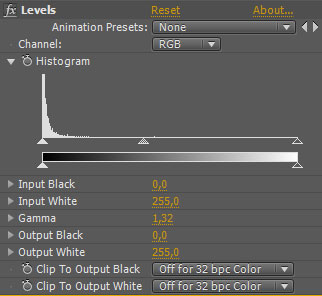
"Levels" effect
Two frames are merged in the picture. The left part is before the adjustment of levels and the right one is after this adjustment. We can see that even the change is very small the final picture has improved slightly.
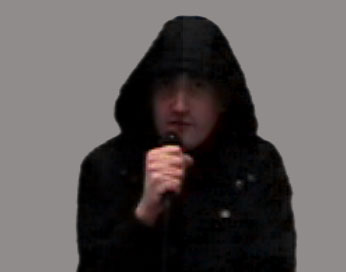
The difference before and after the adjustment of levels
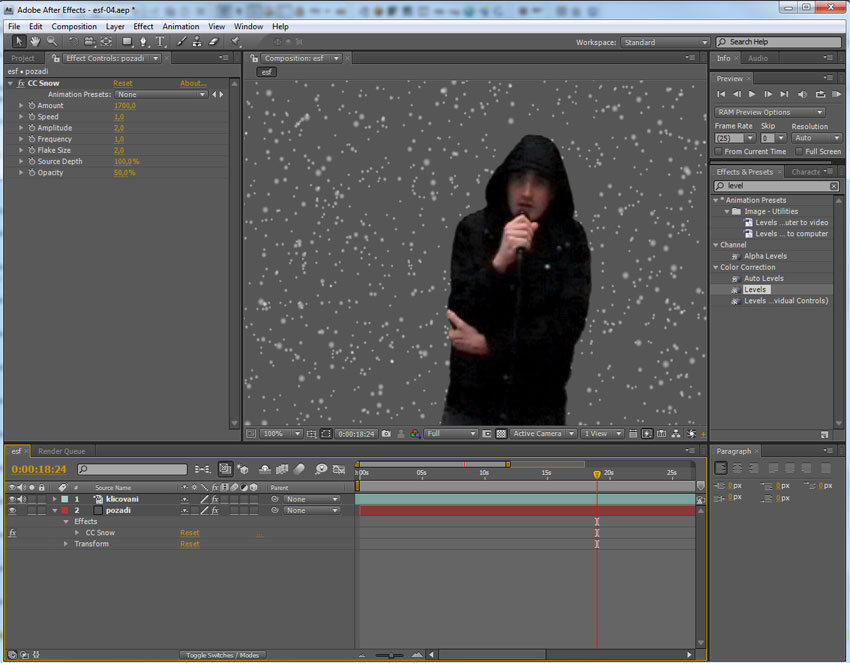
There is one more thing to do, to add the effect of snowing. This part is really simple. Find out this effect in “Effects & Presets”, it`s name is “CC Show” and insert it into the layer with the grey field. Then we can experiment with its setting again. In this case we changed the value of “Amount’ parameter to get heavier snowing.
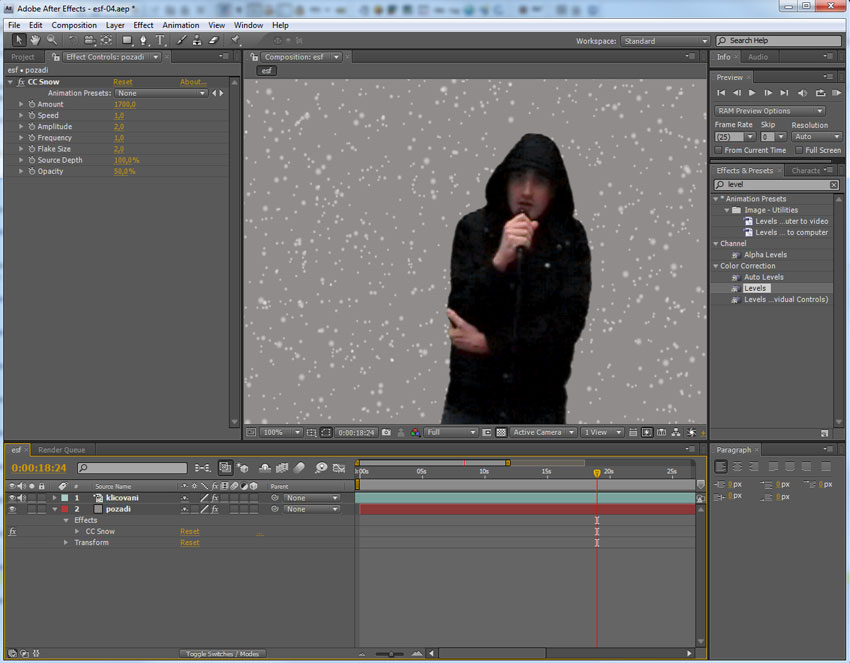
Snowing effect
We can also adjust the setting of the colour of the grey field at the end. Just choose the layer in menu, “Layer” item, the second sub-item “Solid Settings...”. There we choose darker colour.
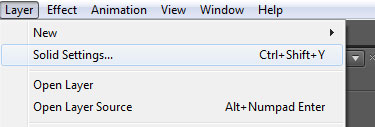
"Solid Settings...
Setting a darker colour of the background
Keying – Individual Task
Task
Create section of a weather forecast that is similar to the one we saw at the beginning of the lesson by using enclosed materials. Use the above mentioned way. Trim the video so that you create several layers and choose a needed section in each one (the layer will be named after this). The sections will be tied together (they will be set up one after another). How to realize the task will be explained in the next steps.
Materials to practise:
- video of persons with green background
- animated synoptic map
- image 1 – beaches
- image 2 – Moscow
- image 3 – MM
Procedure
Insert a video of persons with green background onto a timeline. Copy this layer one under another several times and choose the needed section in each one and name it (see the picture below).
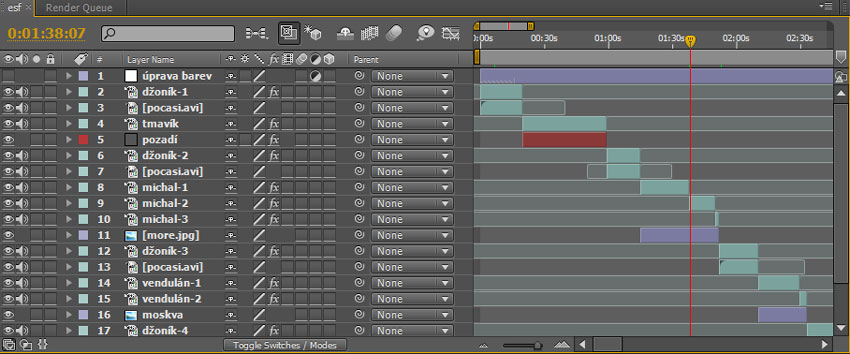
Layers in the weather forecast project
The selection is done by shortening the video from both sides. Simply go to the beginning of the section, click by the left mouse button, keep it pressed and by moving make the section shorter (there will only an outline). Do the same from the end of the section. The part that stays filled is visible and will be played.

Choosing the section
We can also see that there are inserted layers that contain an animated synoptic map, a picture of a beach, Moscow and Michal Mikláš. This animation and the pictures are inserted under separate sections of the video with the people with the green background because after applying keying the green colour will be removed and the following layer will be seen in the sequence.
As for the arrival of the MM photo, it is an animation that is created by key frames and setting of the parameters “position”, “rotation” and “scale”. First of all the photo is placed out of the visible area. Then it is placed in to the left top part by resizing parameters at the moment when the weather forecast moderator in the studio takes a note of a flying picture.
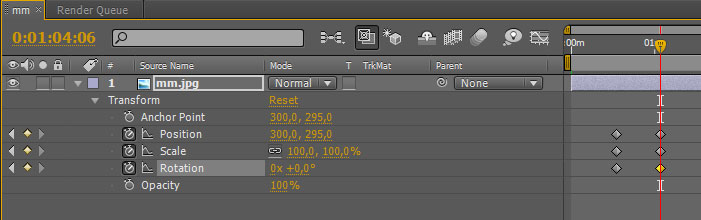
MM photo animation
Questions
- How can the keying be used?
- How is keying done?